How to Draw a Ferrari 458 Speciale - Easy & Detailed Step-by-Step Tutorial
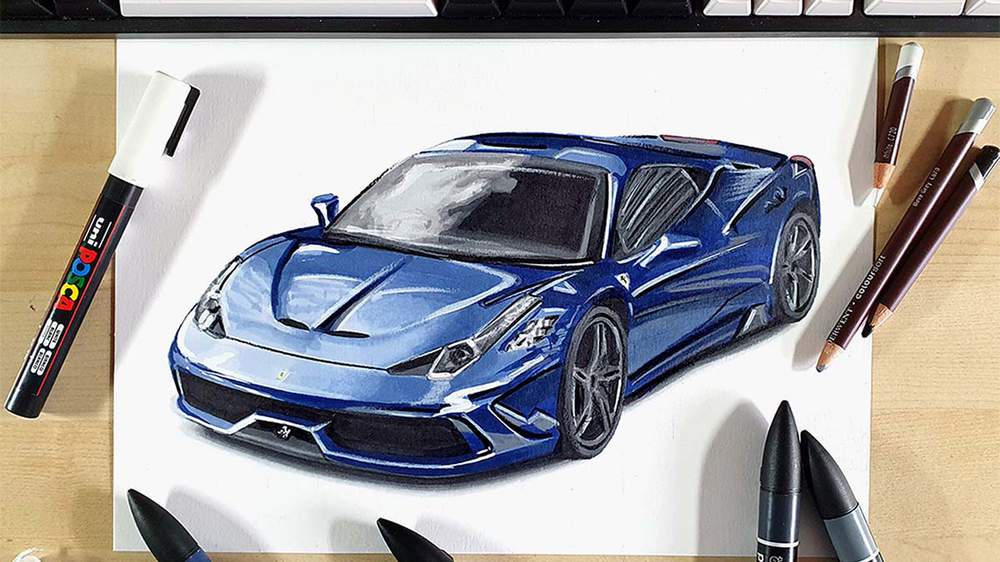
Level: Beginner. Time needed: 3 Hours.
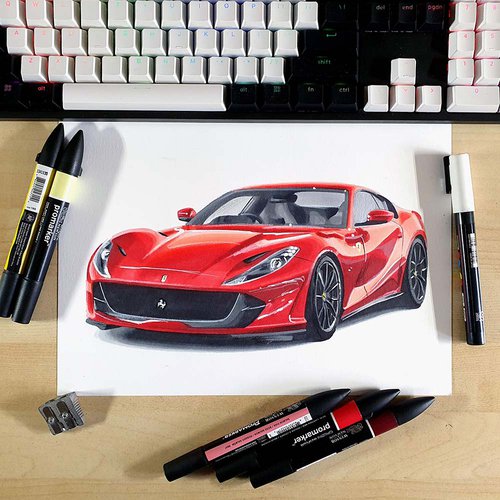
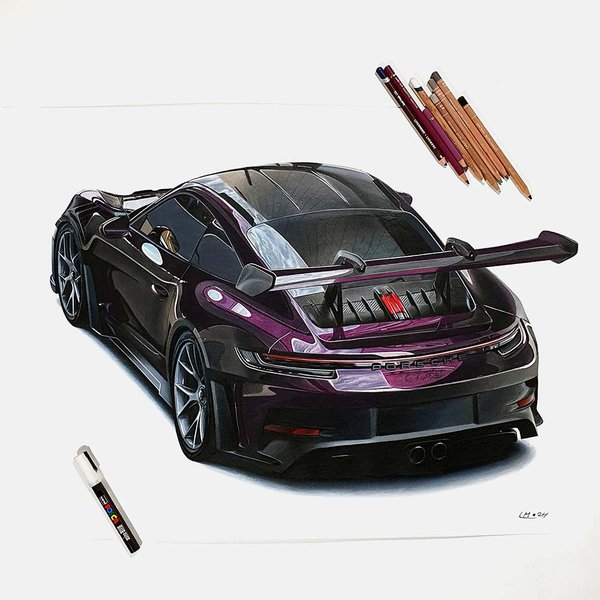
In this week's car drawing tutorial, I'm going to show you how to draw a realistic Ferrari 458 Speciale.
I broke the full process up into detailed and manageable steps that are super easy to follow so you can recreate this drawing yourself!
Disclaimer: In the name of full transparency, please be aware that this blog post contains affiliate links and any purchases made through such links will result in a small commission for me (at no extra cost for you).
How to Draw a Ferrari 458?
To make a realistic drawing of a Ferrari 458, I first gathered a few reference photos for the perspective, proportions, lighting, reflections, and color.
After that, I created a sketch of the outline of the car using the grid method.
Next, I colored the car with alcohol markers starting with the black and the grey parts, before moving on to the main body of the 458 Speciale.
Lastly, I added some details with colored pencils and highlights with a Posca paint marker.
Step 1: Look for Reference Photos
I start off every drawing by searching for reference photos of the car I want to draw.
I looked for a photo of a nice angle of the Ferrari 458, which is often a 3/4 front view as that is my favorite angle of a car.
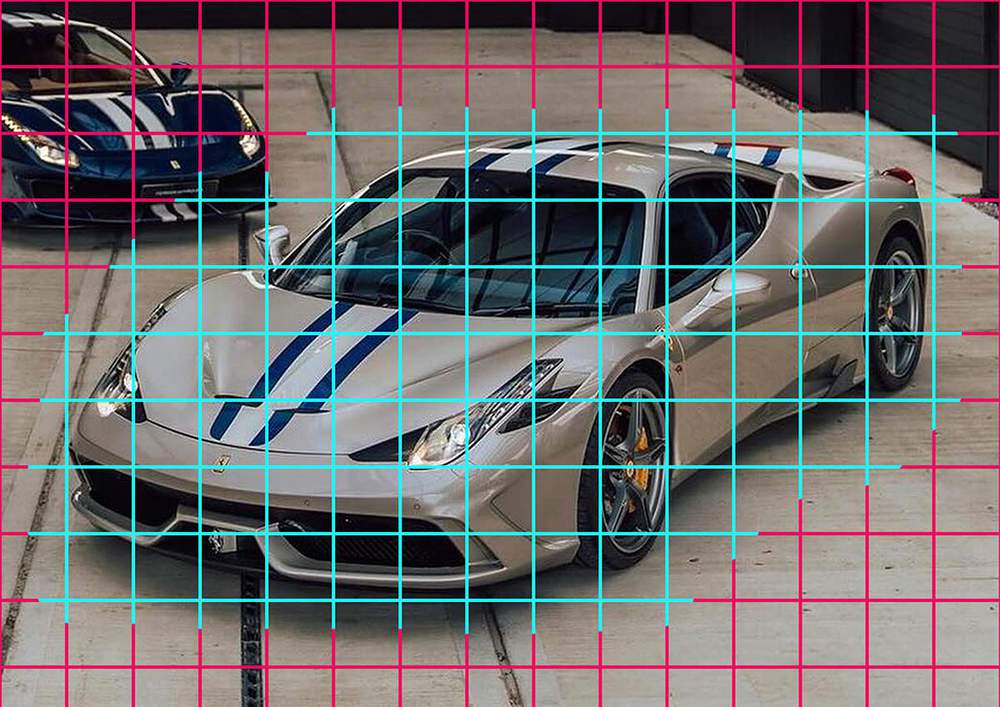
This is the photo I'll be using in this tutorial for the angle/proportions of the Ferrari (2nd slide).
After that, I looked for a photo of a Ferrari 458 Speciale that has nice reflections.
I used the photo below as a reference for that (4th slide).
Lastly, I looked for a color reference. I had no idea what color I wanted to make the 458, but when I found this color I knew it had to be it.
Step 2: Decide What Art Supplies to Use
Next, I choose what art supplies I'm going to use.
I wanted this drawing to be simple and the best way to keep it simple is by using alcohol markers. They are way easier to use than colored pencils while still making it possible to create realistic drawings.
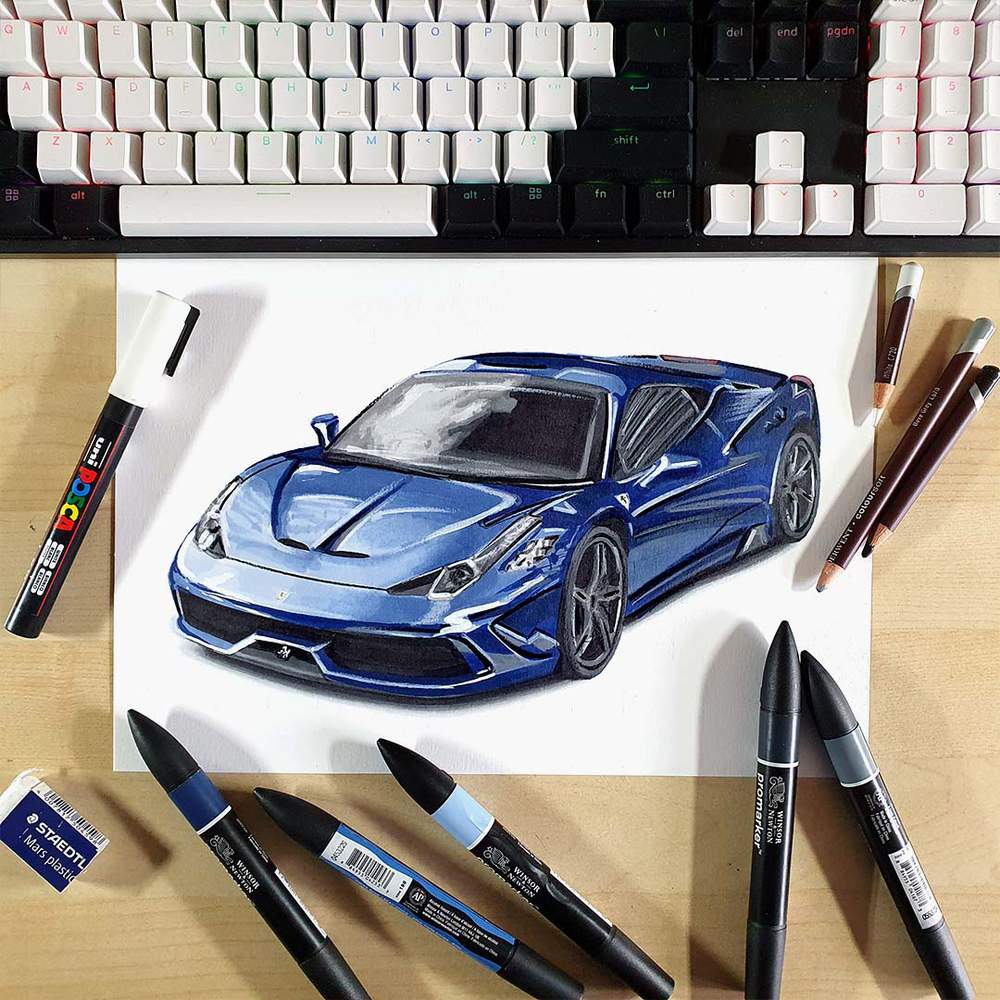
For this drawing I used Winsor & Newton Promarkers in the colors Ice Grey 1 (IG1), Ice Grey 2 (IG2), Ice Grey 4 (IG4), Ice Grey 7 (IG7), Black (XB), Burgundy (R424), Soft Lime (Y828), Blue Pearl (B528), China Blue (B736), Midnight Blue (B624), and Indigo Blue (V234). I also used the colorless blender marker.
I made this drawing on Canson Illustration Manga paper as this is in my experience the best paper for alcohol markers like the Promarkers.
To add the details, I used the White, Dove Grey, and Black Derwent Coloursoft pencils.
For the bright highlights, I used a white Posca PC-3M.
I also used all the other more standard drawing supplies: a ruler, a kneaded eraser, a regular eraser, and an HB graphite pencil.
Step 3: Sketch the Outline of the Ferrari 458 Speciale
Now it's time to start drawing.
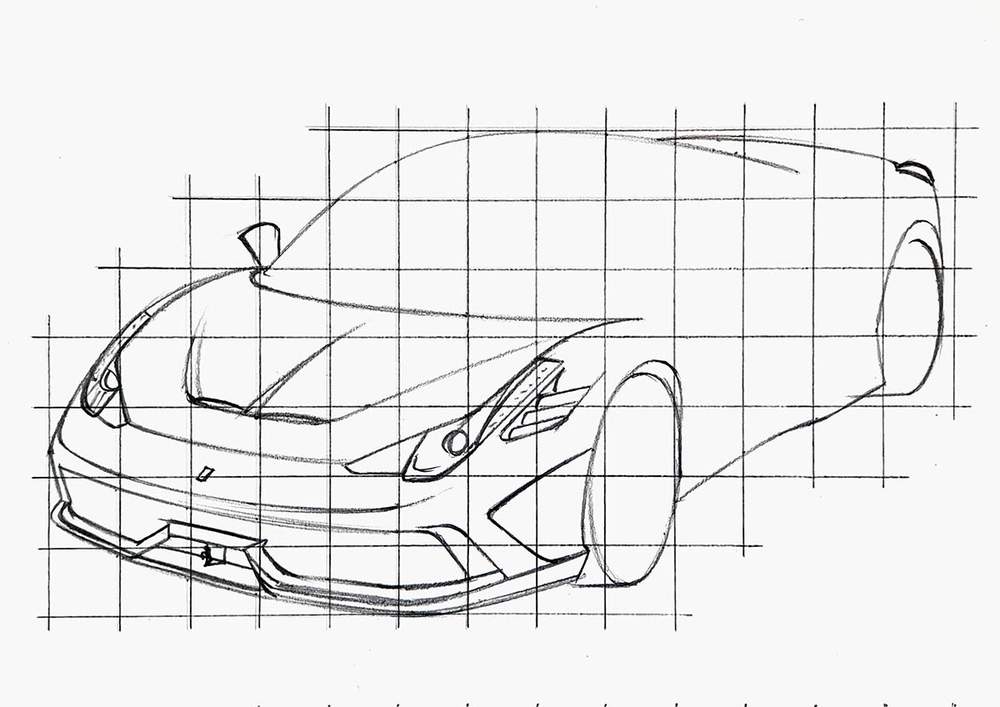
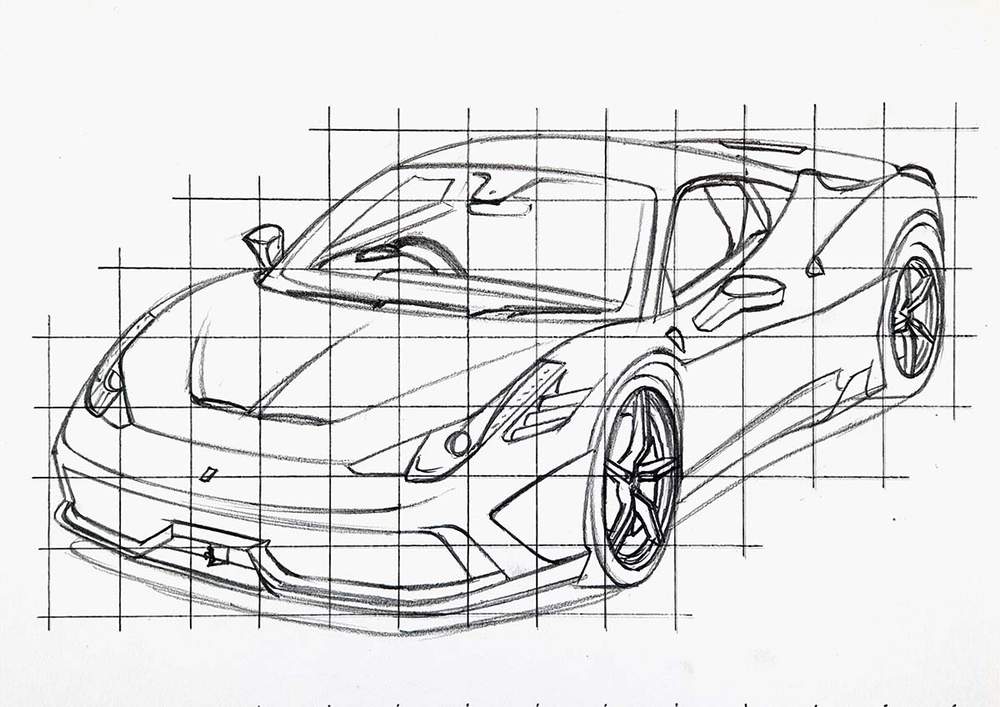
I first make a sketch of the outline of the 458 by using the grid method.
This method makes it so much easier to sketch accurately, even for beginners. Here's a detailed tutorial about how to use this technique.
I start by resizing the reference photo for the proportions to have the same size as my piece of paper, which is 29.7 by 21 cm or 3508 by 2480 pixels.
Then, I overlay a grid of 15 by 10.5 squares on top of the photo and mark the ones I need for the sketch.
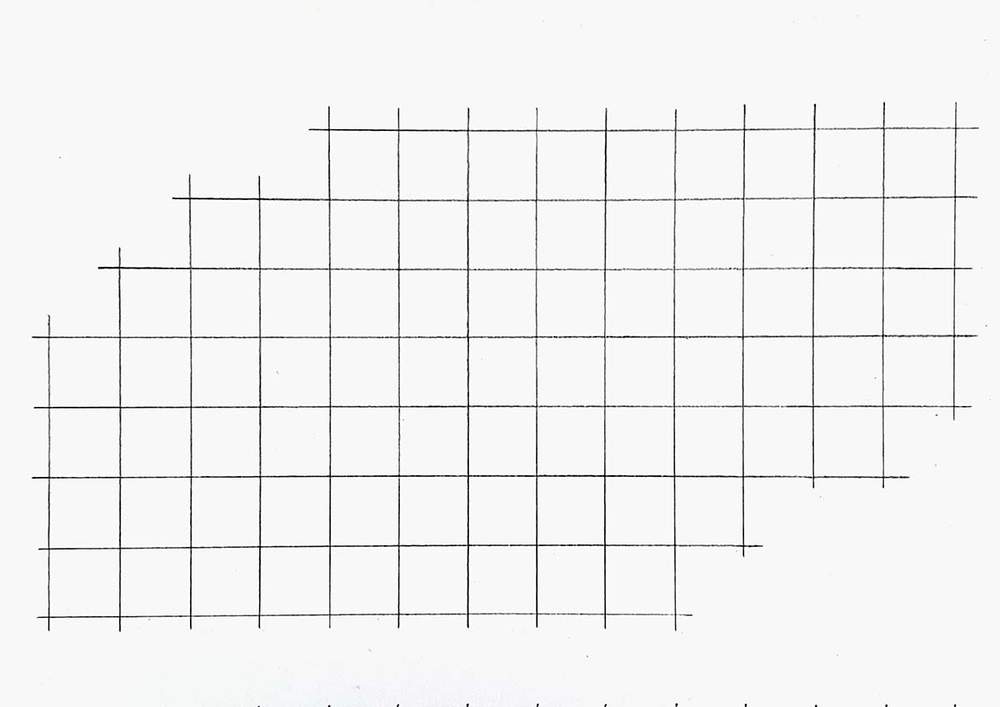
After that, I recreate the grid on my paper. I like to only sketch the grid squares I need for the drawing, but you can just sketch the whole grid. This is a bit easier if you're not too familiar with this technique.
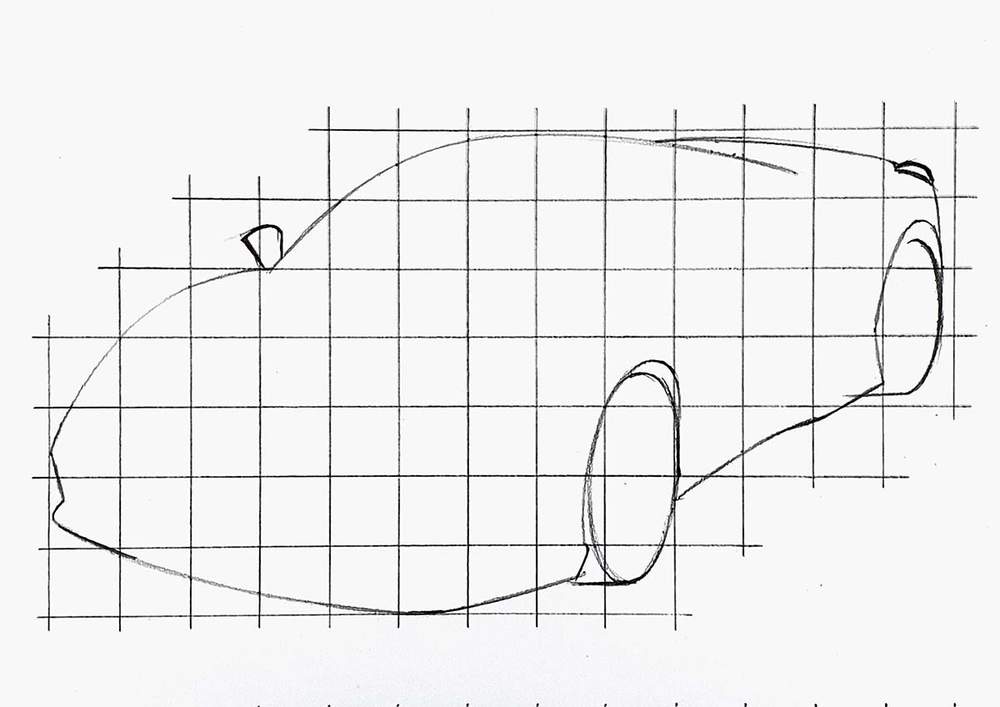
Next, I start sketching the outline. I start by choosing a line to sketch on the left. I mark where it starts, where it crosses grid lines, and where it ends. Then I sketch the lines. I did this for every line on the outside of the car until I sketched all of them.
Step 4: Sketch the Details and the Reflections on the Ferrari 458 Speciale
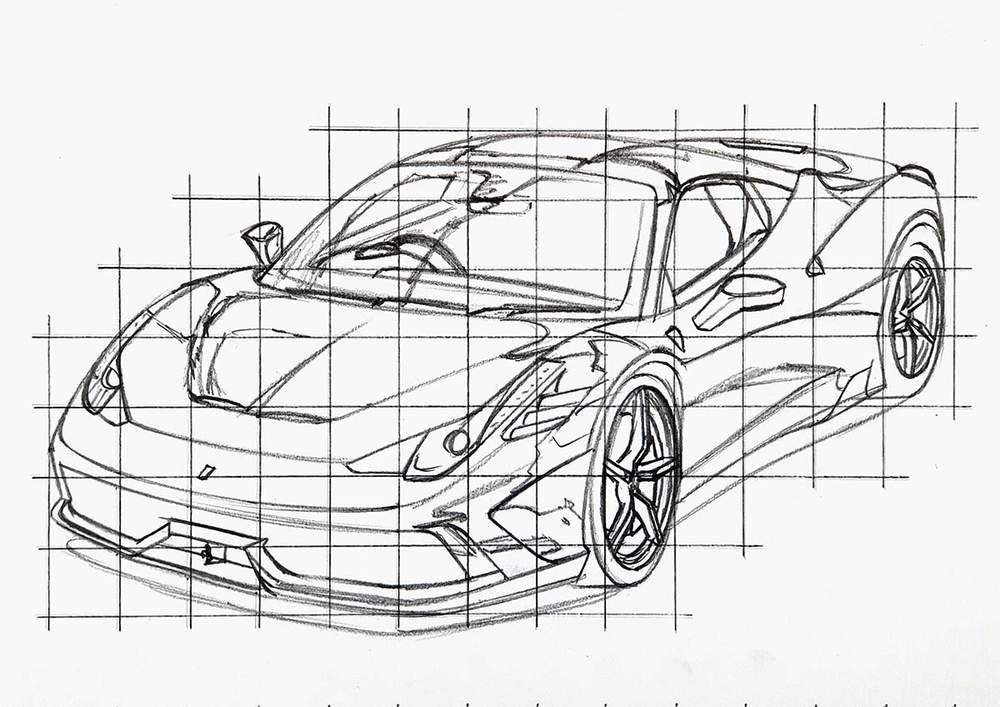
Now that the outline is done, it's time to sketch all the details.
I use the same technique as I used to sketch the outline. I mark the beginning of a line, the end, and where it crosses grid lines, and then I sketch it. I again did this for every single line until I sketched all of the details and body lines of the Ferrari 458.
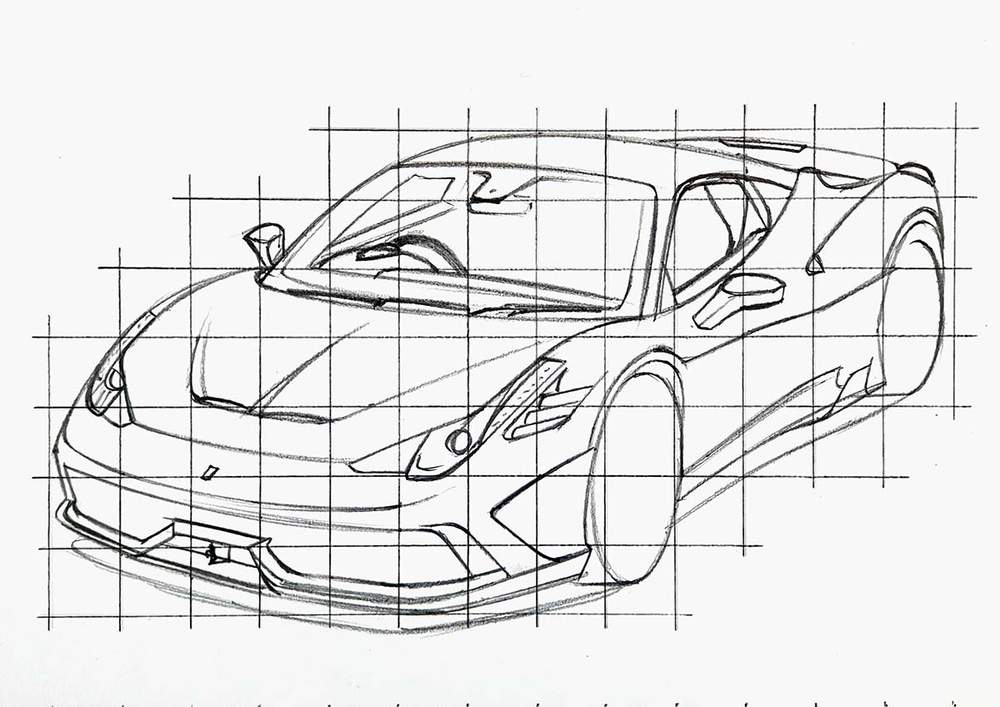
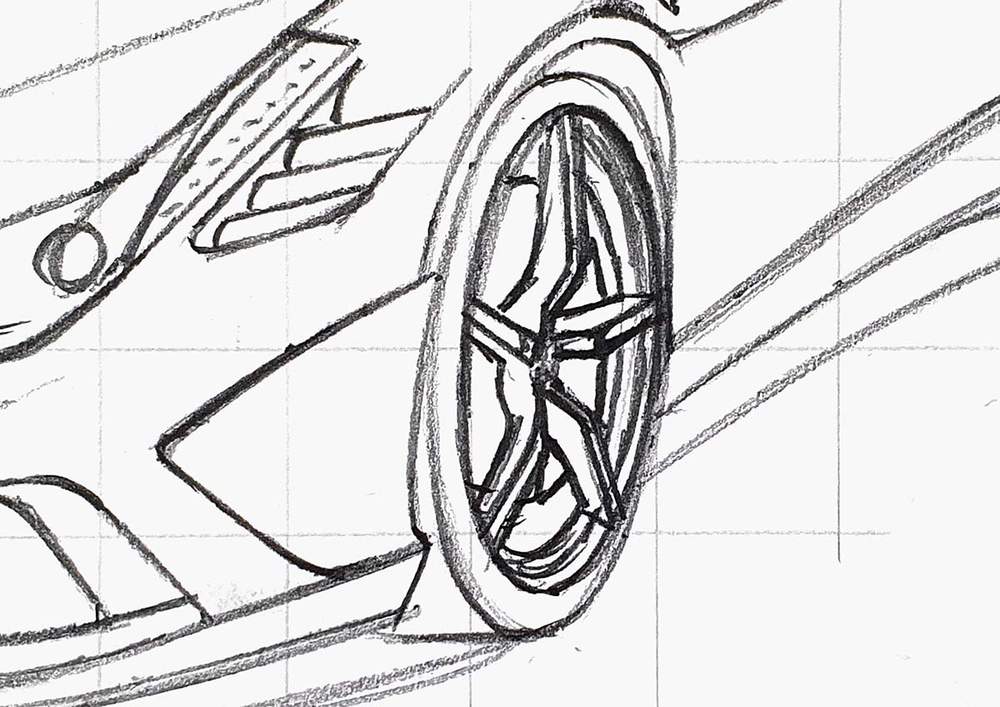
After that, I sketched the wheels. I wanted to take a bit more time to explain how I sketched them as sketching wheels can be a bit complex.
I first sketched the outside of the rim and I marked where the center of the wheel is. I also marked where the 5 spokes connect to the center.
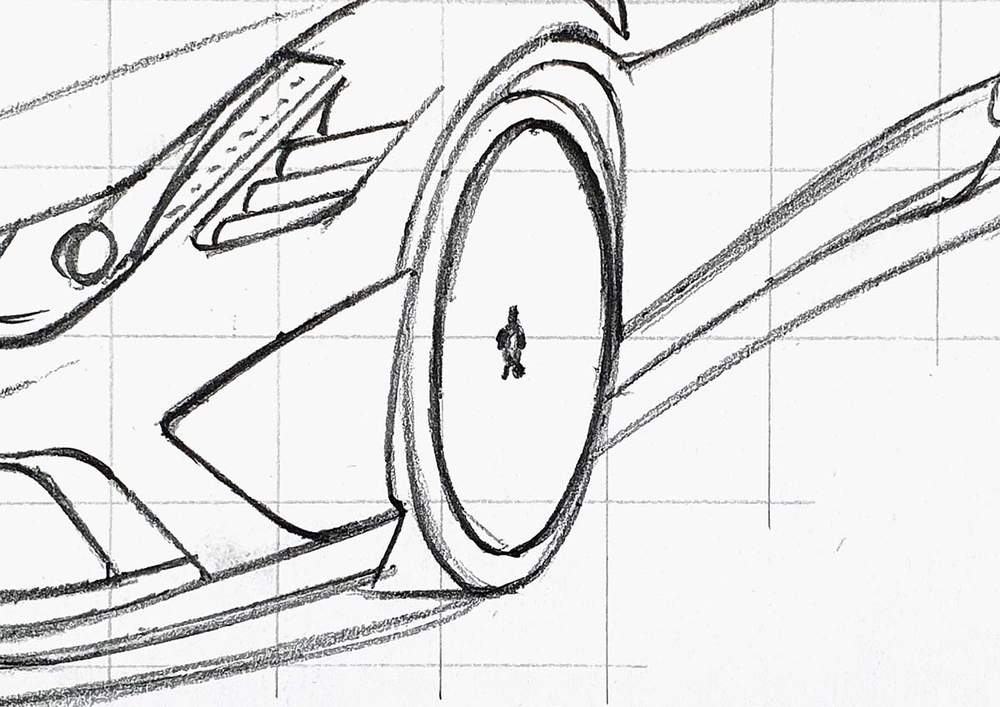
Next, I sketched the spokes. I started by sketching the short bit starting from the center first. Then I connected these bits to the outside rim by sketching 2 lines.
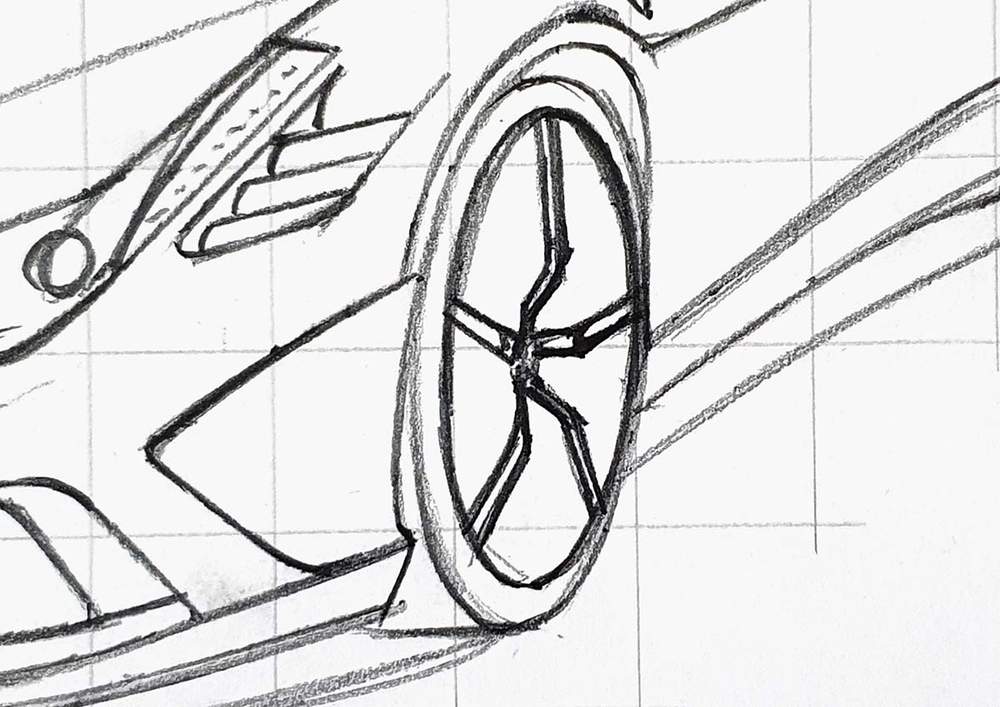
Lastly, I added more ellipse-shaped lines to the rim, added some thickness to the spokes, and sketched the brake disc and caliper.
To finish the sketch off, I also like to sketch where the reflections are going to be.
Step 5: Color the Pure Black Parts of the Ferrari 458 Speciale
Next up, it's time to start coloring the whole car in.
I like to start with the pure black parts as they are the easiest.
I look at the reference photo for the reflections and look for all the pure black spots and color those in my drawing.

Step 6: Color the Wheels of the Ferrari 458 Speciale
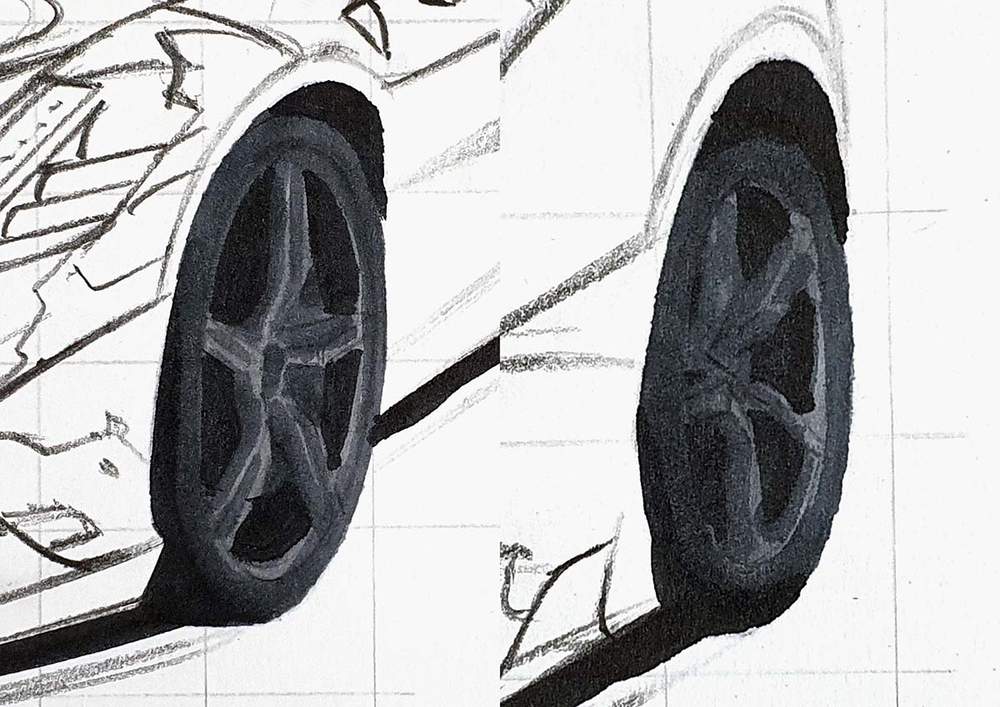
After that, I colored the wheels.
I started by coloring both wheels with Ice Grey 4.
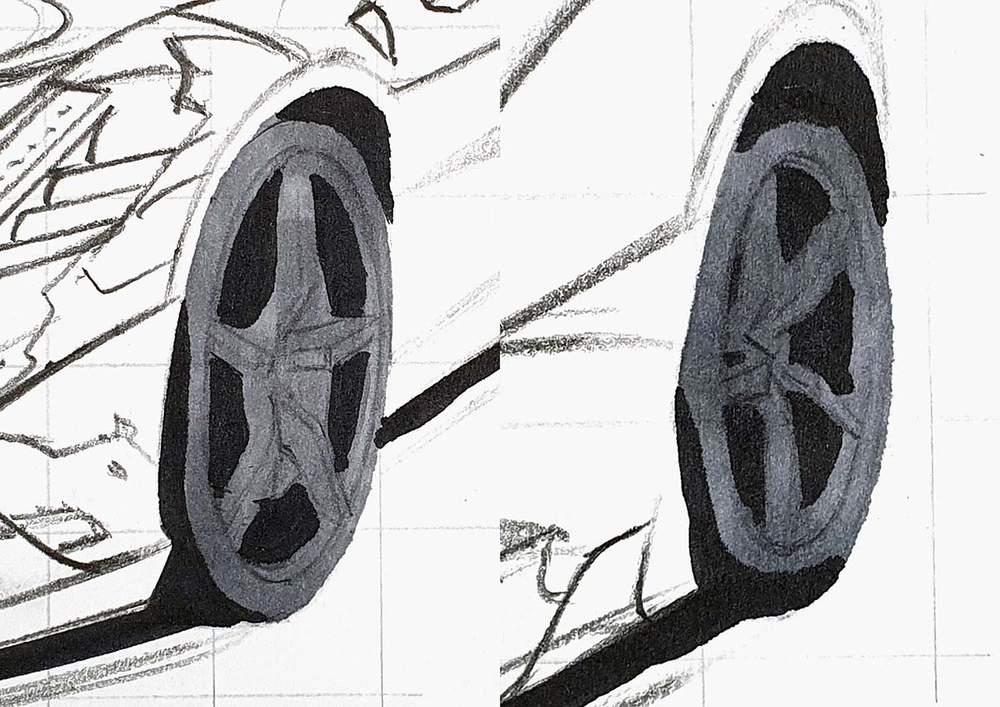
Then, I used Ice Grey 7 to add some details and shadows.
Step 7: Color the Shadow below the Ferrari 458 Speciale
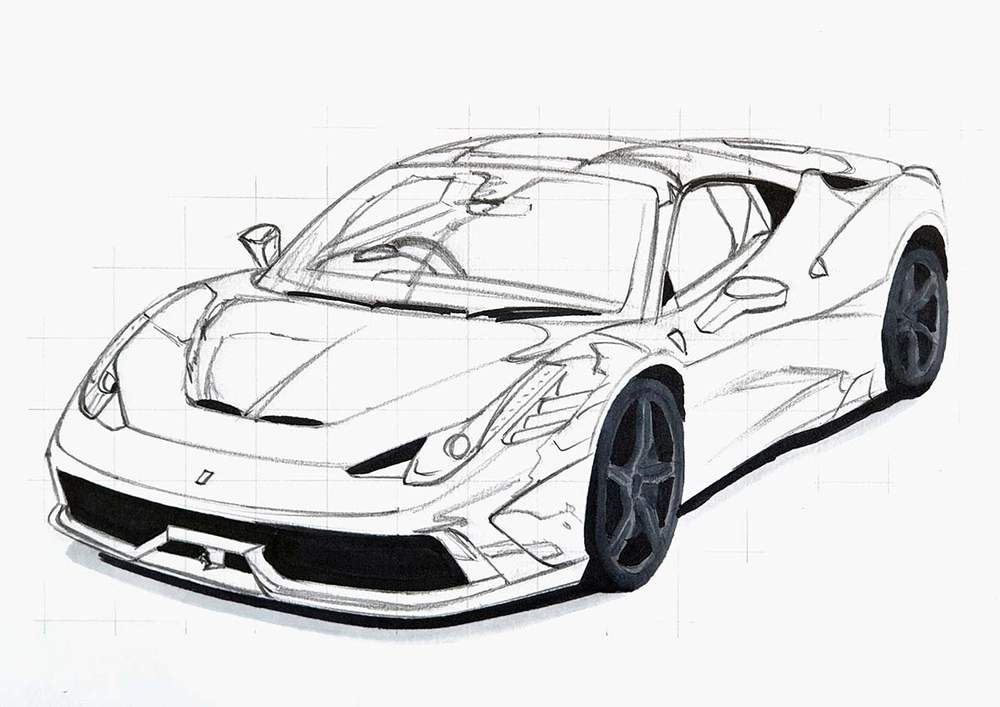
Next, I colored the shadow underneath the 458.
I started by coloring the whole shadow with Ice Grey 1.
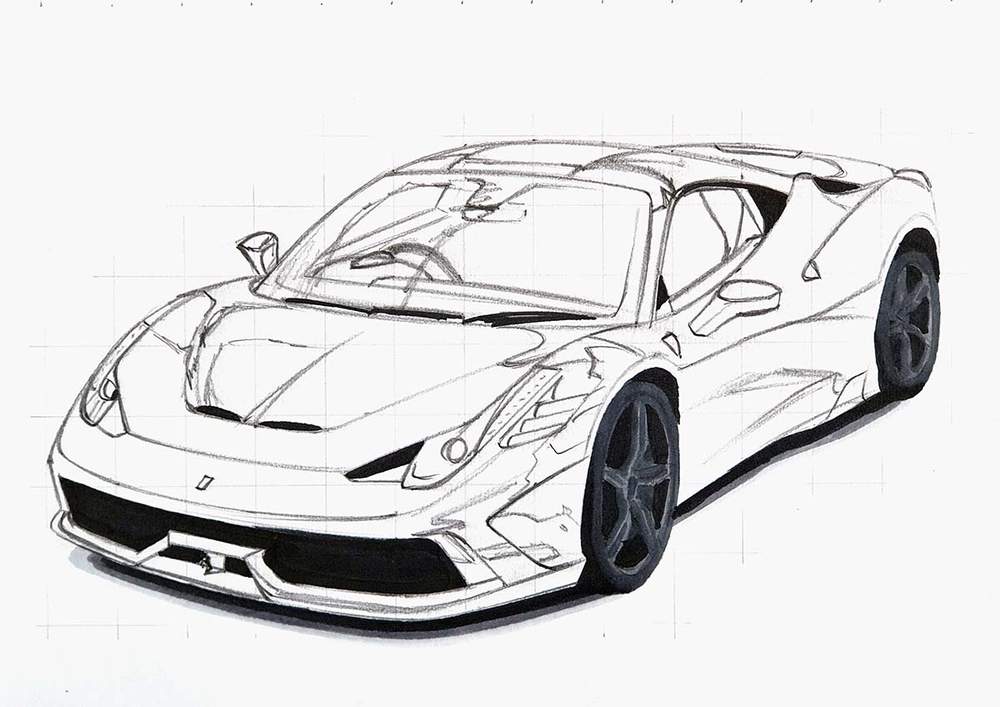
After that, I used Ice Grey 4 to color in between the black and the Ice Grey 1.
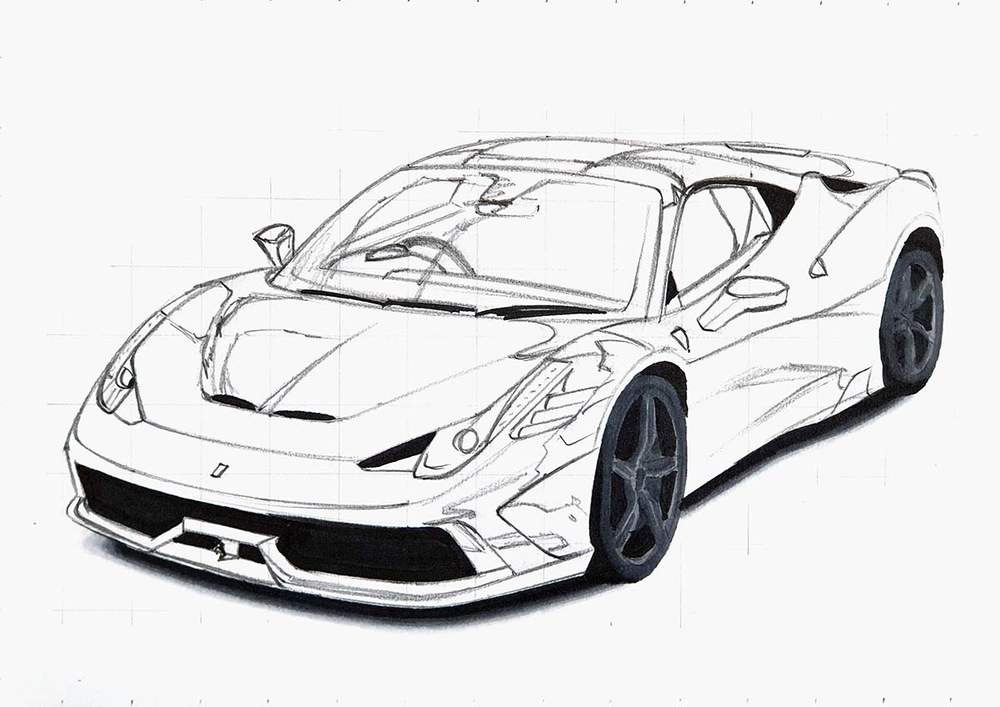
Lastly, I blended all the colors to form a smooth gradient.
I started by blending the black into grey by using Ice Grey 7 to color over the edge of the black and the grey.
Next, I used Ice Grey 4 to blend the Ice Grey 7 into the Ice Grey 4, again by coloring over the edge where the two colors meet.
Then, I used Ice Grey 1 to blend the Ice Grey 4 into the Ice Grey 1.
And lastly, I used the colorless blender to blend the Ice Grey 1 into the white of the paper.
Step 8: Color the Front Splitter and the Logo of the Ferrari 458 Speciale
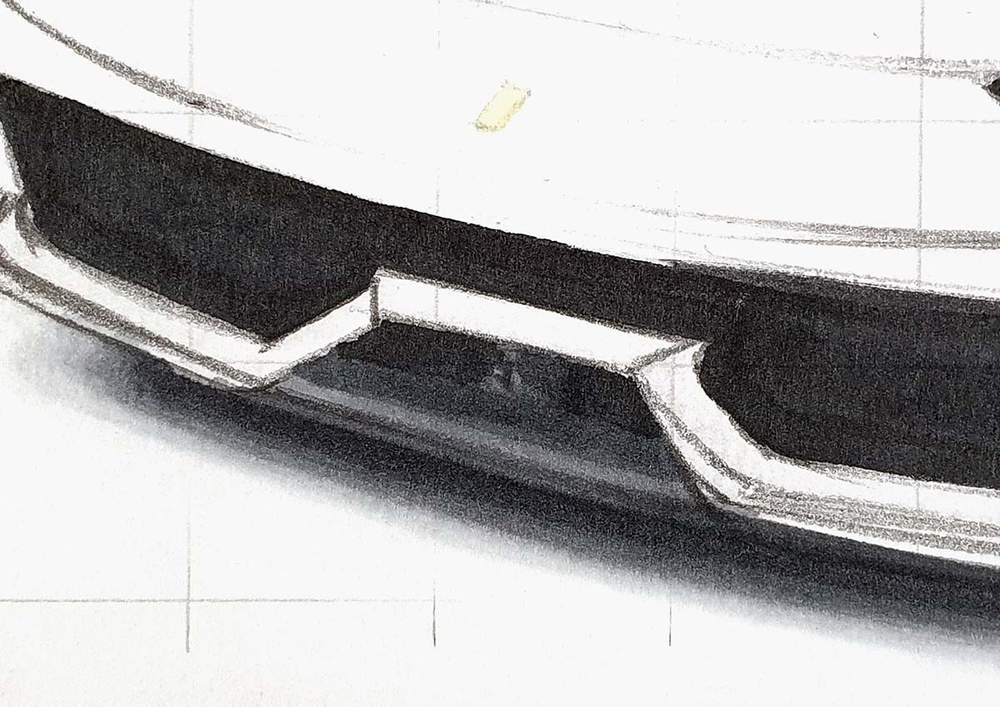
Next, I colored the small grey part of the front splitter.
I first colored it fully with Ice Grey 4. I also colored the Ferrari logo on the front with Soft Lime.
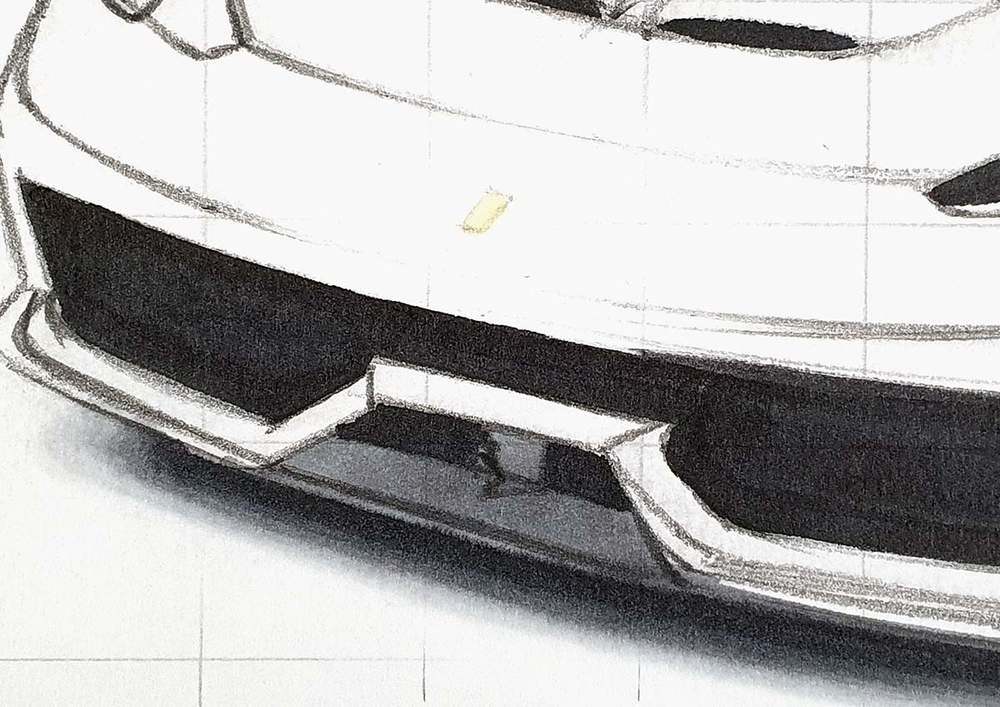
Then, I used Ice Grey 7 to add some details and shadows while leaving a light edge.
Step 9: Color the Headlights of the Ferrari 458 Speciale
After that, I colored the headlights.
I started by coloring both of them with Ice Grey 2.
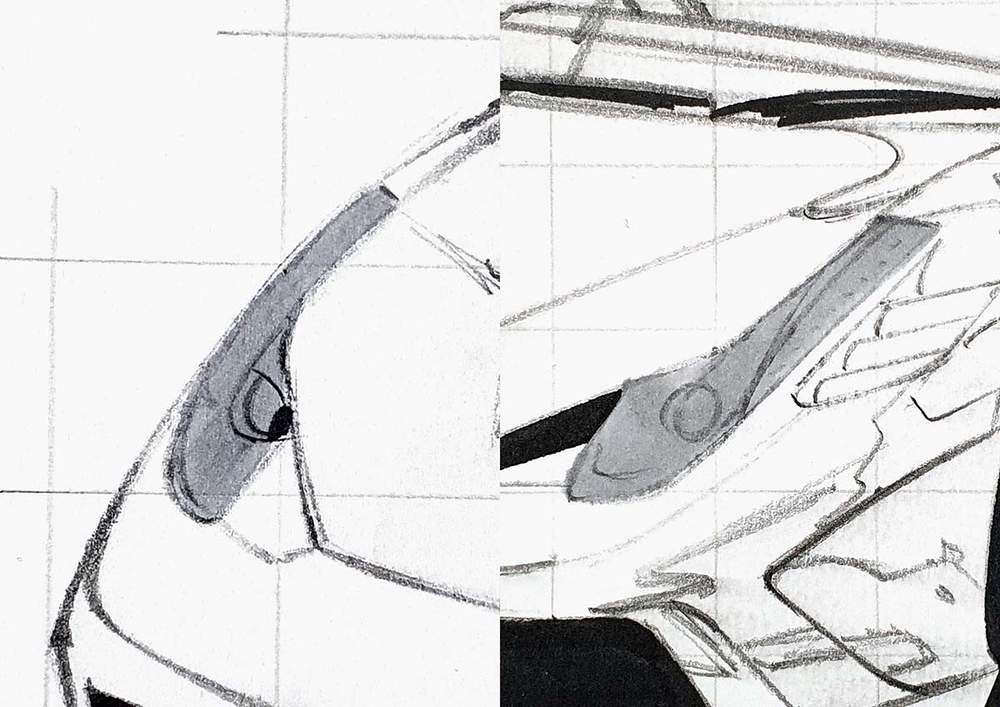
Then, I used Ice Grey 4 to add the details and darker tones.
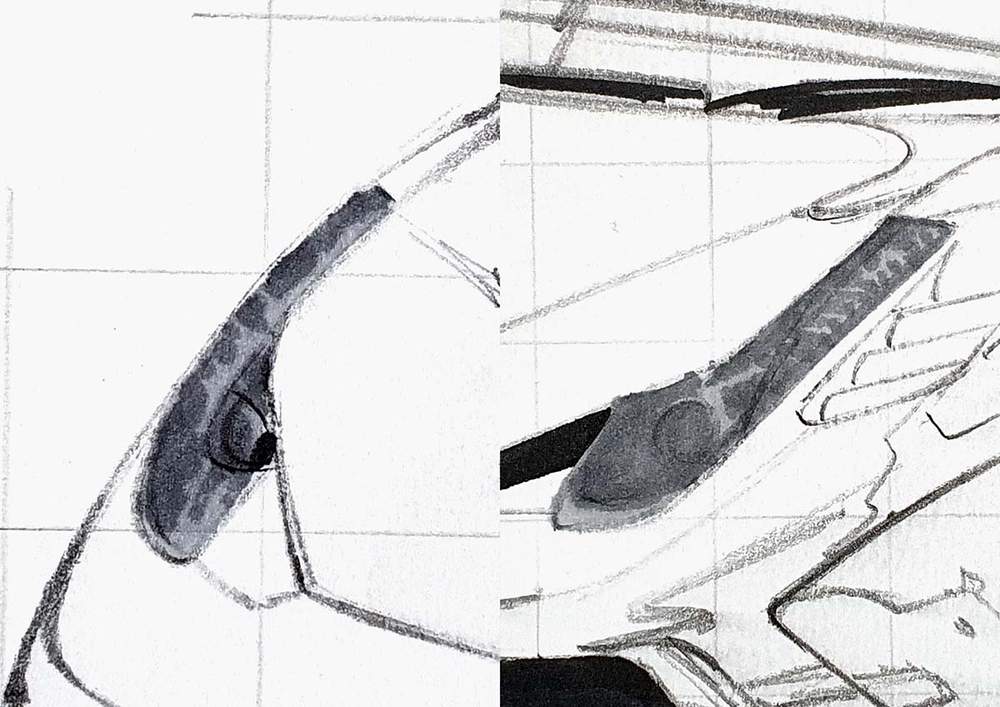
Lastly, I used Ice Grey 7 to color the darkest shadows and reflections.

Step 10: Color the Windshield of the Ferrari 458 Speciale
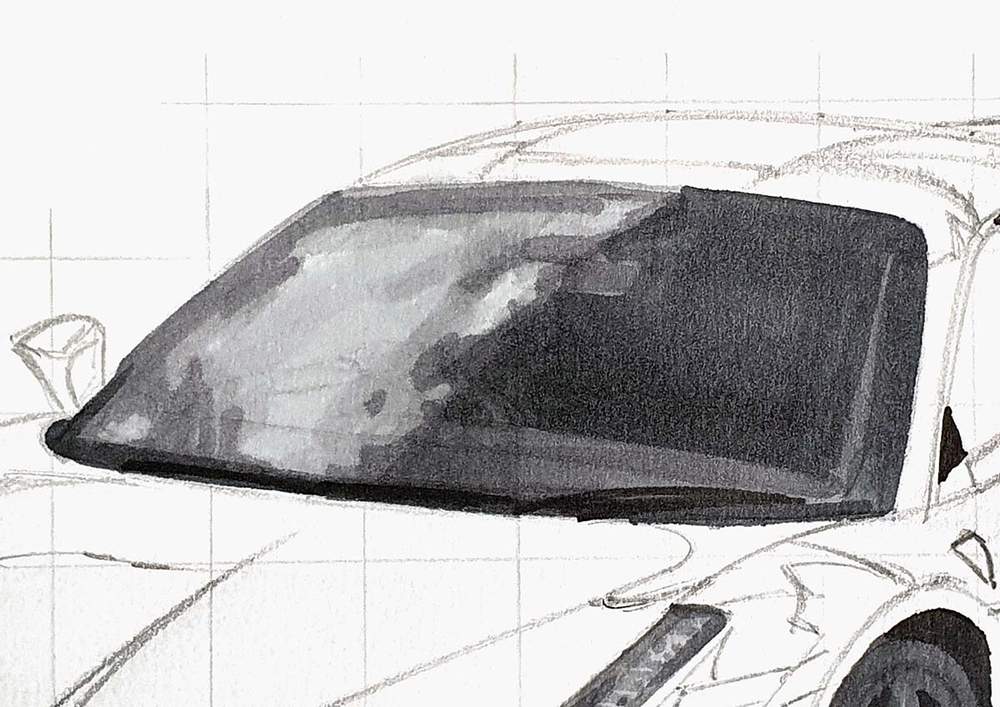
Next up, I colored the windshield.
I started by coloring the lightest part which is this big cloud reflection across the left half of the window.
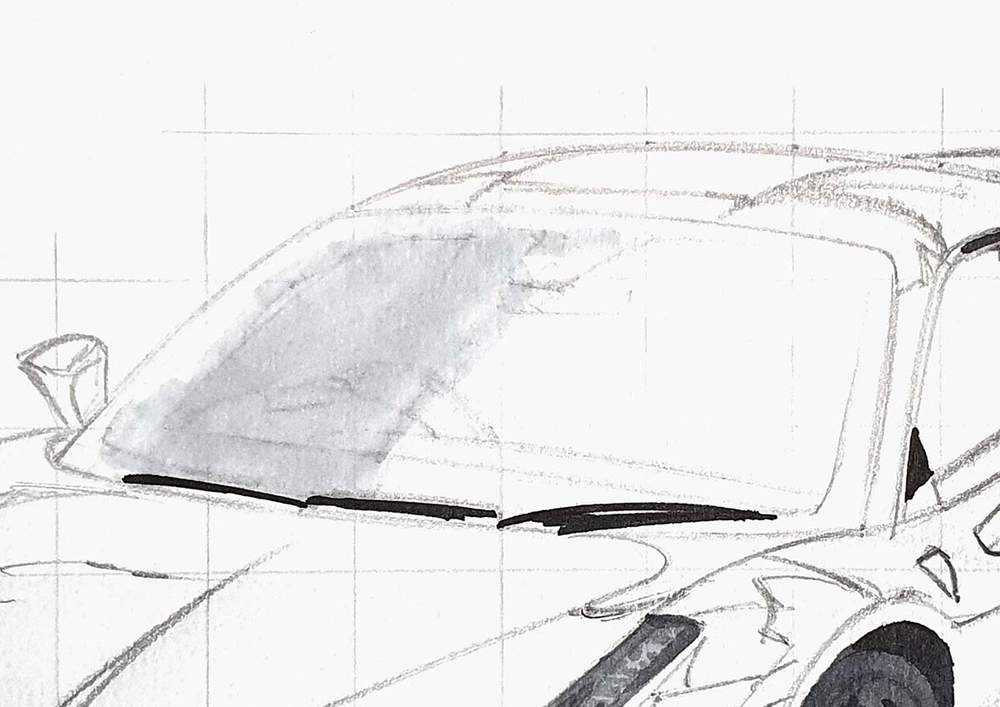
After that, I colored the remainder of the left half with Ice Grey 2.

Then, I used Ice Grey 4 to color the dashboard on the right and the right edge of the windshield as well as some reflections on the left half, mainly on the left and the top.

Lastly, I used Ice Grey 7 to color the remainder of the window.
Step 11: Color the Side Windows of the Ferrari 458 Speciale
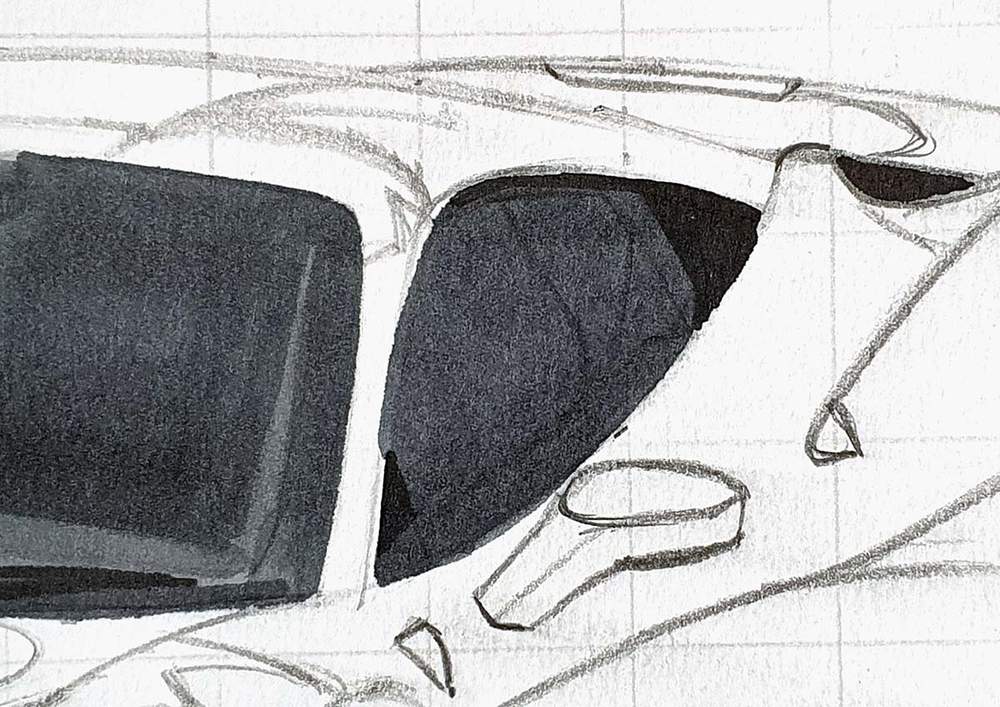
After that, I colored the side windows with Ice Grey 7.
Step 12: Color the Tail Light and Brake Light of the Ferrari 458 Speciale
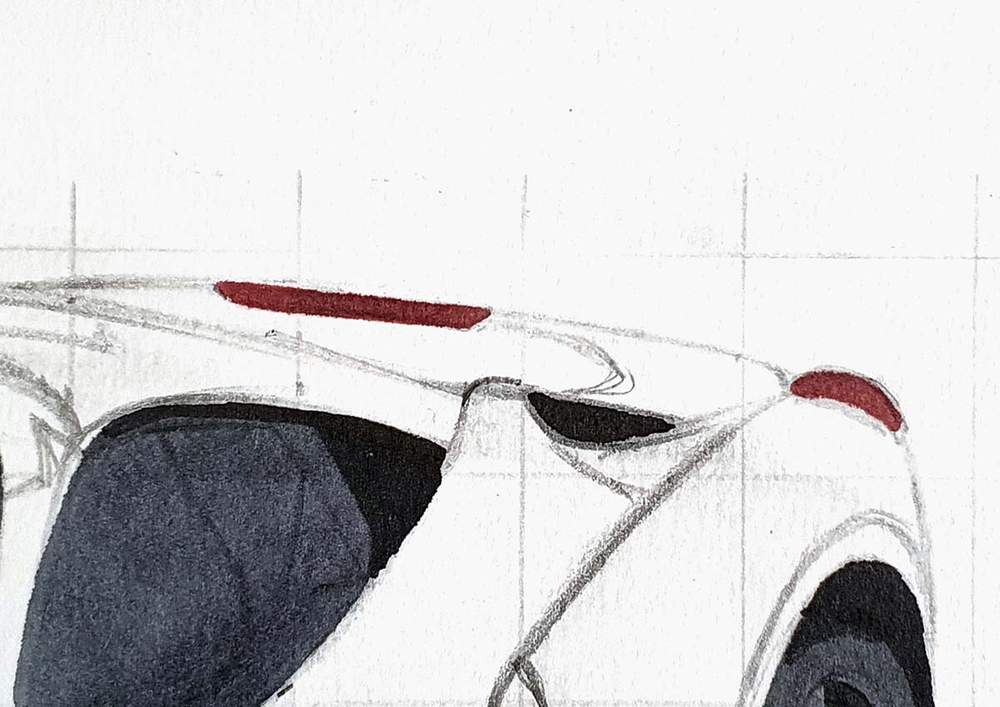
Then, I colored the right taillight and the center brake light with Burgundy.
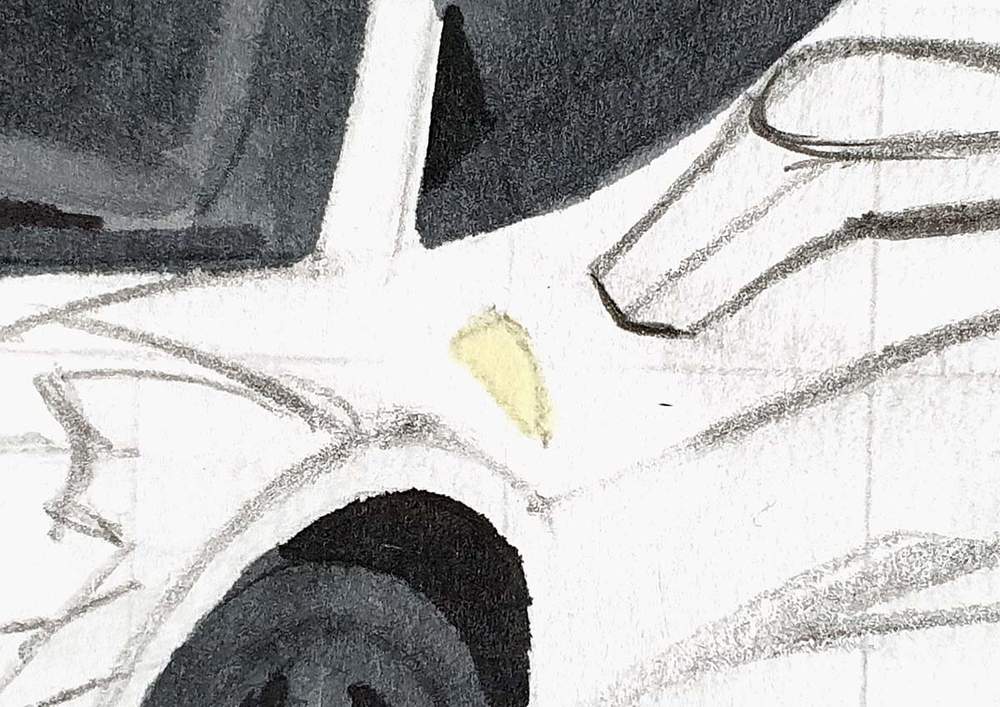
Step 13: Color the Ferrari Shield on the Side of the Ferrari 458 Speciale
Next, I colored the Ferrari shield on the side of the 458 with Soft Lime.
Step 14: Color the Fin on the Side of the Ferrari 458 Speciale
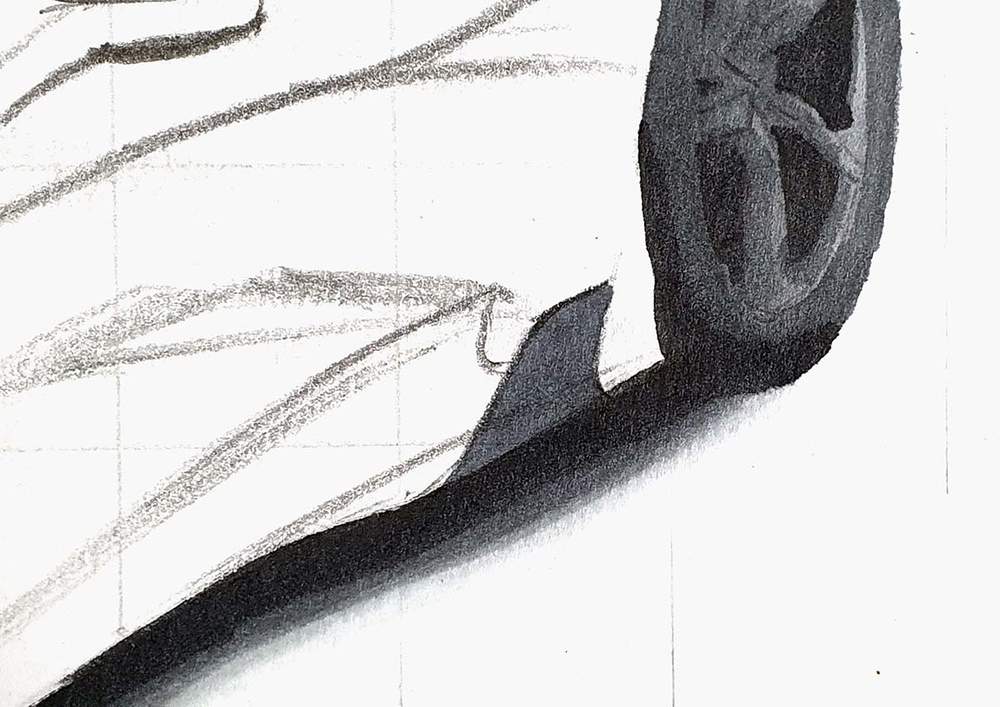
After that, I colored the fin just in front of the rear wheel with Ice Grey 7.
Step 15: Color the Louvers in Front of the Front Wheel of the Ferrari 458 Speciale
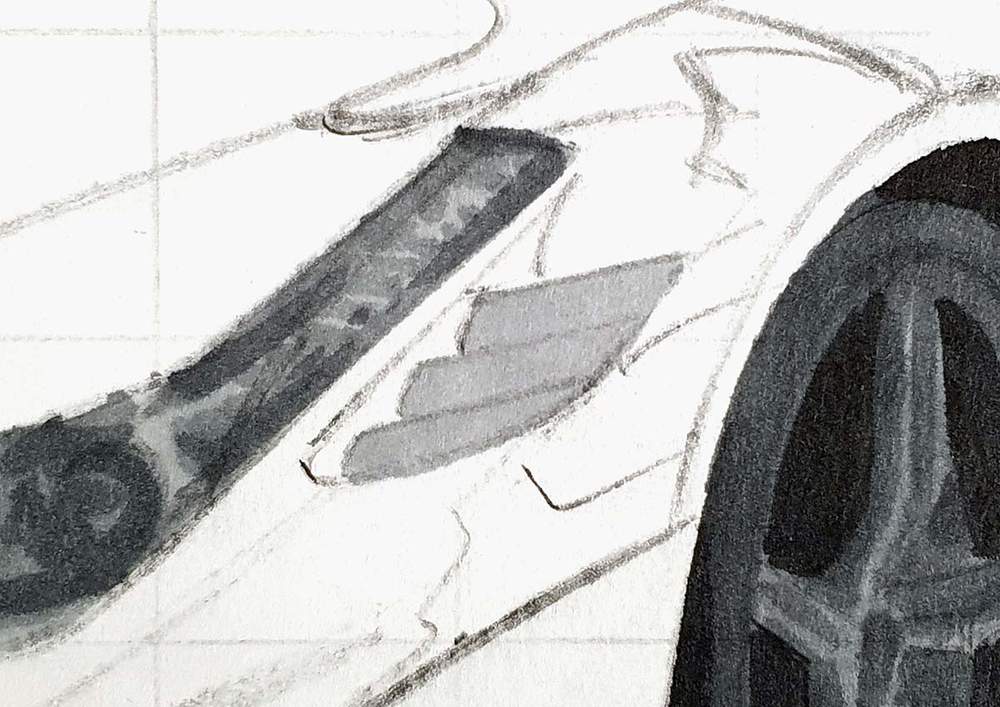
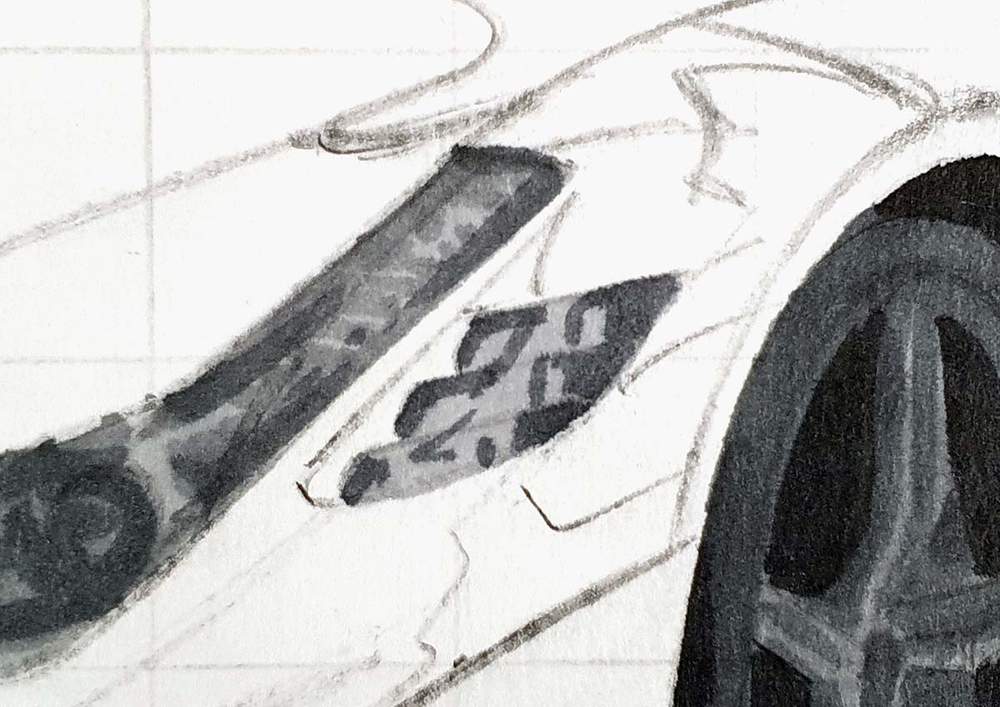
Next, I colored the louvers in front of the front wheel.
I started by coloring them with Ice Grey 2.
After that, I added some dark reflections with Ice Grey 7.
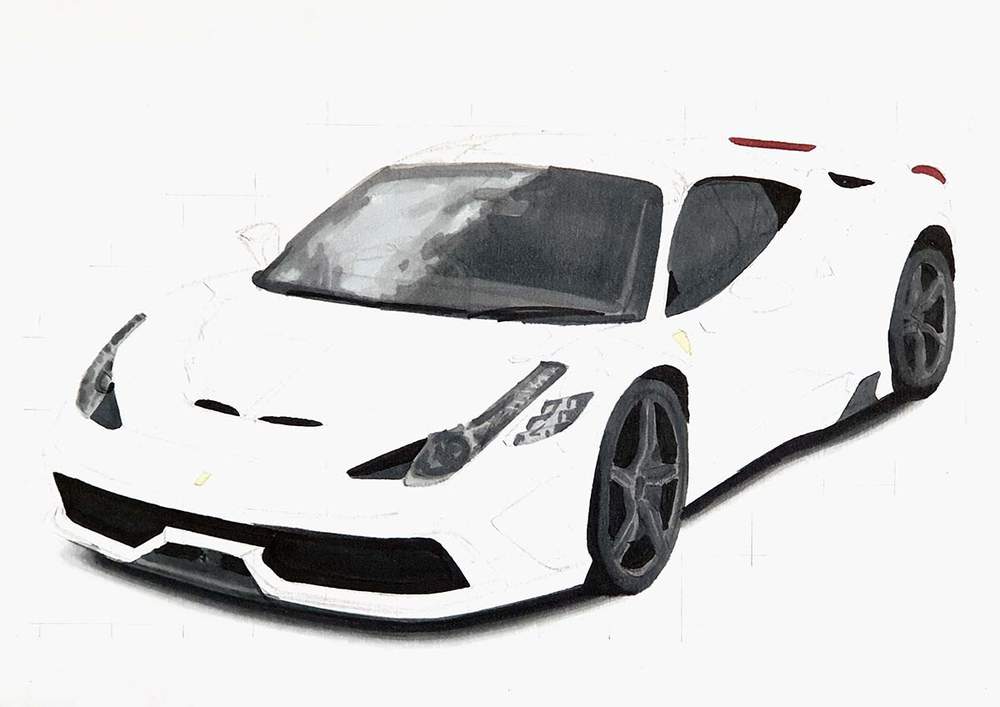
Step 16: Color the Grey Parts Next to the Headlights of the Ferrari 458 Speciale
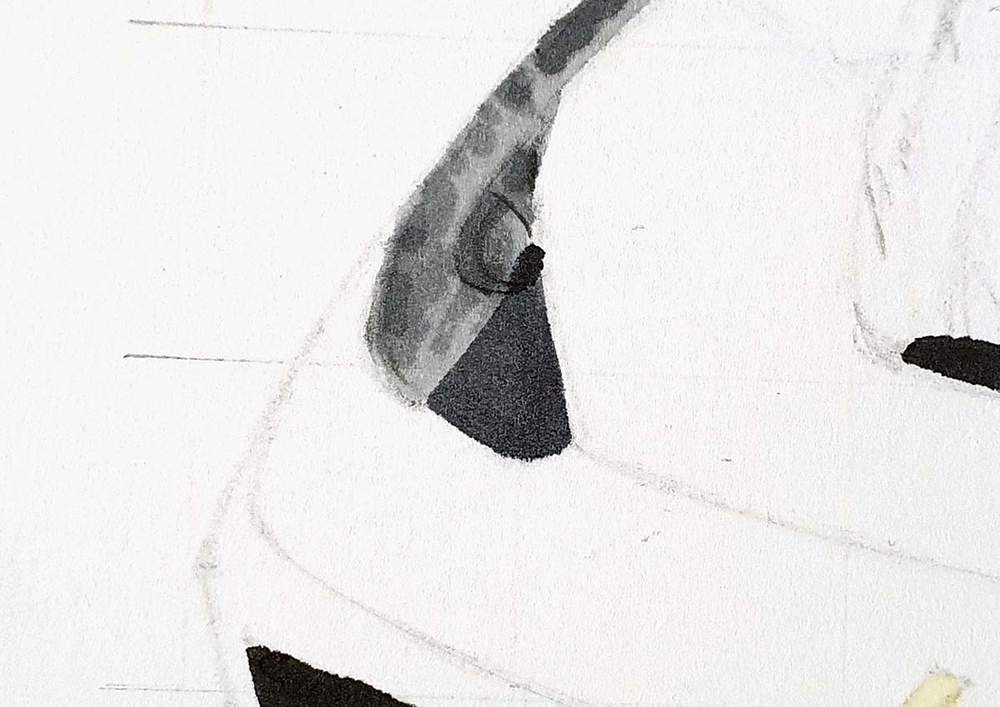
I would've colored these parts next to each headlight earlier when I colored the headlights themselves, but I forgot. So we're coloring them now.
I colored them Ice Grey 7.

Step 17: Color the Main Body of the Ferrari 458 Speciale
All that's left to color is the main body of the Ferrari 458.
I started by coloring the lightest reflections with Pearl Blue.

Next, I colored the rest of the main body with China Blue.

Then, I added some darker reflections with Indigo Blue.
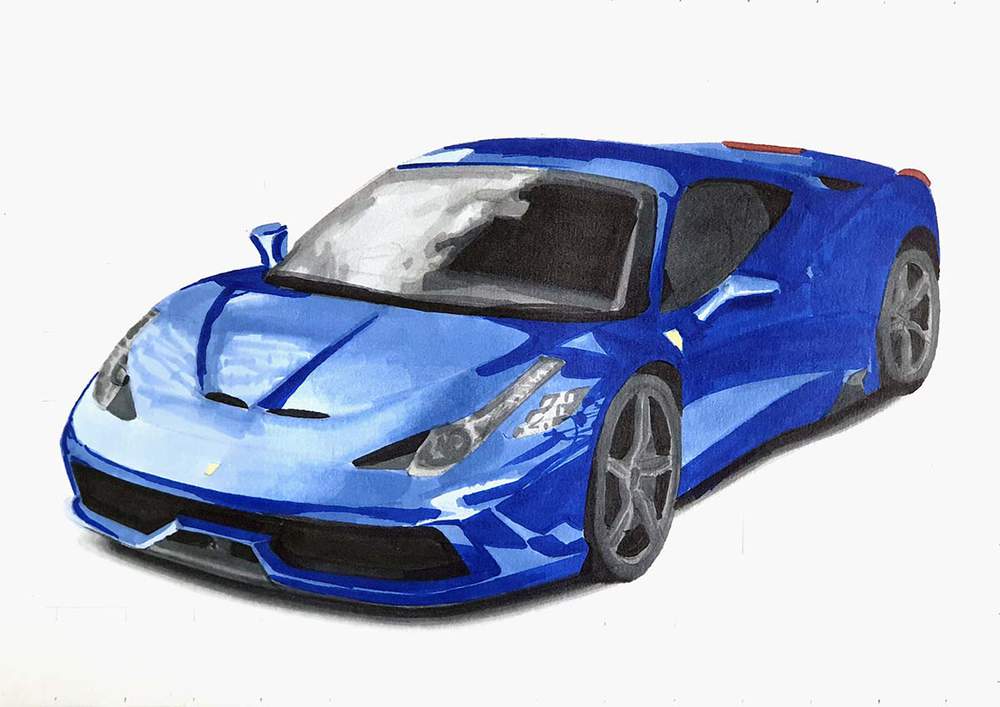
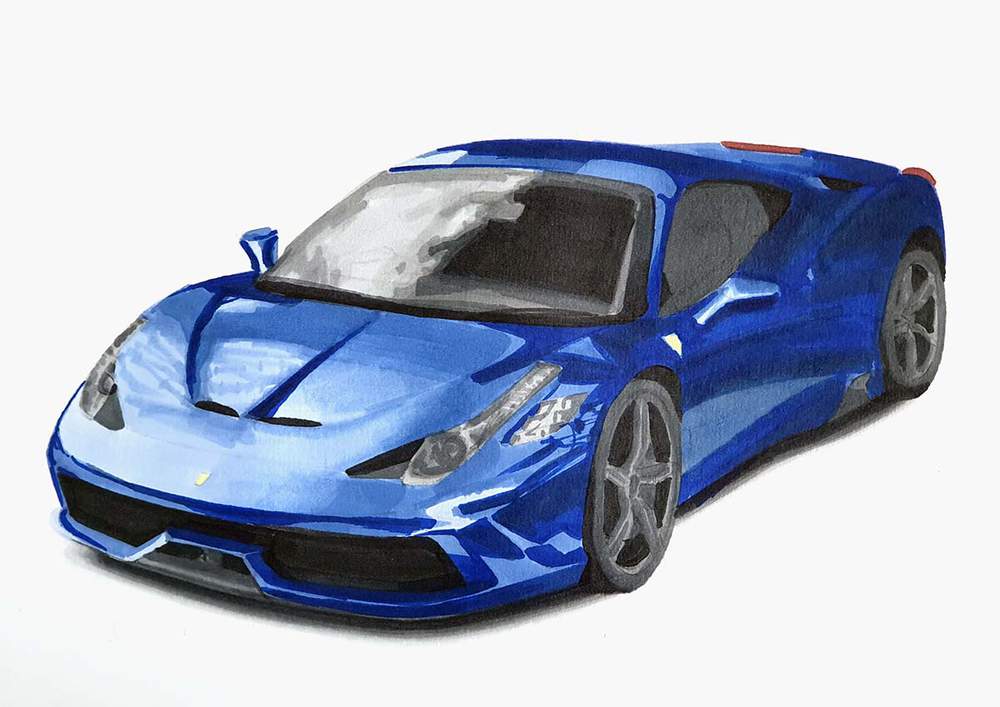
Lastly, I used Midnight Blue to add some darker/greyer reflections on the dark parts to make it less monotone.
Step 18: Add Details to the Ferrari 458 Speciale Drawing
The Ferrari 458 Speciale is now fully colored, but it looks far from done. It especially lacks details.
That's where the colored pencils come in.
I used the white colored pencils to add tons of details and reflections all over the car. I also refined the spokes and the rims and a few more things.
Next, I used the Dove Grey pencil to refine the wheels a bit more.
Lastly, I used the Black pencil to add some dark reflections and to color the panel gaps.

Step 19: Add White Highlights to the Ferrari 458 Speciale Drawing
To finish the drawing off, I used the white Posca paint marker to add some white highlights all over the car.
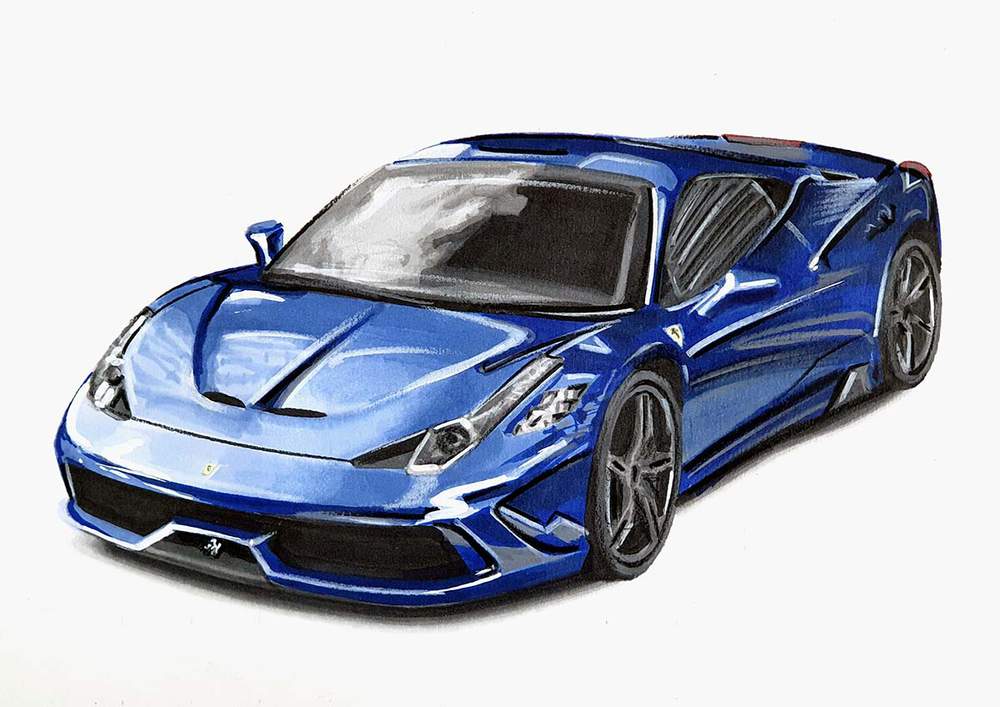
And That's How I Made This Ferrari 458 Speciale
I hope this was helpful to you!
Thank you for taking the time to read (and follow) this tutorial!
Leave a comment with what other cars you want me to make tutorials for!





Be the first to comment!
Comments
There are no comments yet.