How to get the proportions right using the grid method
Drawing proportions can be very hard. At least I find it hard, but I want to be better at it.
I knew about a technique called the grid method for a long time now, but I never used it as it seemed too time consuming and complex. And I always remembered in the back of my head how the first time I used it went. I think you can guess how that went...
So from then on I thought I was just bad at sketching and I would avoid it by just tracing. It was easy and somewhat time efficient, but definitely not always fun. I used my iPad to trace, but to use it I always needed to wait until it was dark enough. And I would zoom in on the photo I was tracing, but when drawing I often would accidentally touch the screen resetting the zoom...
But now since a year or so I've been enjoying the grid method a lot. For me this made sketching a lot more fun. It does take some practise, but definitely not as much as free handing does.
So what is the grid method exactly and how do you use it?
What is the grid method
The grid method is a tool you can use to make drawing proportions a lot easier. To use the grid method you draw a grid on the photo you're drawing and replicate that same grid onto your piece of paper. This devides complicated photos or subjects into many comprehensible squares. You can now focus on each square instead of the whole picture which is easier than trying the sketch the whole subject at once. If your subject is very detailed or complicated you can make a denser grid with more squares to make it easier to sketch it accurately. And if you have a relatively easy subject you don't need a grid with many squares.

How to use the grid method for sketching
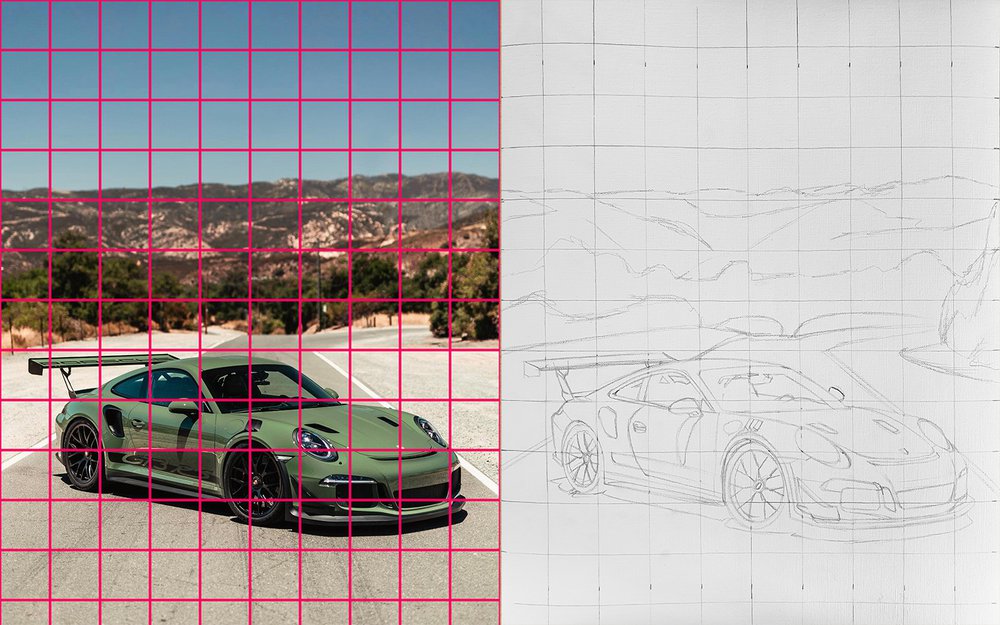
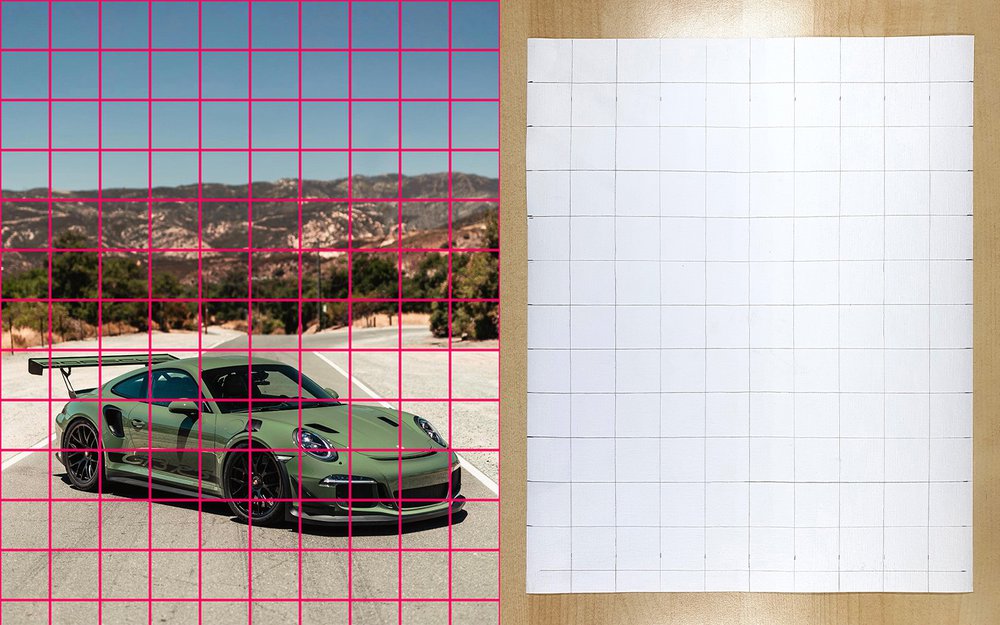
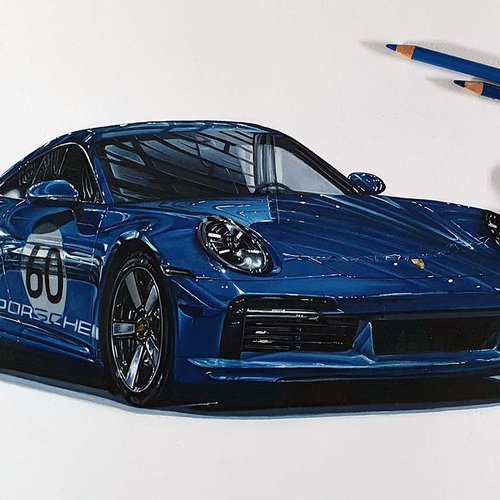
Step 1. The first thing you need to do is print your reference photo or import it into a photo editing app like Photoshop or Procreate. I wil use the photo below to follow along with the steps.

Step 2. After that you'll need to decide how big you want the grid to be and draw that grid onto the photo. If you using a photo editing app you can download this image of a grid I already made for you and paste it in the layer above your reference photo. And then resize it to the size you want. You can also use my grid overlay tool.
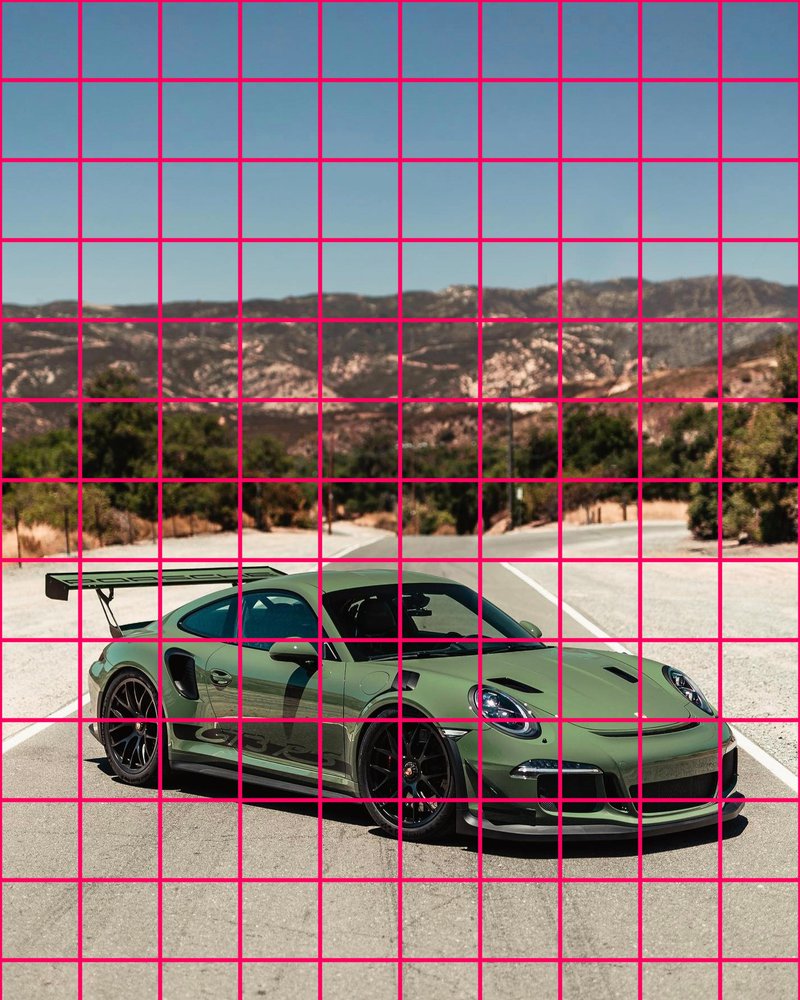
For example, my reference photo has an aspect ratio of 4:5 and looks complicated so I made a grid of 10 by 12.5 squares in Photoshop.
If you don't have any photo editing software, you can also just print out your reference and draw the grid on there like I've done in the example below. First I measured the width and the height of the photo on the paper which was 20 by 25 cm. I then devided the width by 10 because I wanted the width to be 10 squares wide. This resulted in squares of 2 by 2 cm. Then I drew a grid of 2 by 2 cm squares onto the printed photo.
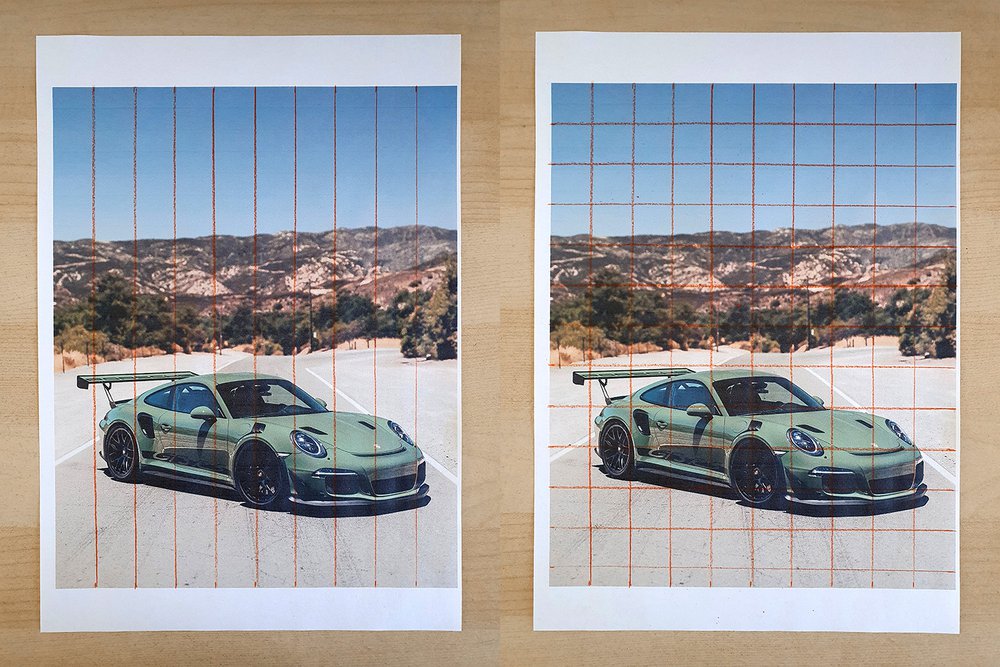
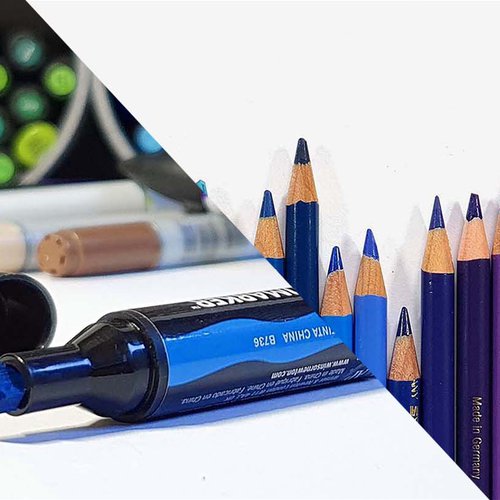
First I drew the vertical lines and then I drew the horizontal ones. You can also do it the other way around. I used a red pencil because the photo was mainly green blue-ish and red is the opposite color of that, so the lines will be more visible.
Step 3. Once you've drawn the grid on the photo you'll need the replicate that same grid onto your piece of paper. The piece of paper I'll be sketching on is 32 by 40 cm which has the same aspect ratio (4:5) as my reference photo which is very important. As the grid I drew is 10 by 12.5 squares, each square of my grid will be 3.2 by 3.2 cm on my paper, because 32 cm, the width of the paper, devided by 10 squares is 3.2 cm per square. The same goes for the length of the paper which is 40 cm, so 40 devided by 12.5 squares is 3.2 cm. Once you've drawn your grid on the paper it should look something like this.
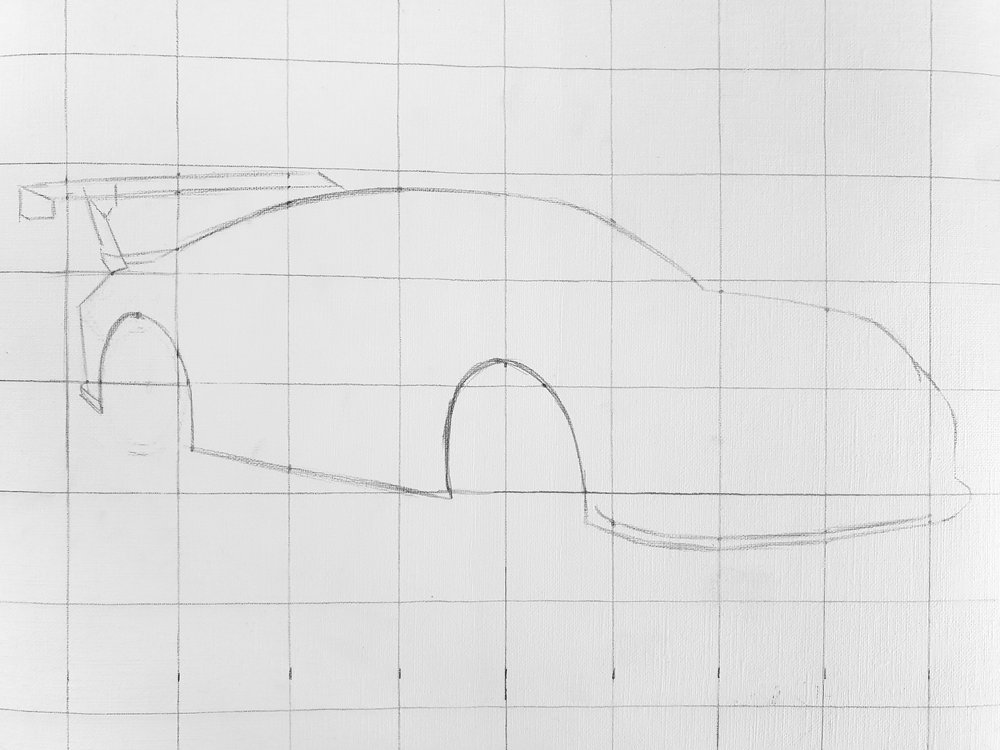
Step 4. Now it's time to start sketching. It's easiest to start with the outline of an object. For example I'll start by sketching the outline of the car. And then you just choose a place to start. I recommend starting at the left if you're right handed so you don't smudge the paper with your hand. And if your left handed I'd recommend you start on the right for the same reason.
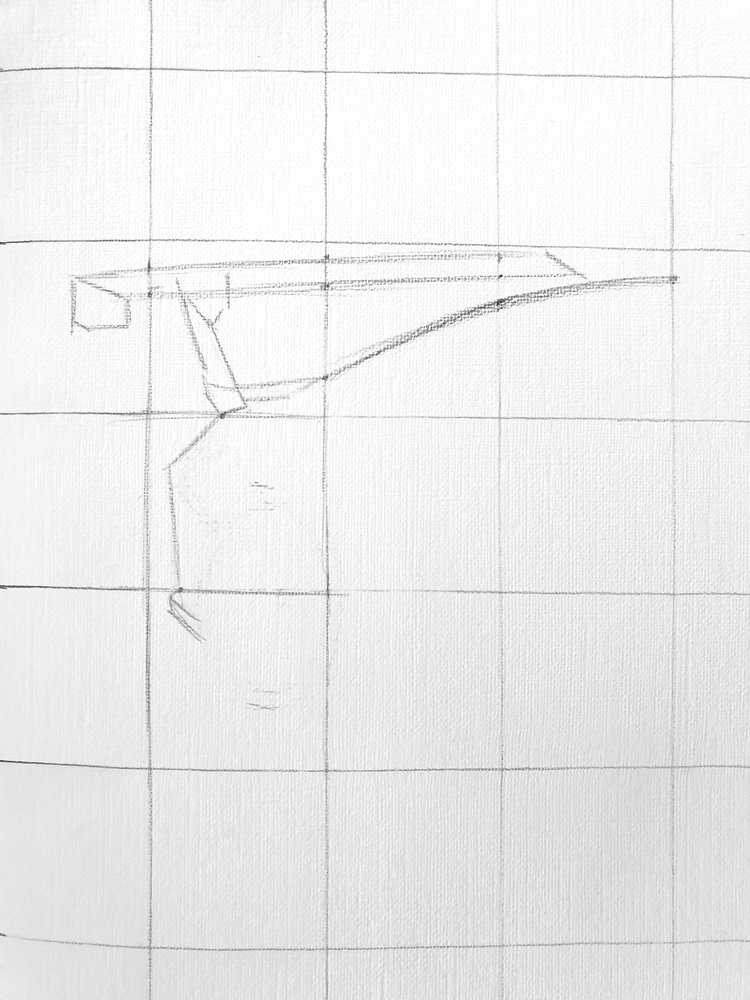
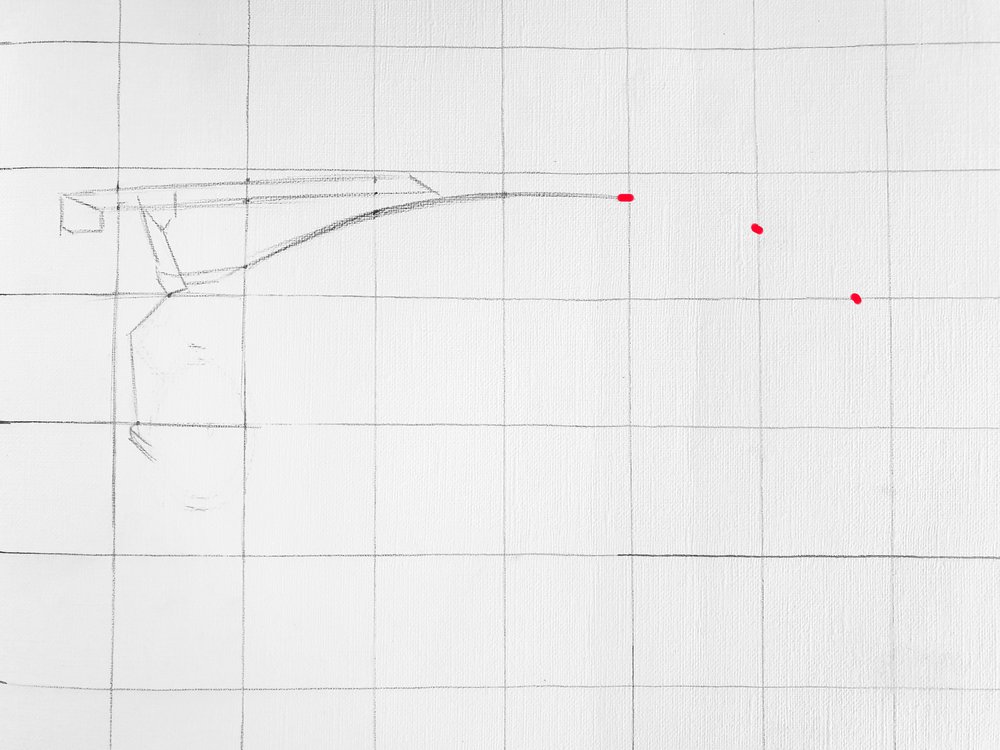
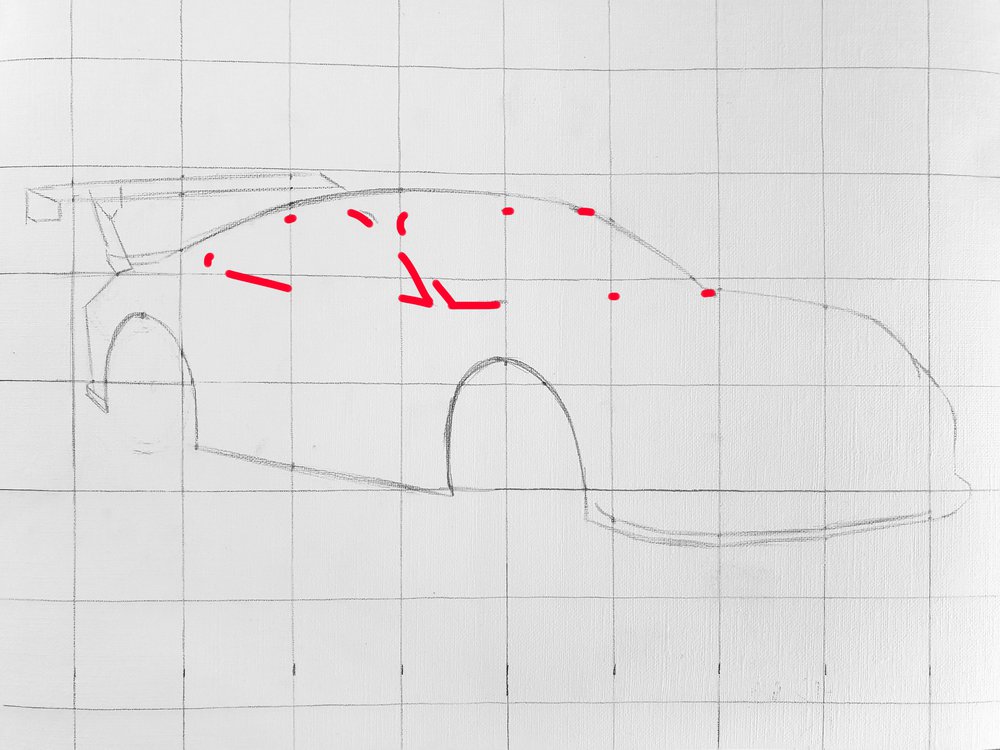
As you can see I started at the left and drew some basic lines. If the lines you need to draw are complex you can just simplify them and refine them later. If a line crosses any lines of the grid you can mark those points to make it easier the sketch the line in the correct position. And then when you've marked those points you can draw the line in one motion. In the images below you can see how you can do that.
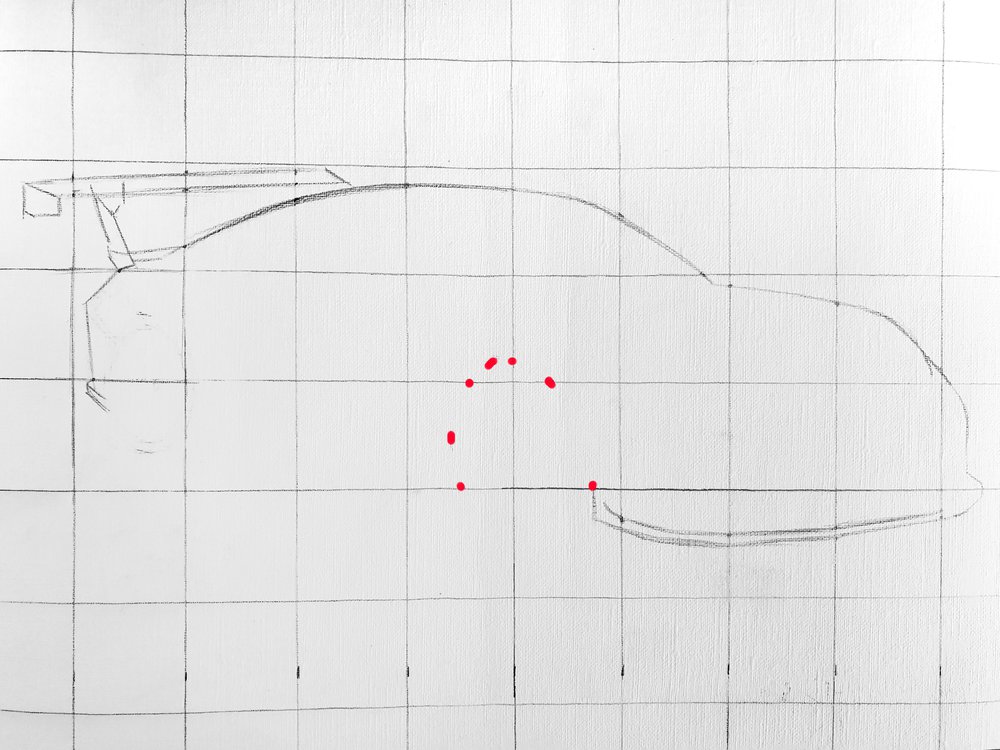
Circles are hard shapes to sketch right, so for the wheel arch I marked some extra points then just the points that intersect with the grid. Apart from the intersecting points I also marked the highest point of the arch and the most left part. Now it's just a game of connecting the dots.
Now you just continue doing this until the outline of the object you're drawing is done.
Now that the outline is done it's time to add some more basic shapes to it like the windows and the wheels in my case. Just repeat what you've already done, but now you can also compare the position of the shapes you're going to add to what you've already drawn. In the image below for example I saw the the edge of the window was a little bit below the roof line, so I marked some points a little below the roof line where the window line would intersect the grid lines. I also marked some points where the lines would change direction.
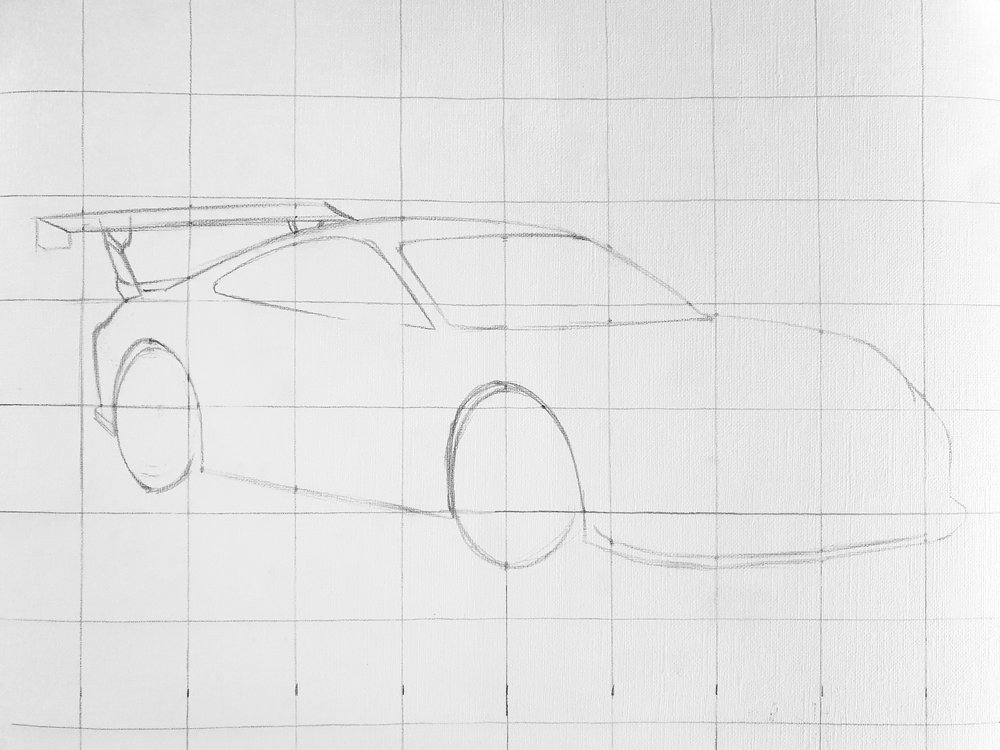
Now that all basic shapes are done it is easier to sketch the details. This is because you can, as I said before, compare the position of the remaining elements to what you've already drawn. And as most of the details probably don't cross any of the lines of the grid it is easier to estimate where you should sketch them when the basic shapes are already done.
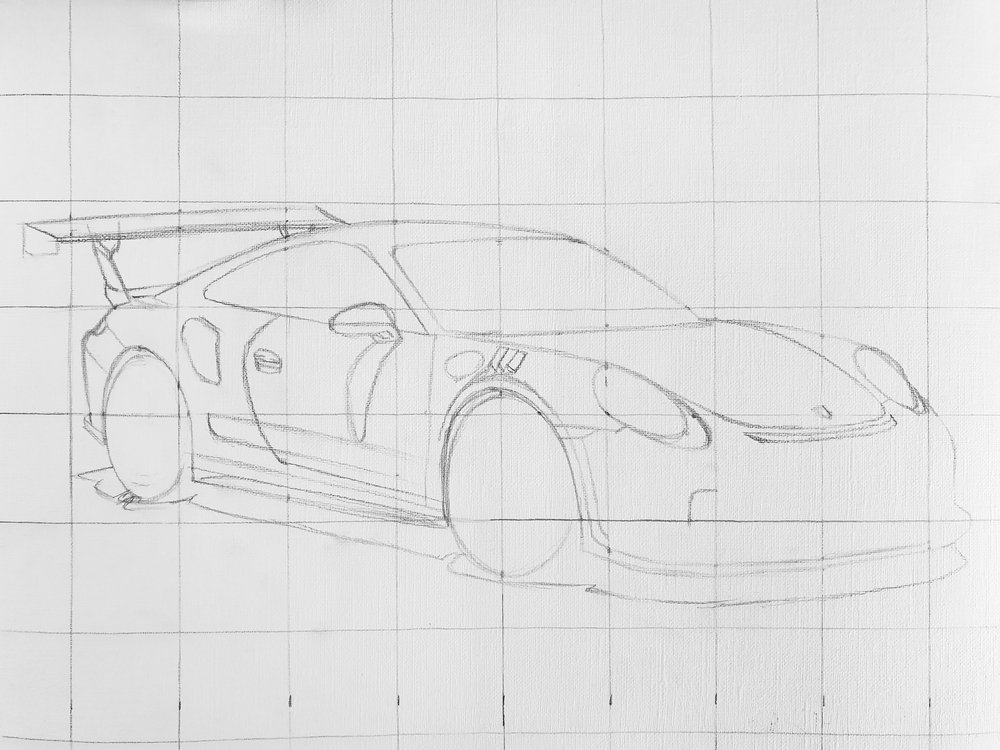
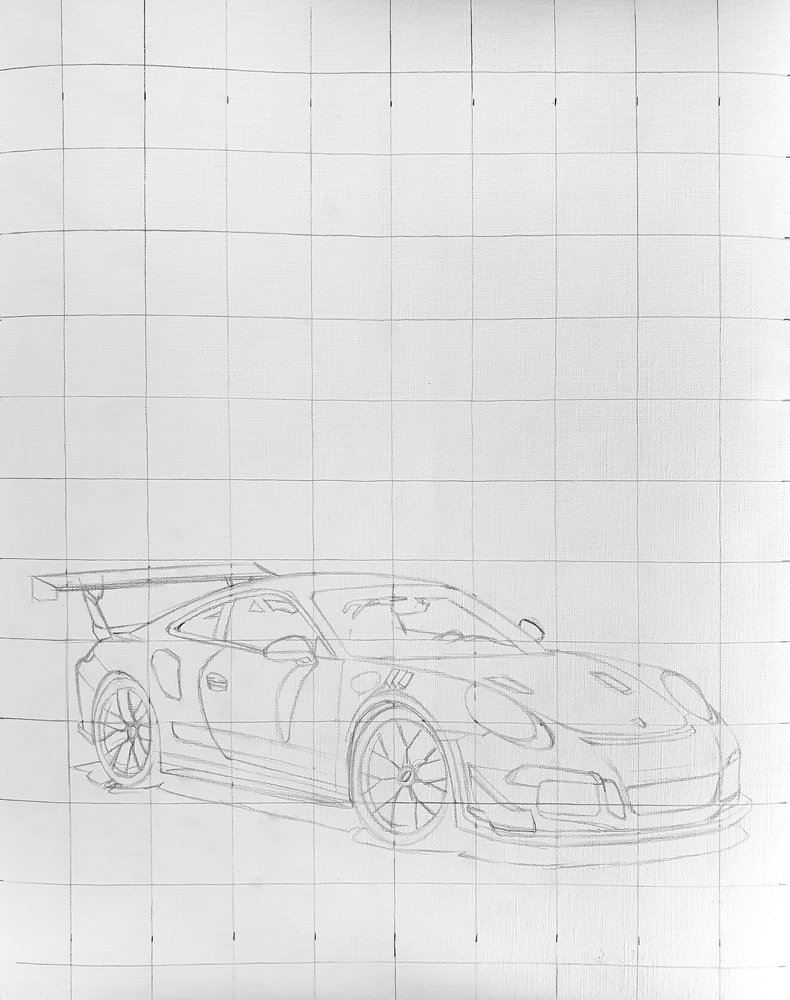
Now your first object should be done. If there are any more objects you need to draw, you just repeat the previous steps. The sketch I'm making only contains a relatively simple background apart from the car I just sketched. I just repeat what I've done before and then my sketch will be finished.

Conclusion
You just made a sketch with correct proportions! At least I hope so (let me know how it went by writing a comment below). You probably need a little more practise to get better at it though. But you don't need to be good at free handing a sketch to draw correct proportions at all. By using the grid method you immediately get a lot better at drawing correct proportions.
Tags
Articles You Might Also Like

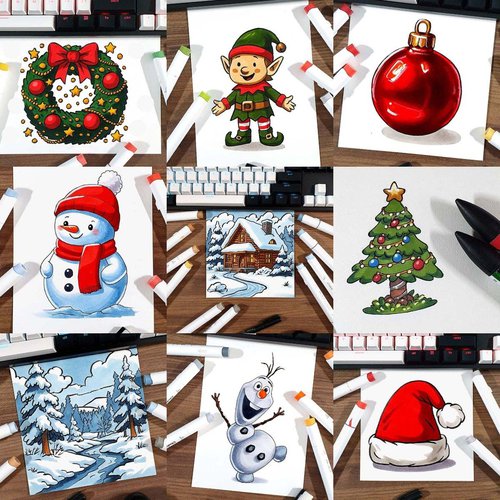


I love bringing cars to life with alcohol markers and colored pencils.
Whether you're just starting out or looking to improve your skills, I'm here to help!
Click here to learn more about me.


Add a comment
Comments
I really appreciate it all bro it's def helped bring my pieces to another level. I've used the grid method to draw only once before I found your stuff and it turned out alright, but after I found you ive seen a massive difference. Thanks!
It is helpful 😄 I tried it and I'll show you the sketch very soon