How To Draw An Orchid - Simple & Easy-To-Follow Step-By-Step Guide
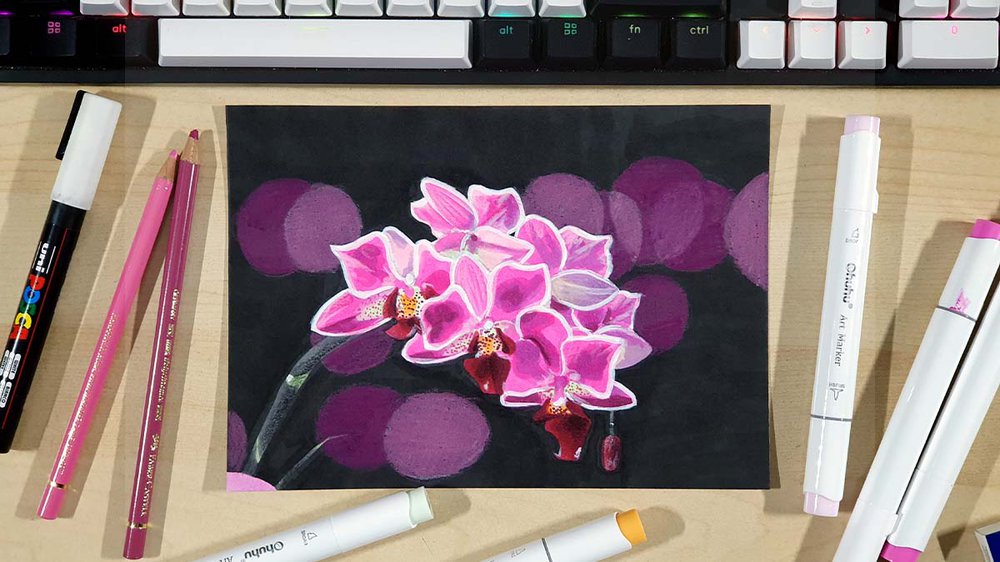
I've been creating realistic drawings for years, and in this tutorial, I'm going to show you how you can draw this beautiful orchid.
I've broken the whole drawing up into easy-to-follow steps so you can make your own realistic-looking orchid drawing.
Let's get started!
Disclaimer: In the name of full transparency, please be aware that this blog post contains affiliate links and any purchases made through such links will result in a small commission for me (at no extra cost for you).
The Draw Materials I Used To Make This Drawing
To make this orchid drawing, I used a combination of alcohol markers and colored pencils.
I used the Ohuhu Honolulu markers in the colors WG130 Warm Grey 13, G240 Beige Green, GG110 Toner Green, G110 Mignonette, YR150 Chrome Orange, E160 Soft Sun, RV350 Crimson, RV250 Peony, RV080 Bright Pink, RV100 Red Onion, RV240 Bronze Purple, RV130 Queen Pink, V150 Mallow, and V050 Pearl Violet.
If you're on a tighter budget, these Caliart markers seem like a good and cheap alternative.
I used the Derwent Chromaflow pencils to add some details. To do that, I used 2400 White and 2300 Black.
I also used 2 Faber-Castell Polychromos pencils: 129 Pink Madder Lake and 125 Middle Purple Pink.
And I used a white Posca PC-3M paint marker for highlights.
And I made this drawing on my favorite marker paper: Canson Illustration Manga. I cut one sheet of paper in half to make it A5-size.
The Reference Photo I Used For This Drawing
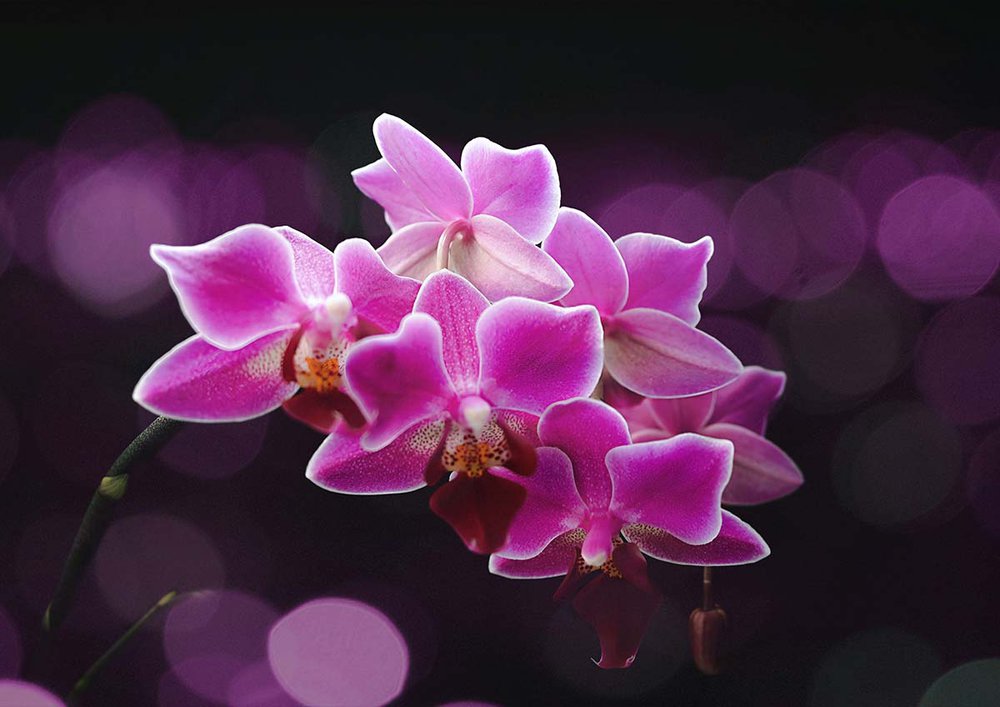
To make this orchid flower drawing, I used this photo I found on Unsplash as a reference.
This is such a beautiful drawing that I could not not draw it.
How Do You Draw An Orchid?
To draw an orchid, you start by sketching the basic shape of the flower. Then refine your sketch by adding the individual petals and then the details. Next, use markers to color the whole flower and work from light to dark. Then you add details with a few colored pencils. Lastly, add a few white highlights to make the flowers pop.
Step 1: Sketch The Basic Shapes Of The Orchid
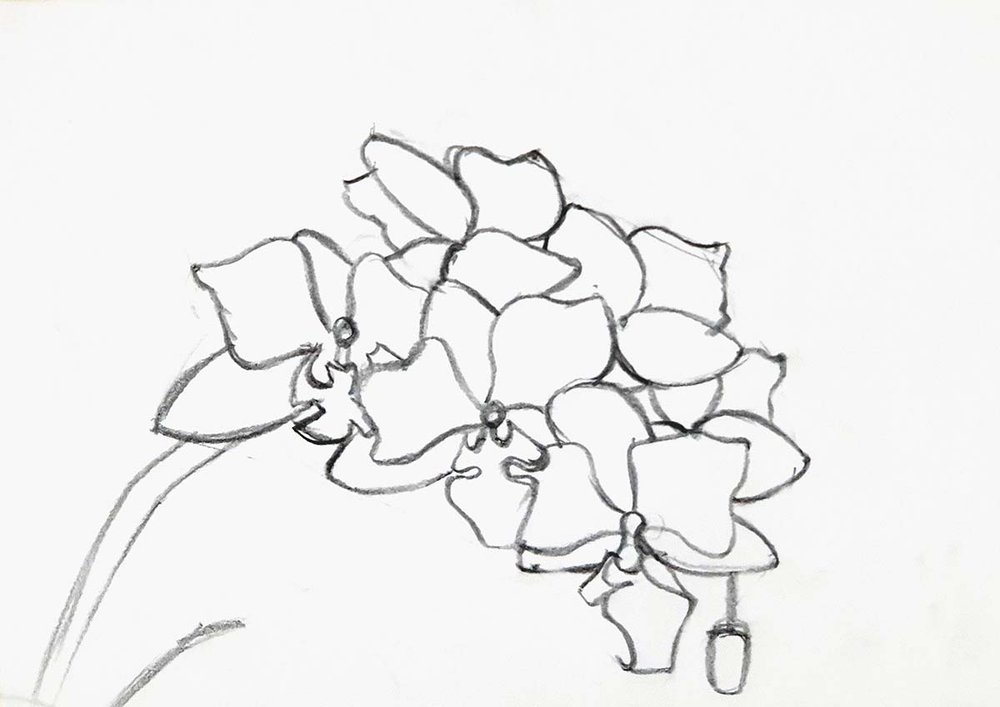
To make sketching the complex shapes of the orchid flowers a lot easier, I like to start by sketching a basic outline.
I start by marking the tips of the most outside petals and connect those dots with a line. I then sketched the stem.
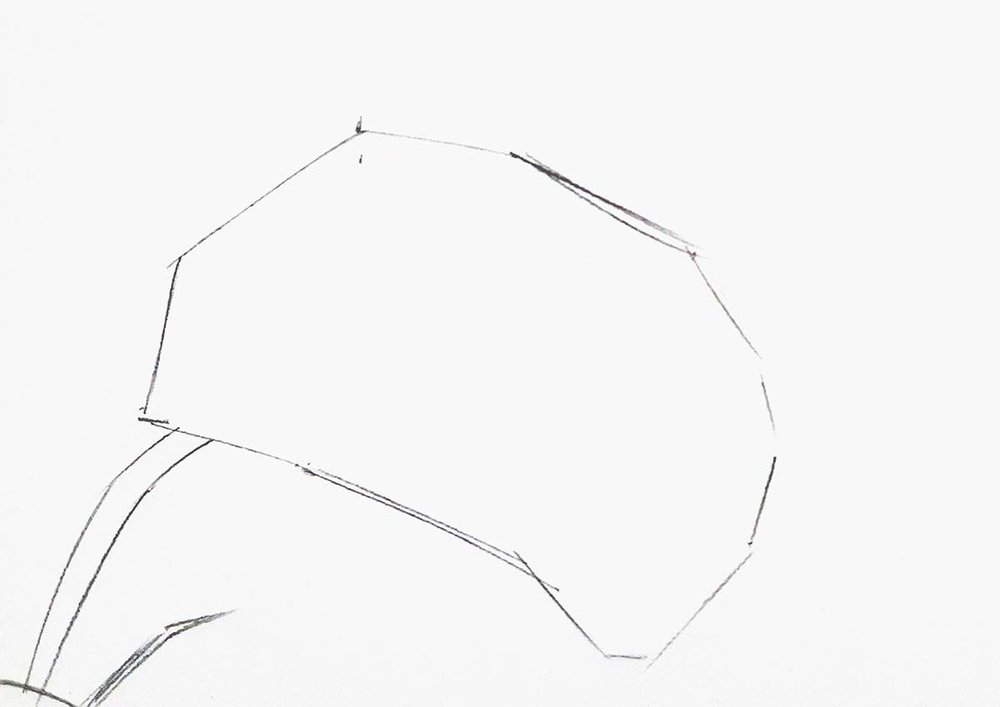
Next, I mark the center of each of the 6 flowers in the bunch. This makes it easier to sketch each individual petal.
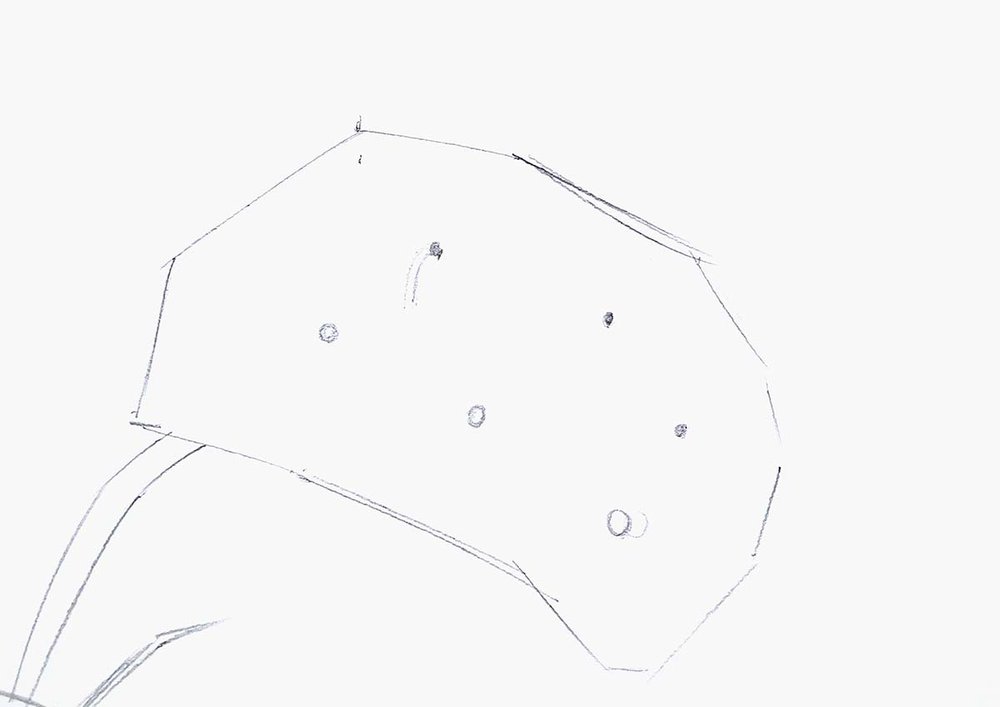
Step 2: Sketch The Orchid Flowers
After that, I sketched each petal one by one.
I started on the bottom right one as that one was in front of all the others.
I first sketched the centerpiece of the flower which is kind of shaped like an hourglass.
Next, I sketched the top and the bottom petals. I tried to replicate the shapes as well as I could by carefully looking at the reference photo.
Lastly, I sketched the 3rd petal which is partially behind the other ones.
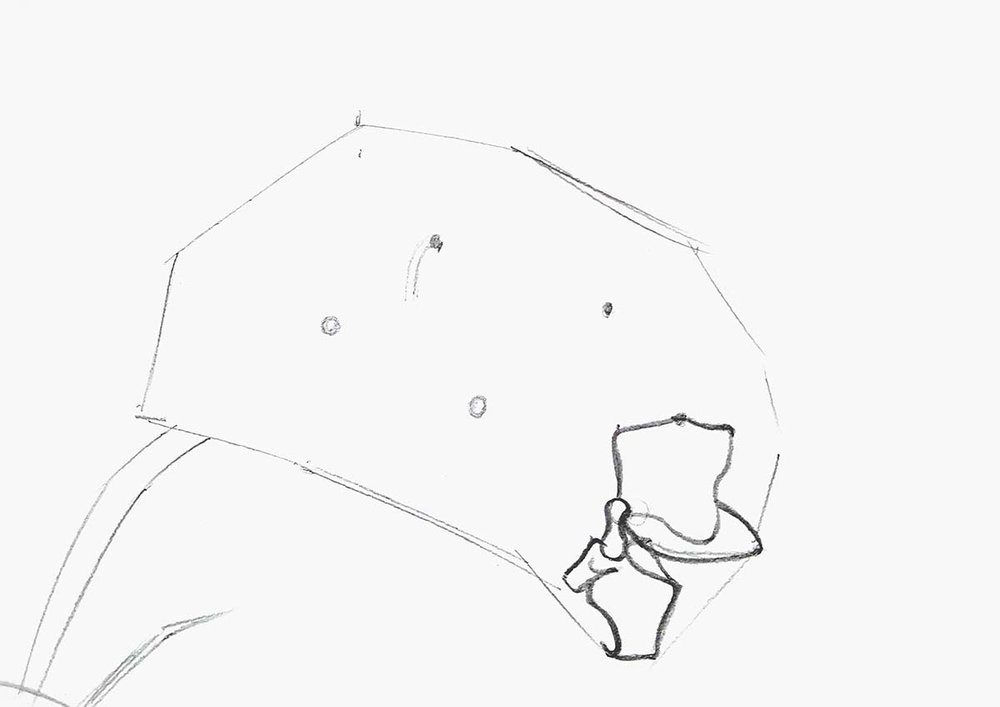
After that, I moved on to the surrounding flowers. I again first sketched the petals that were all the way in the foreground. Then, I added the ones that were partially covered by others.
For the more complex petal
that each flower has, I marked the tip and sketched a basic outline.
From that, I added more details like the intricate curves and angles.
They don't need to be an exact copy of the photo as long as the shape is somewhat similar. Orchids are plants and plants are organic meaning that they can look a thousand ways and still look realistic.
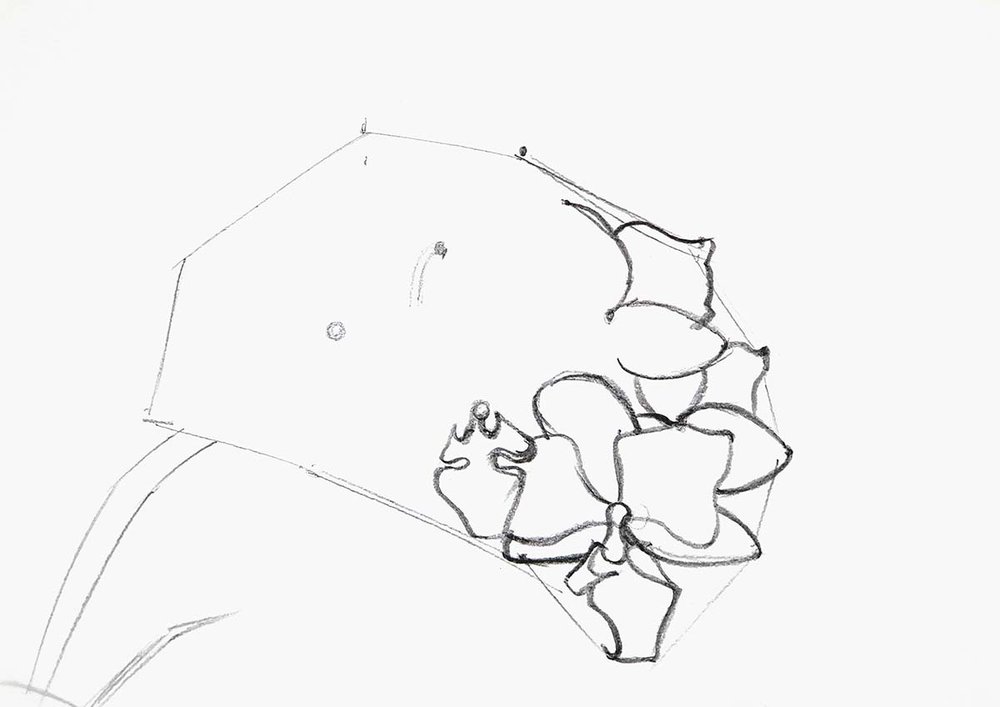
I continued this until I had sketched all the flowers and the flower bud on the bottom right which I almost forgot...
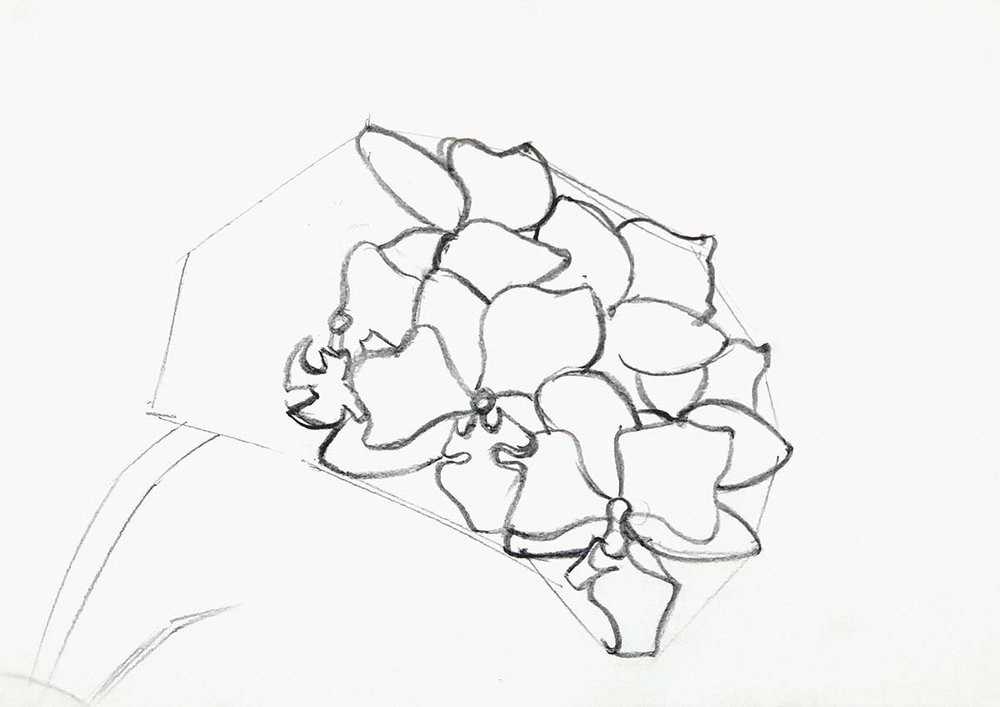
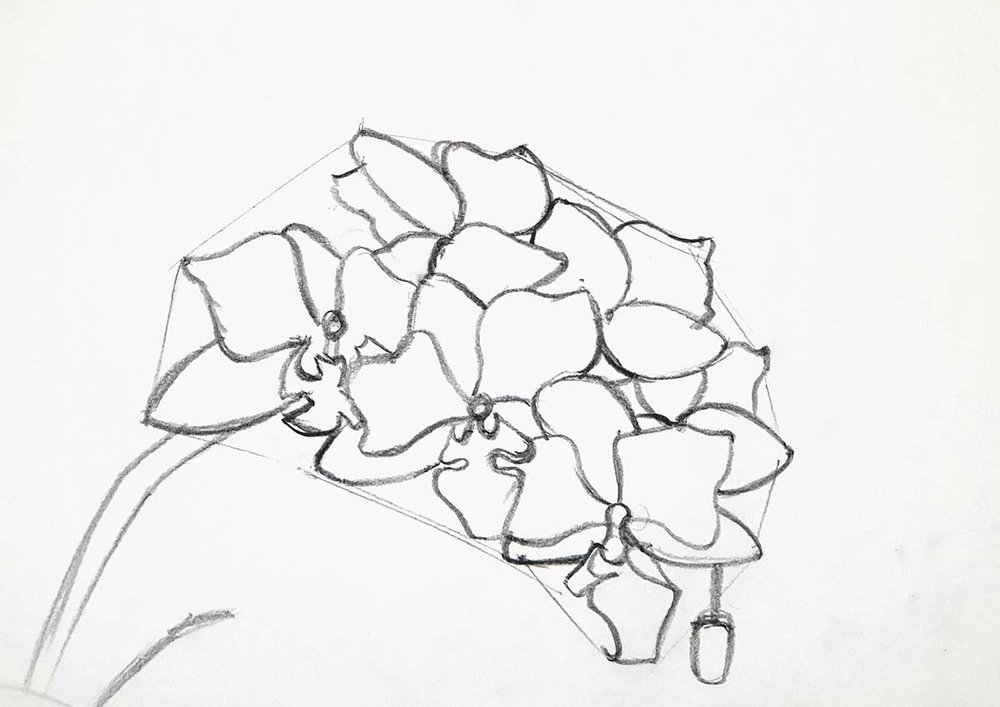
To finish the sketch off, I erased the construction lines I made at the start.
Step 3: Color The Orchid
Now that the sketch is done, it's time to start coloring.
I first colored the whole background black with WG130 Warm Grey 13 which is almost black. I just don't have a black marker for some reason.

Next, I erased my sketch to make it lighter. This prevents the sketch from showing through the marker ink.
After that, I colored the stem of the orchid. I first colored the light green bits with G240 Beige Green.
Then, I colored the rest of the stem with GG110 Toner Green.

Next, I colored the center half of each flower with G110 Mignonette.

After that, I started coloring the weird petals that the bottom 3 flowers have.
I first colored the bright orange bit with YR150 Chrome Orange.

Then, I colored the surrounding bits on those petals with E160 Soft Sun.

Lastly, I colored the rest of those petals with RV350 Crimson And then I added some darker parts with RV250 Peony.
I also colored the flower bud on the right, first with RV350 Crimson, and then with RV250 Peony. And I colored the stem above it with GG110 Toner Green.


After that, I colored the other
petals, starting with the bright pink ones. To color those, I used
RV080 Bright Pink. I didn't color over the parts that I previously
colored light green.

Next, I colored the light pink petals on the left half of the bunch of flowers with RV130 Queen Pink.

Then, I used V150 Mallow to color the remaining petals. I also used this color to blend the light green into the bright pink on the bright pink petals by coloring over the edge of the two colors.

After that, I used RV100 Red Onion to add some slightly darker bright pink spots on the petals that had some darker spots. These were mainly on the bottom half except for one petal which was at the top.
I then used RV240 Bronze Purple to add some even darker spots on the petals that had some dark spots in the reference photo.

And lastly, I used V050 Pearl Violet to add some blue-purple tones to the petals, especially the petals of the top and right flowers.
When
doing this, I also noticed that the flower on the top should be more
bright pink, so I colored the left 3 petals and a line through the
center on the right one with RV080 Bright Pink.
I also colored the bit of a vague circle on the bottom left caused by the bokeh effect with V150 Mallow.
Though, looking back at it, I would just color this part black first and then color over it with a pink colored pencil.

Step 4: Add Detail To Your Orchid Flower Drawing
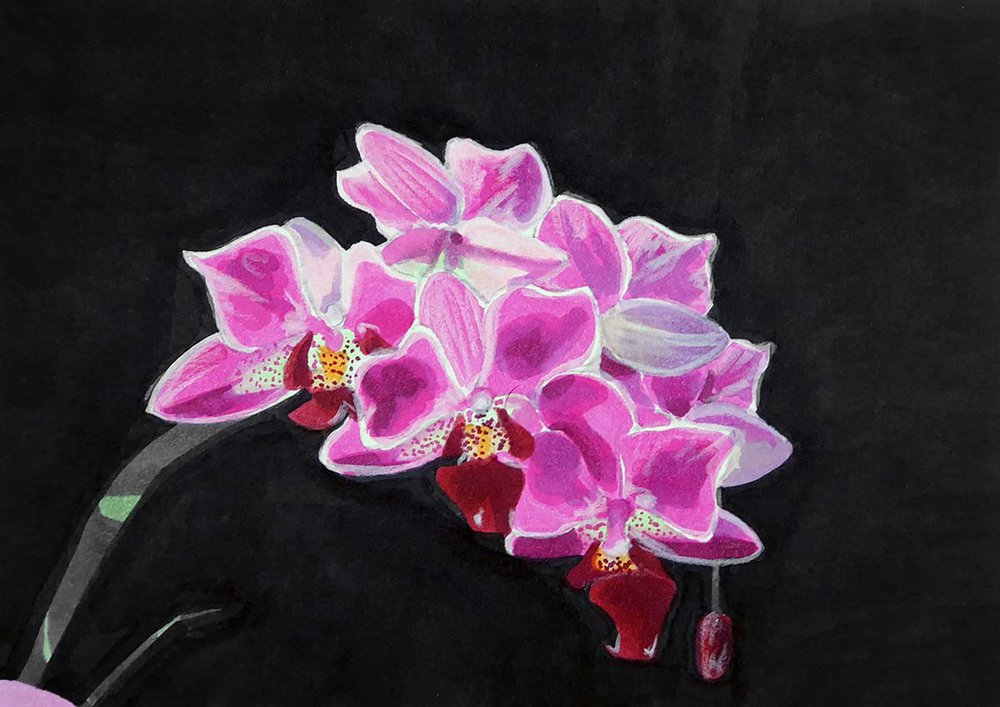
Next up, I added some white details to the orchid flowers with my white Chromaflow pencil.
I added some lines in the petals and outlined some petals. I also added some highlights on the darker red petals and the flower bud.
During this step, I also added some dots to the center of the flower. I used RV250 Peony for the dots on the dark red petals and RV080 Bright Pink for the dots on the other petals.
Step 5: Add Highlights To Your Orchid Drawing
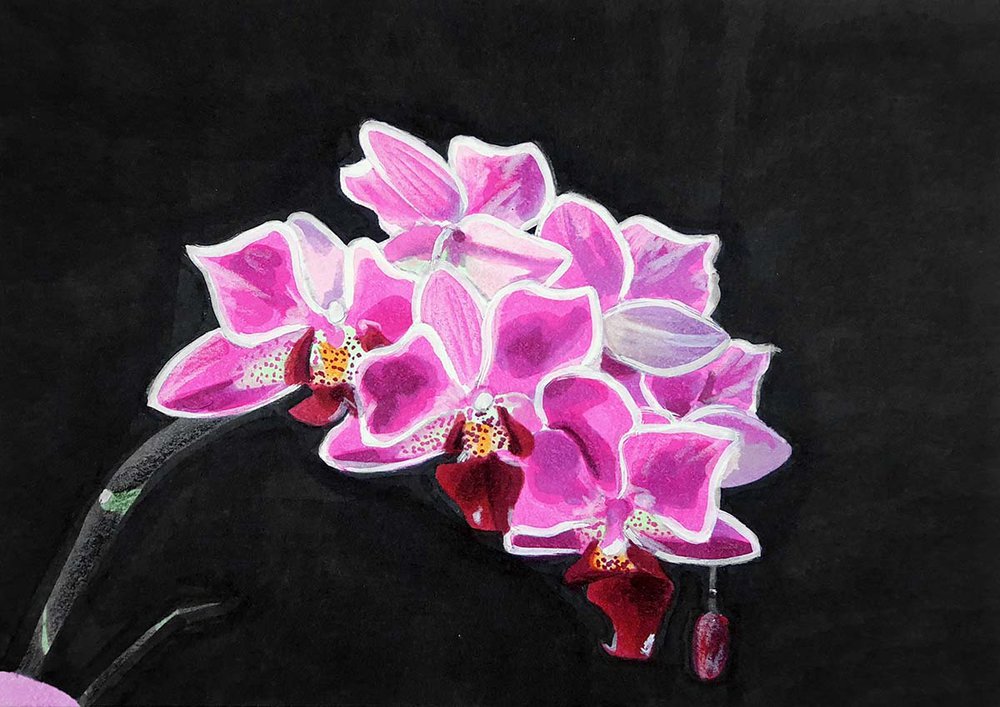
After that, I added some black details with my black Chromaflow pencil. I mainly added some details to the dark red petals and I darkened the right half of the stem.
I also added a bright white outline to most of the petals on the orchid flowers.
To do this, I used my Posca PC-3M white paint marker.
Step 6: Color The Bokeh Circles In The Background Of The Orchid
To finish this drawing off, I colored the circles in the background that were caused by the bokeh effect.
To add these circles, I used a light and a dark pink colored pencil.
I first colored the light pink circles and then the dark pink ones. And where the circles overlap, I mixed both colors to get a medium pink.

And That's How You Can Draw This Beautiful Orchid Flower
This was one of the most fun drawings, I've made in a long time and I hope you liked it too.
Let me know how yours turned out and if there were any parts that you found difficult!
Thank you for following along! And I'll see you in my next tutorial!







Be the first to comment!
Comments
There are no comments yet.