How To Draw A Scary Witch (Step-by-Step Tutorial for Beginners)
Want to learn how to draw a classic scary witch, complete with wrinkly hands, a pointy hat, and a wicked grin?
You’re in the right place!
In this step-by-step drawing tutorial, I’ll guide you through sketching and coloring a creepy cartoon-style witch that looks like she just flew in on her broomstick.
Whether you're getting creative for Halloween or just love spooky characters, this guide will help you bring your own wicked witch to life.
Let’s get started!
Disclaimer: In the name of full transparency, please be aware that this blog post contains affiliate links and any purchases made through such links will result in a small commission for me (at no extra cost for you).
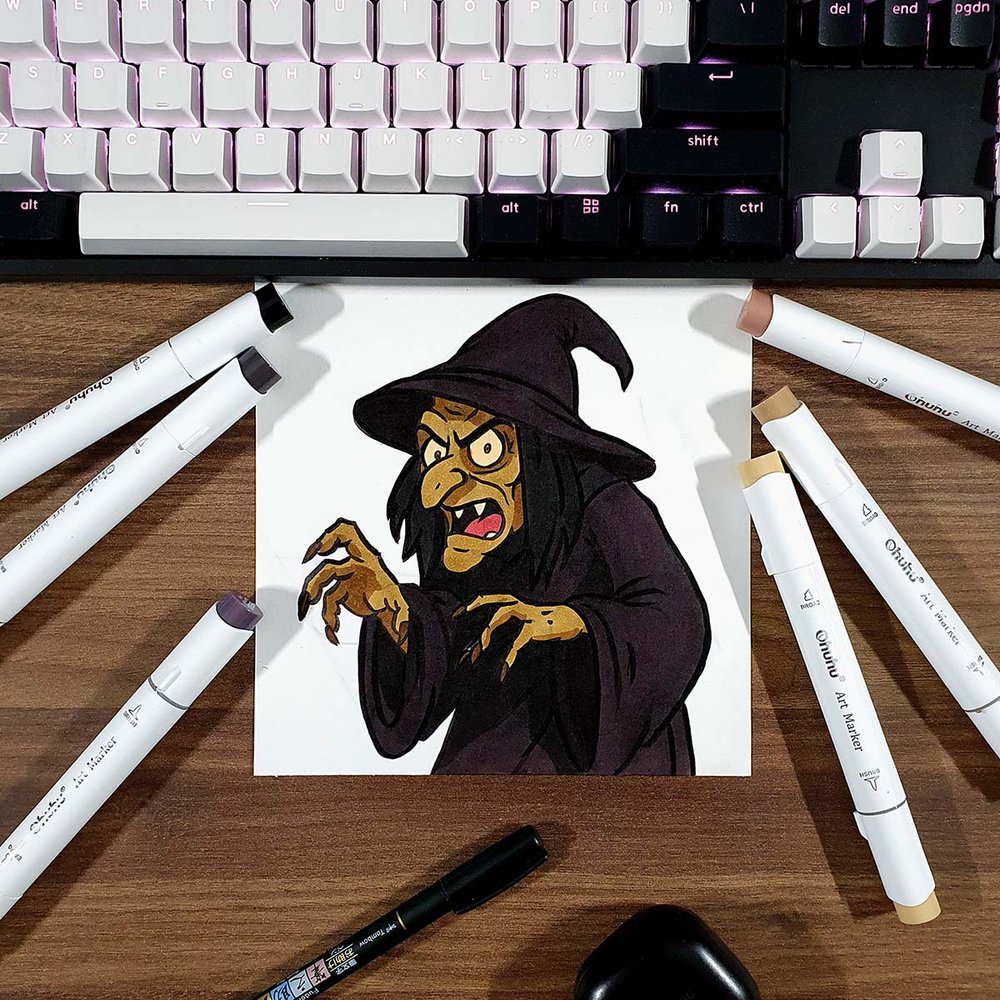
Drawing Materials You'll Need
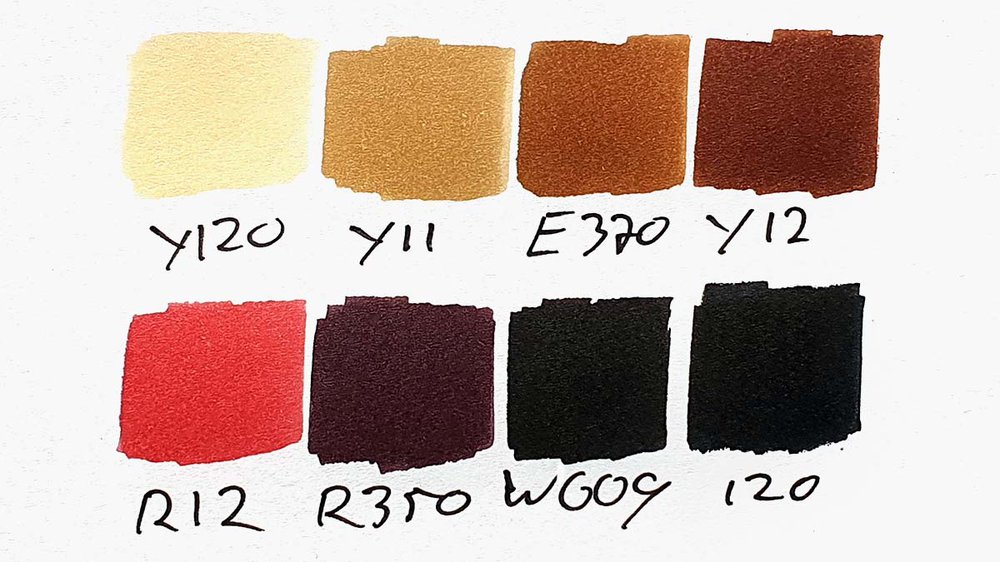
To make this drawing, I used Ohuhu Honolulu markers in the colors Buttercup Yellow (Y120), Brown Grey (Y11), Light Walnut (E370), Mahogany (Y12), Rose Buvard (R12), Dark Purple Grey (R350), Warm Grey 9 (WG09), and Black (120).
I used a Tombow Fudenosuke Brush Pen to outline the sketch.
And I made this drawing on Canson Illustration Manga Paper.
How Do You Draw A Scary Witch?
To draw a scary witch, start by sketching simple shapes to block out the pose. Then, draw her angry face with sharp features and wrinkly details. Add a classic witch hat, claw-like hands, and clothing wrinkles. Outline the sketch with a black brush pen, then bring it to life using dark alcohol marker shades like purple-grey and warm greys for a spooky, dramatic effect.
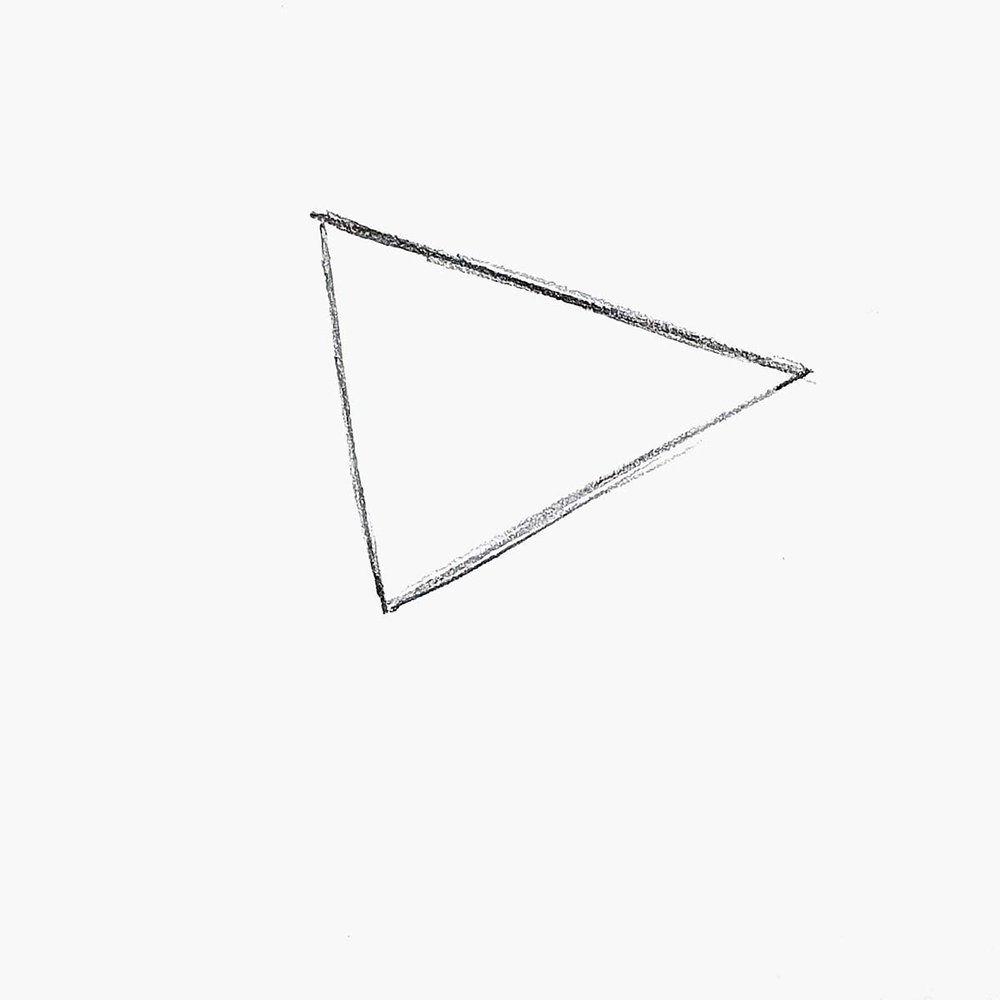
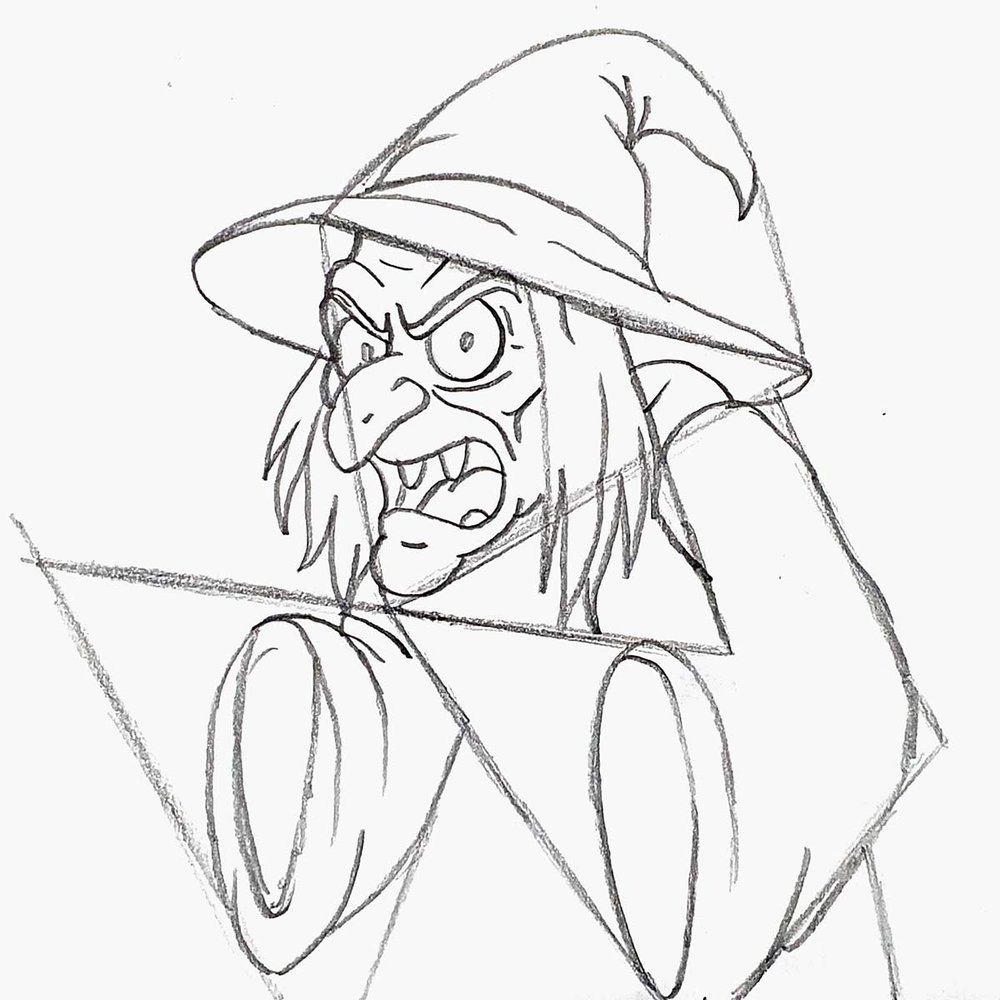
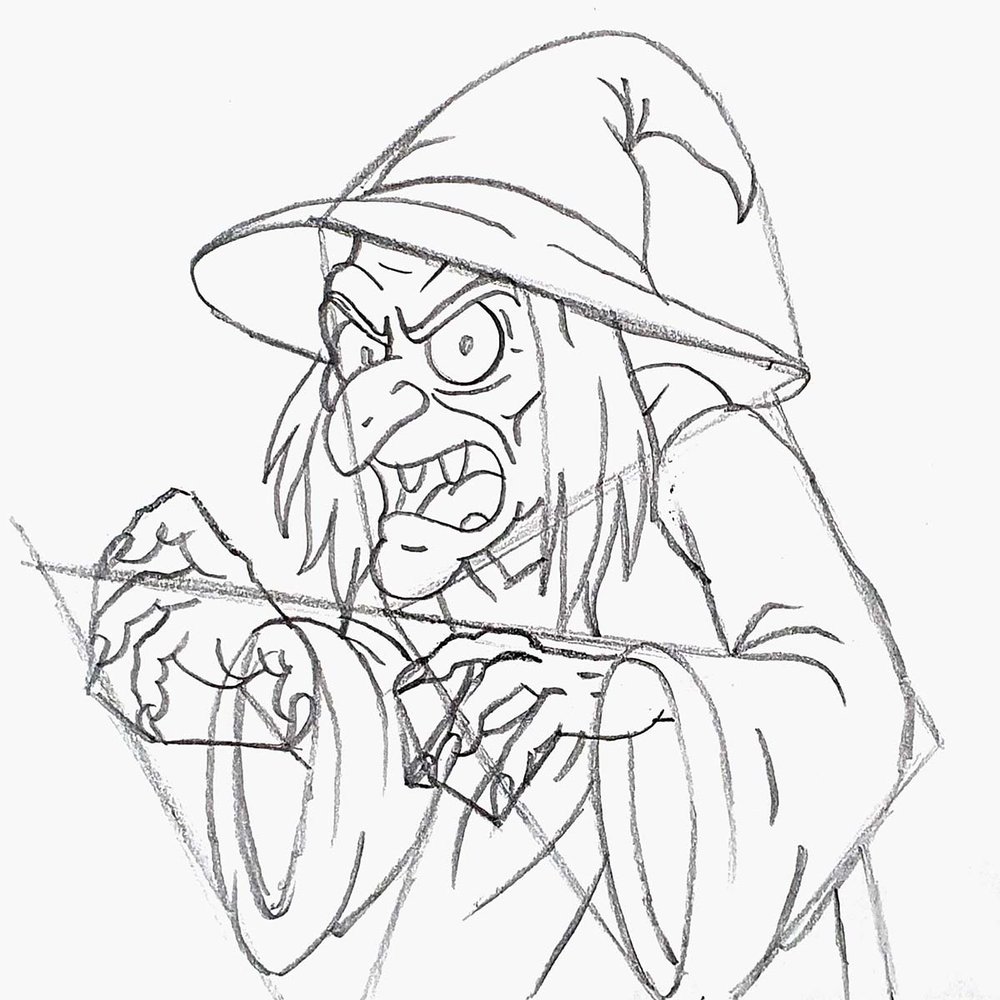
Step 1: Sketch Simple Guiding Shapes
The witch I wanted to draw for this tutorial turned out to be quite complex, so I decided to first break the drawing down into a mosaic of simple shapes.
I started by sketching a big triangle just above the center of the paper, which will be the shape of her head.
Then, I added a big arch on top for the hat and sketched two sides of a triangle overlapping the first one on the right.
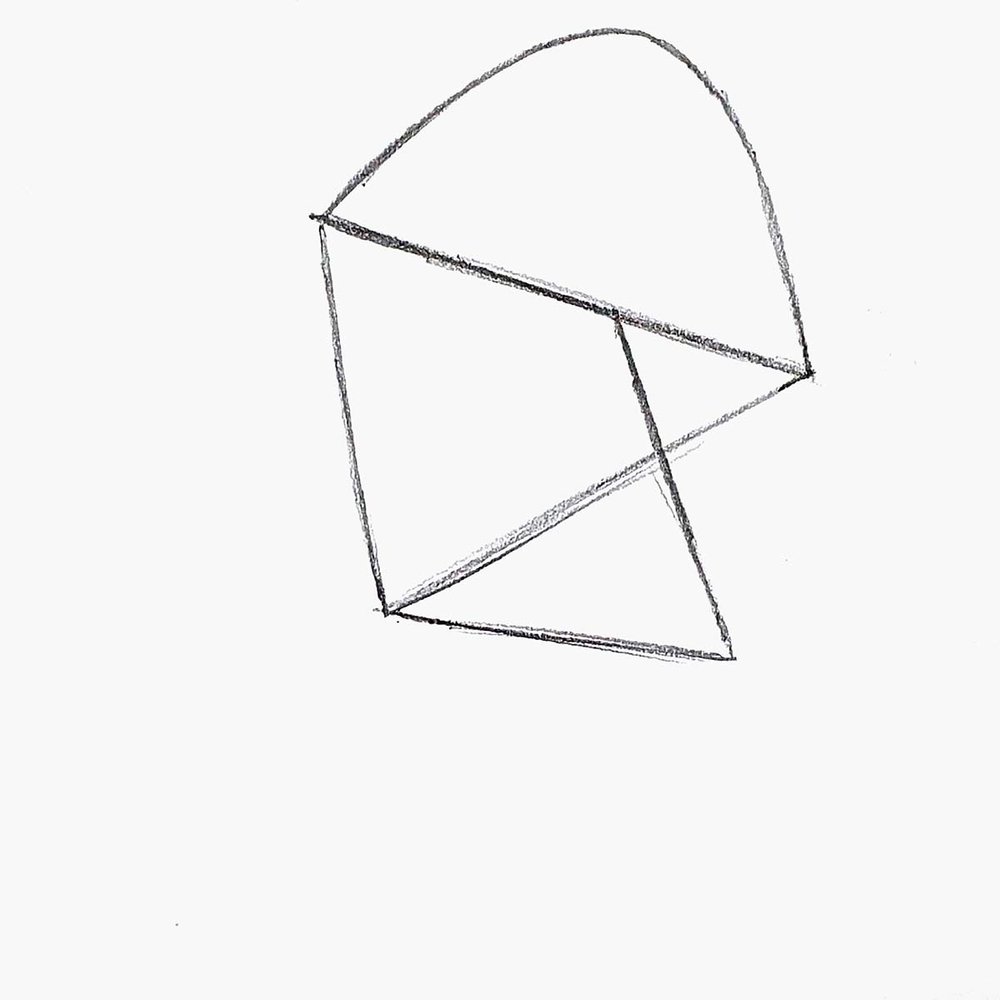
Next, I attached a wonky square-like shape to the bottom right of the first triangle.
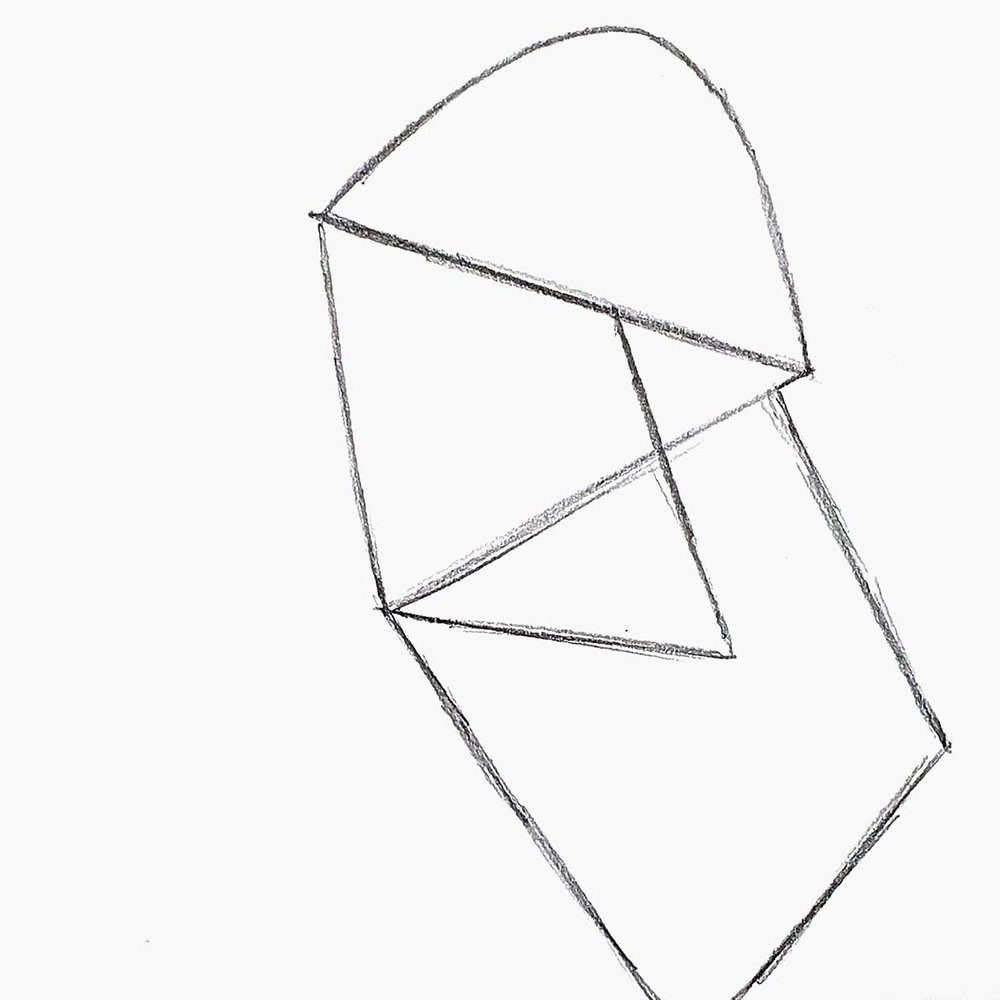
And to finish the mosaic, I added a large triangle to the bottom left and a short line to the bottom right.

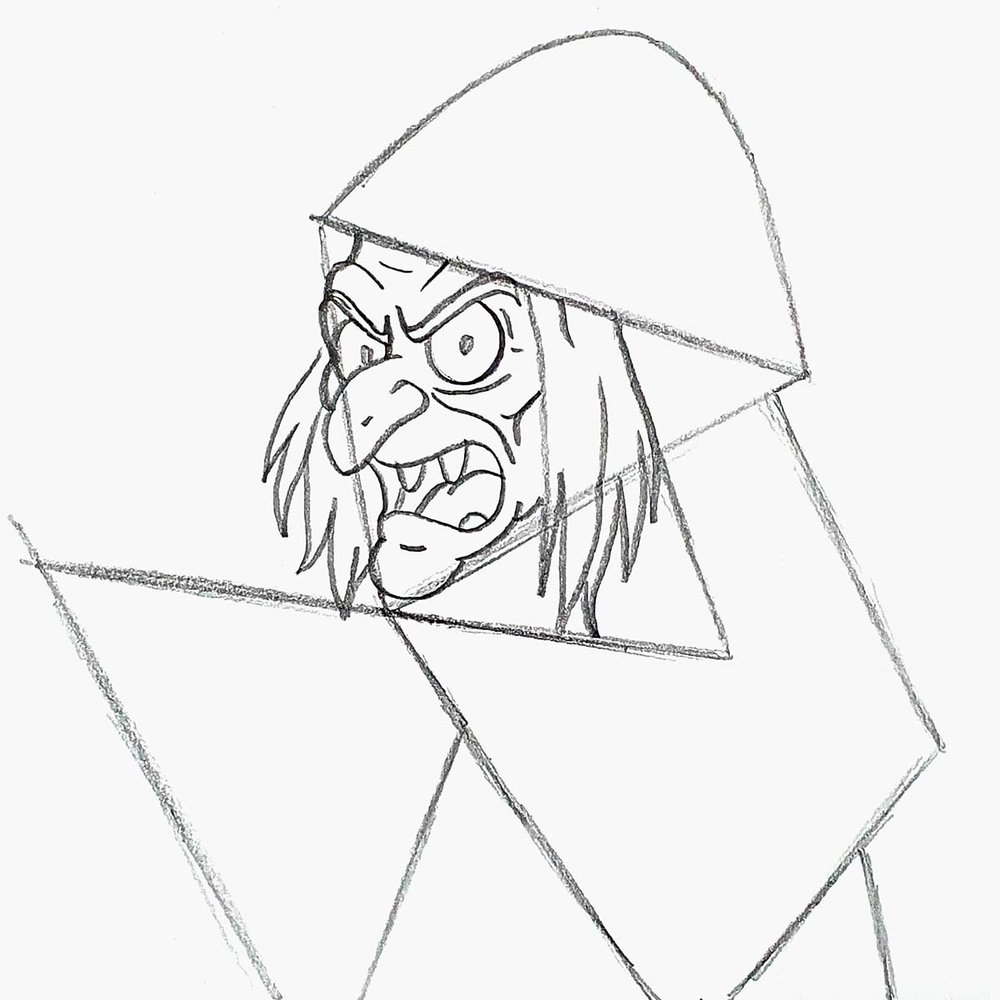
Now, we've got a solid base to sketch from.
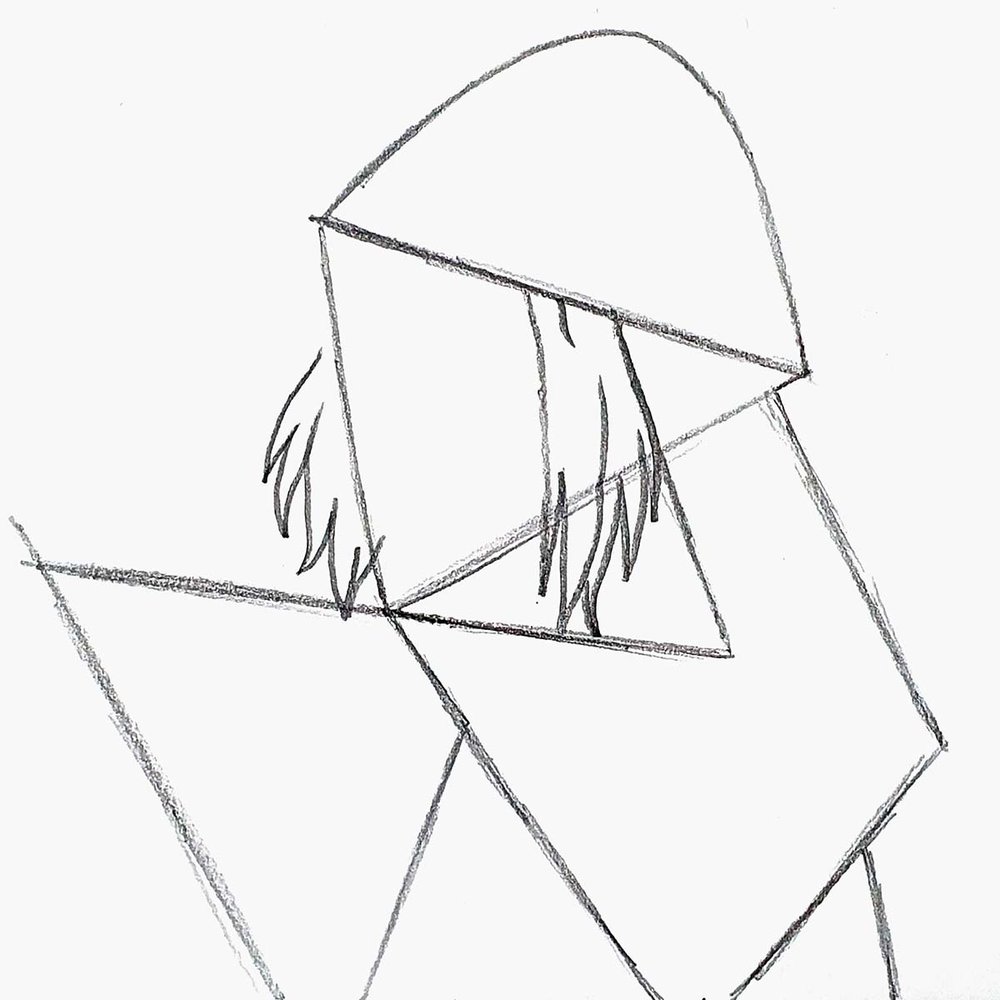
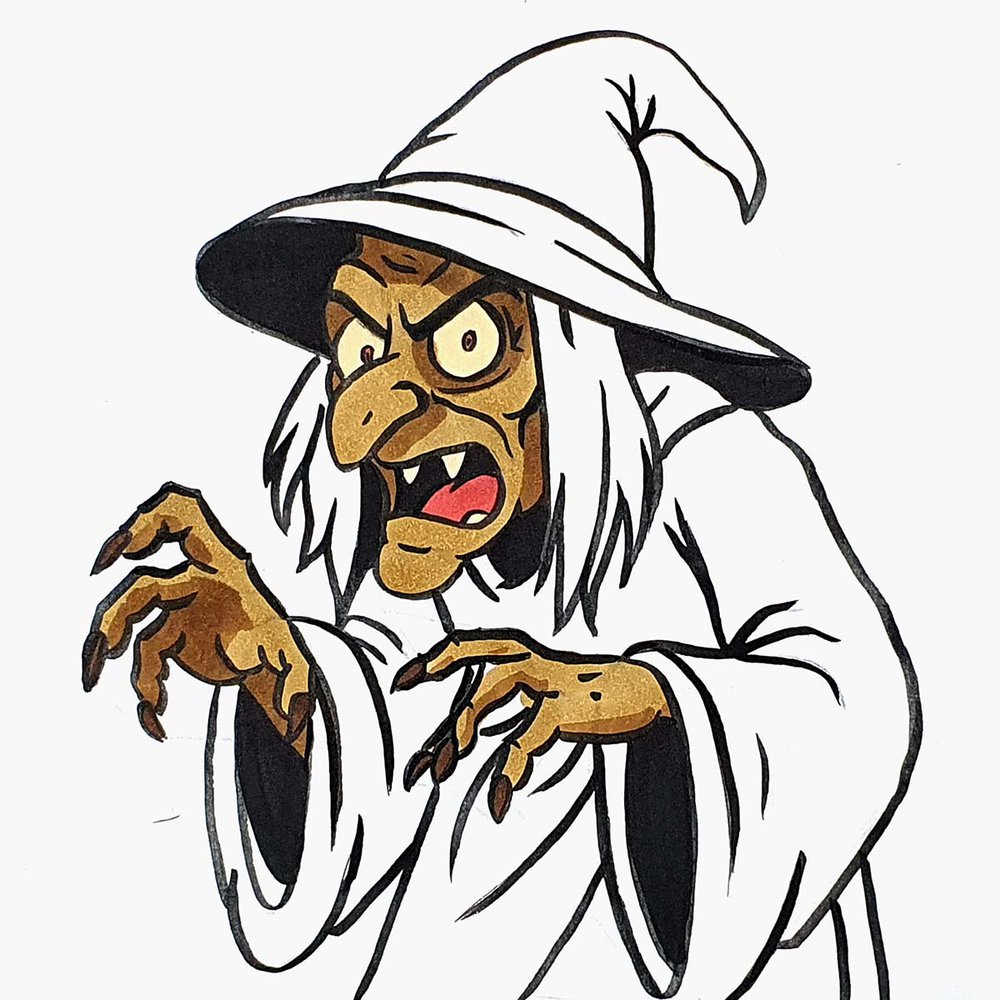
Step 2: Draw The Witch’s Angry Face
With the basic shapes in place, sketching the witch becomes a lot easier.
I first sketched her head, starting with her hair.
The hair is made up of wavy lines that overlap and connect into points. I added these to either side of her face.
After that, I added the outline of her face.
The outline consists of curvy lines, a pointy yet round chin, and a big nose.
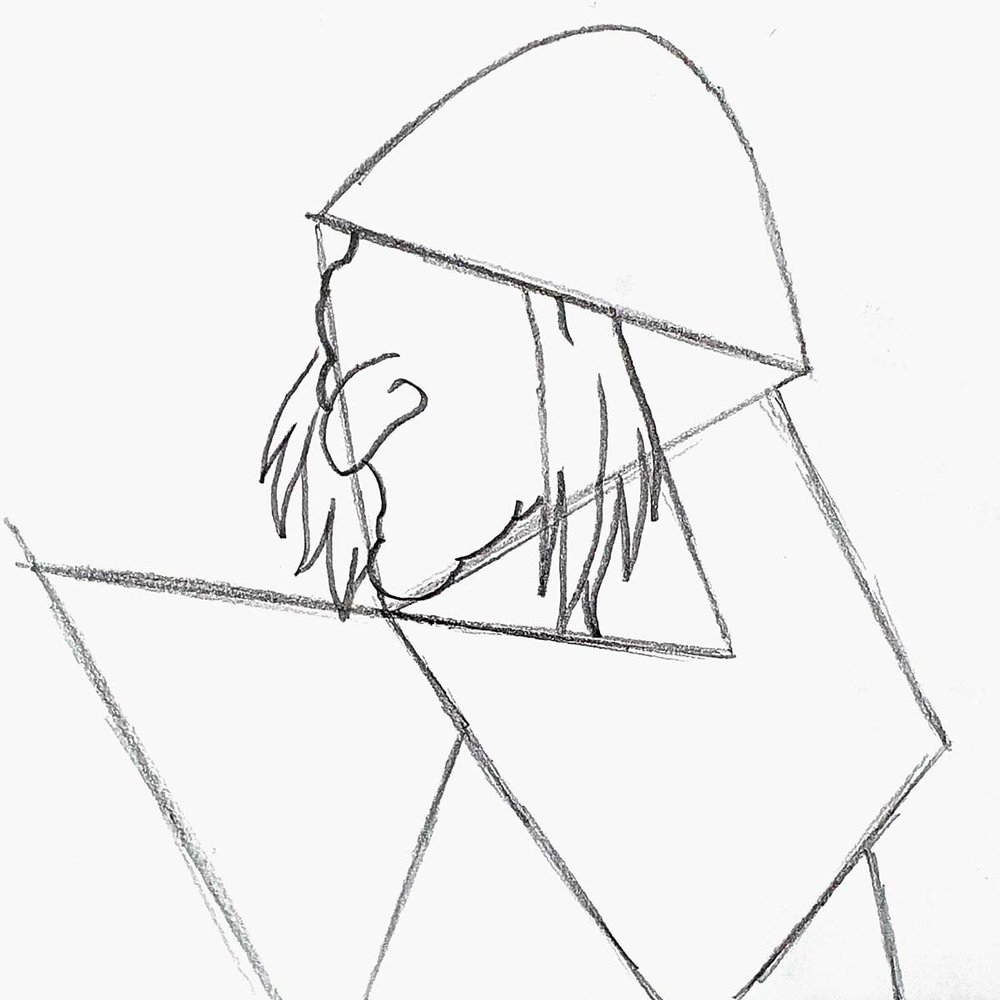
Next, I added her round eyes and mouth. I also added a tiny line on her chin.
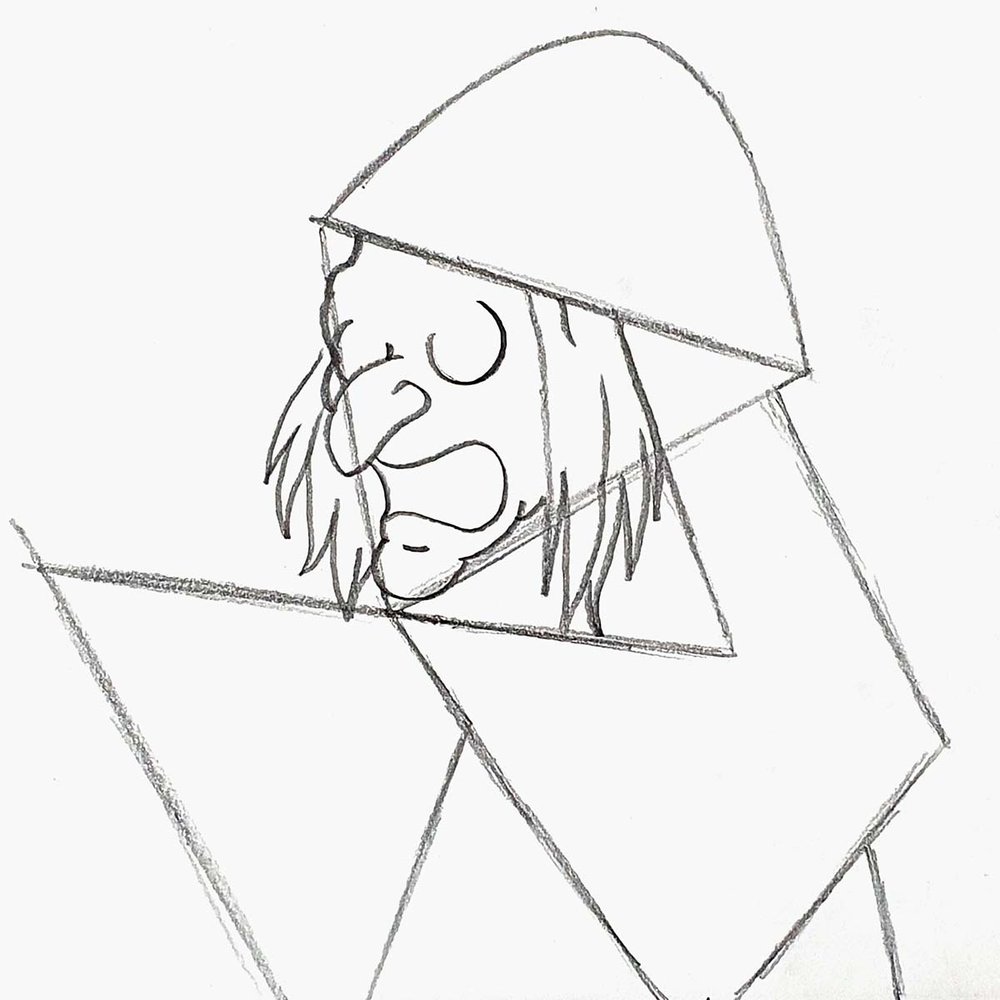
To make her look scarier, I added the angry eyebrows, pupils, teeth, and tongue.
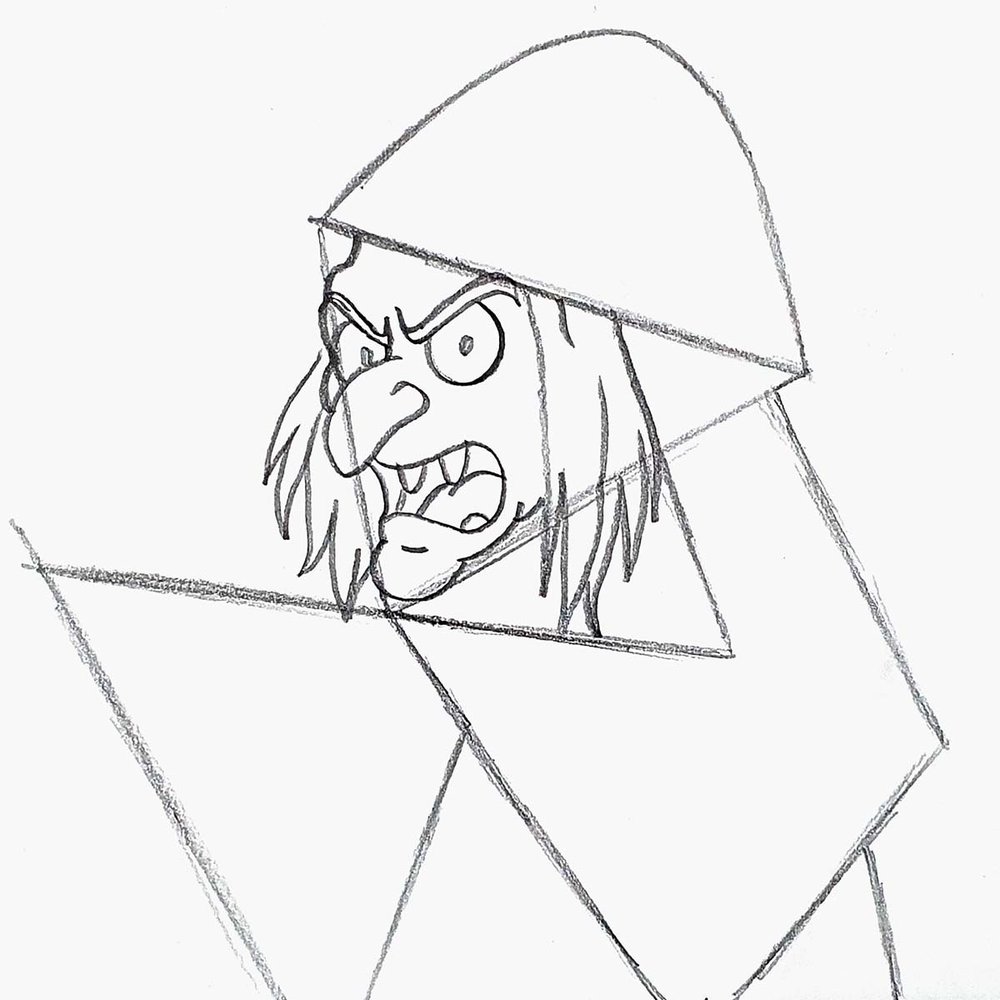
And to complete her face, I added wrinkles on her cheek and forehead.
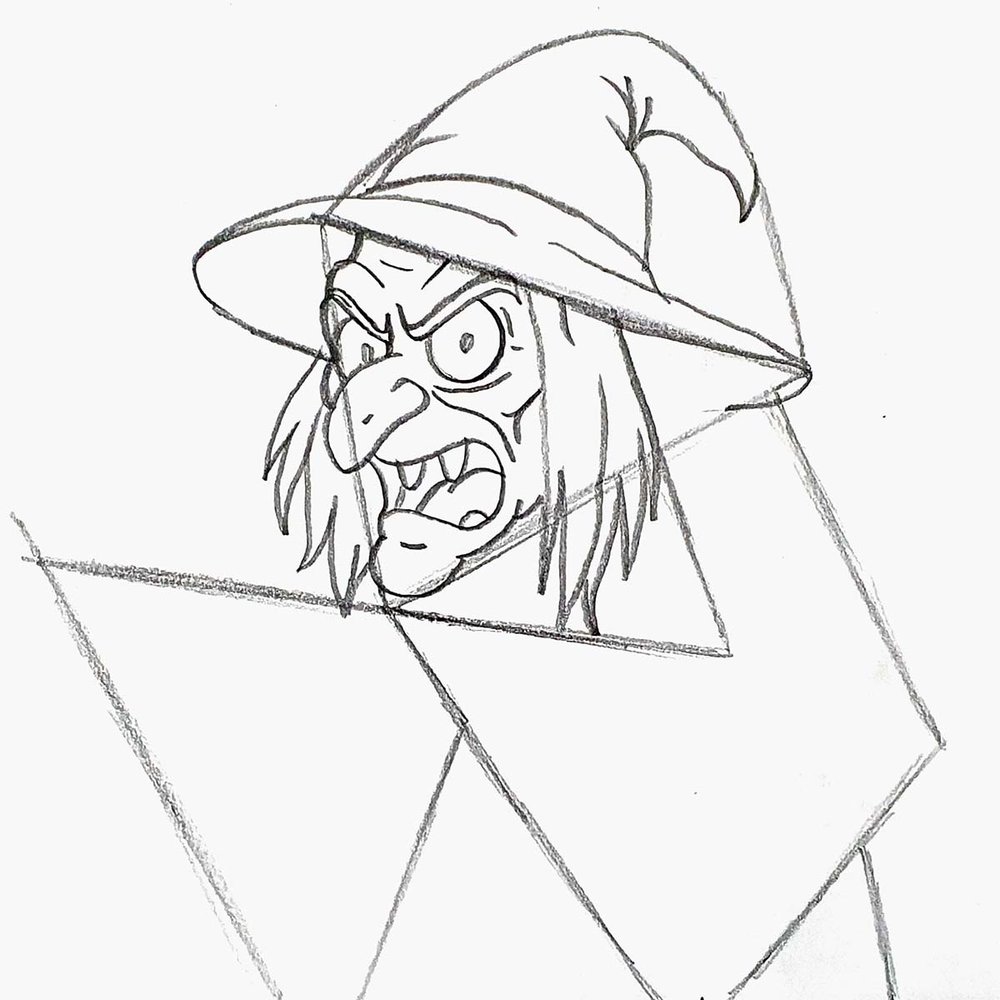
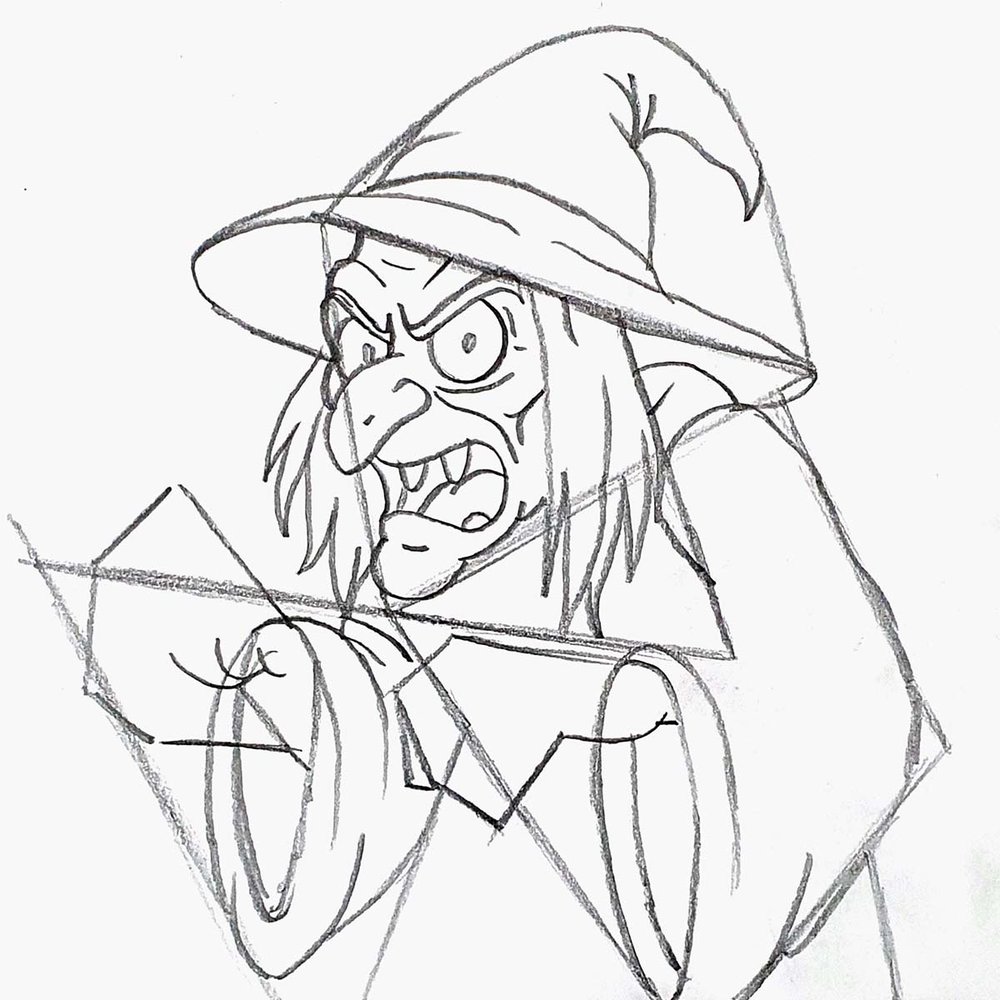
Step 3: Add The Classic Witch Hat
Next, I sketched her witch hat, starting with the brim.
I added an arch to the top left of her face and sketched a wavy line following the bottom edge of the arch on her head.

After that, I added the typical witch hat shape following the arch on the left side.
I also added some layers above the brim.
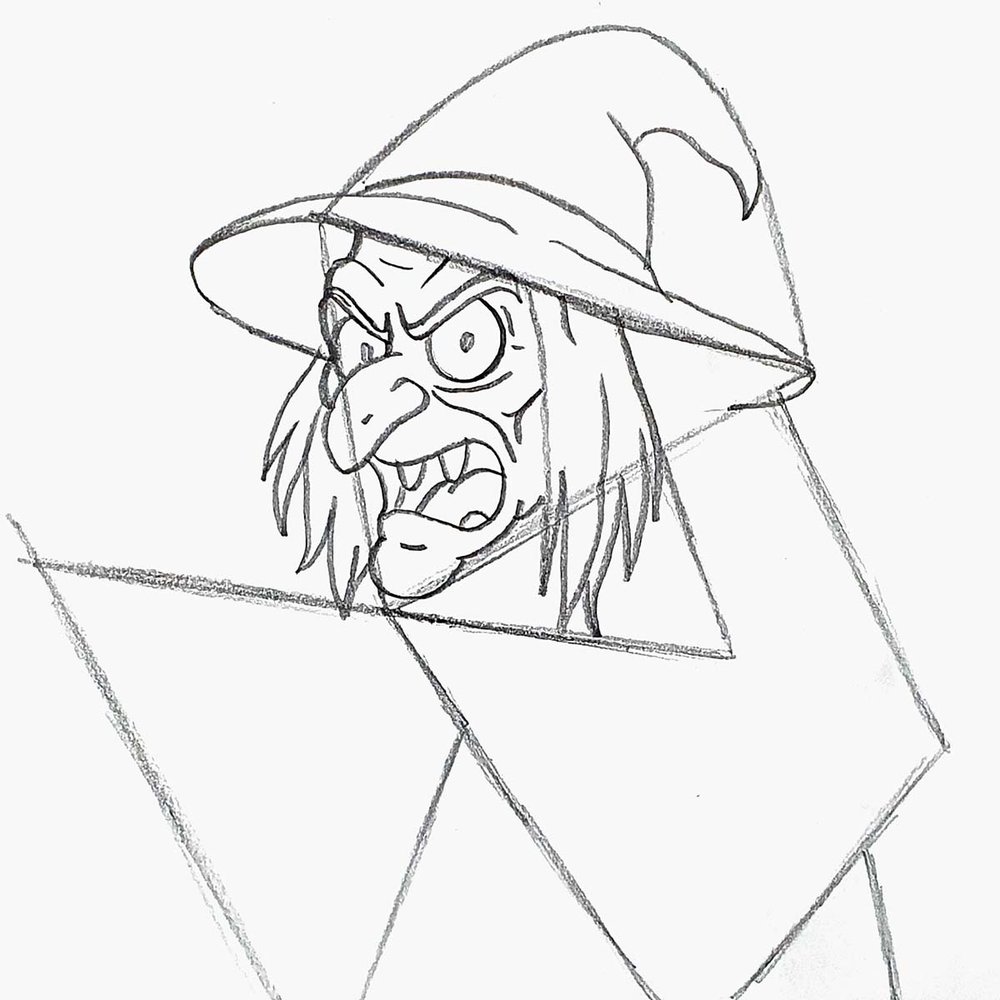
Lastly, I added a few wrinkles, mainly in the crease on the top and one on the left.
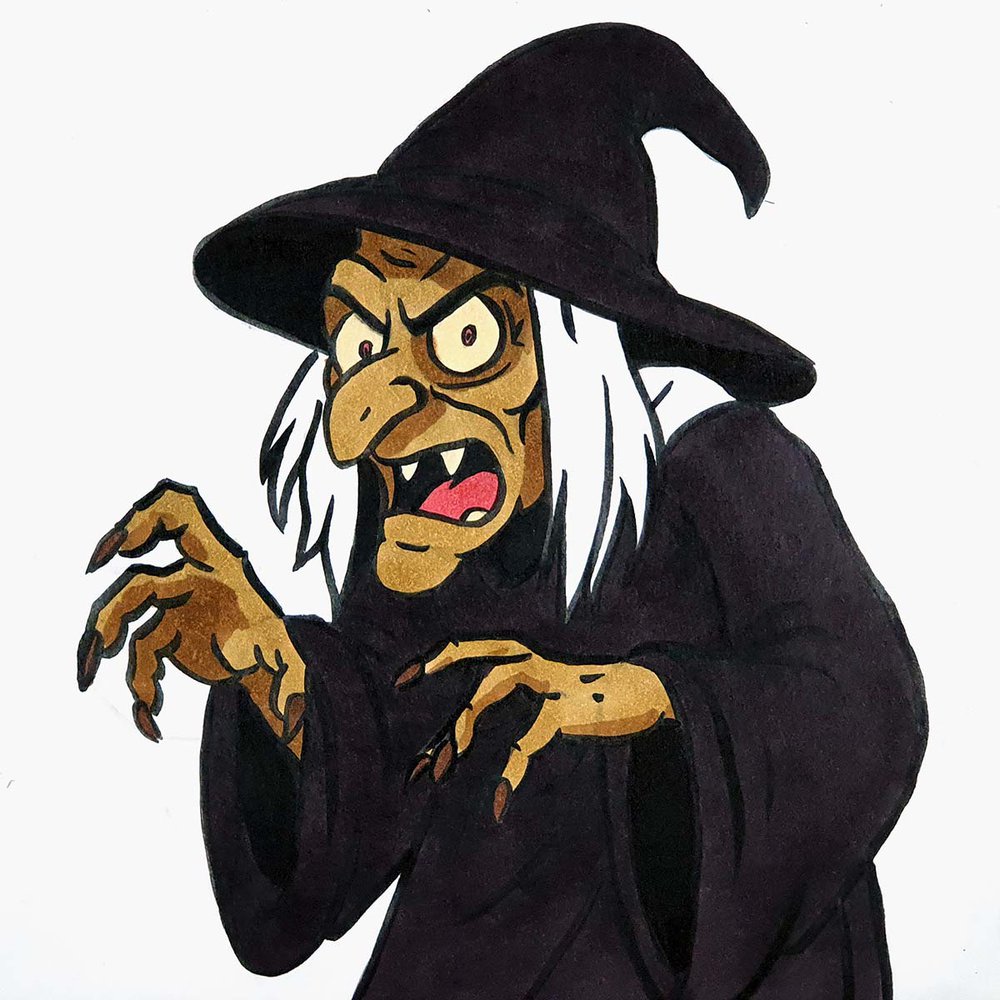
Step 4: Draw The Wrinkly Claw-Like Hands
After that, I sketched the sleeves using wobbly lines for the outer edge and oval shapes around the openings.
Next, I drew the outlines of her hands coming out of the sleeves.
I sketched the shape of her wrists and the fans to serve as a guide for the fingers.
I decided to give her 4 fingers on each hand as 5 would make things a little too complicated on this scale.
I sketched the topmost fingers first, following the guide we just sketched.
I drew her fingers using a bunch of curvy lines and added a sharp raindrop shape as her nail.
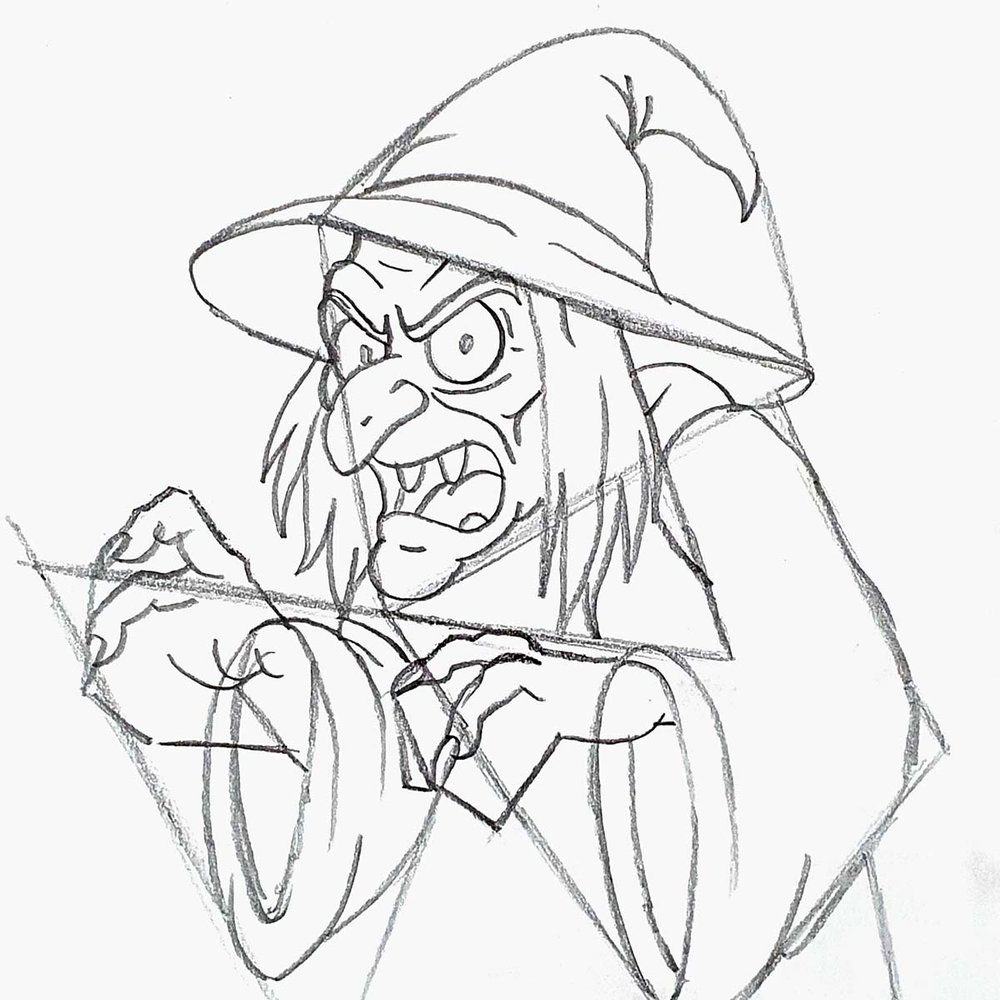
To finish the witch's hands, I sketched the other two fingers.
On her left hand, the 4th finger is pretty much all behind her hand. You can only see the nail.
Step 5: Add Clothing Wrinkles
And to complete the sketch, I added some wrinkles in the clothes.
I added lines to the inside of her elbows and the main part of her clothing.
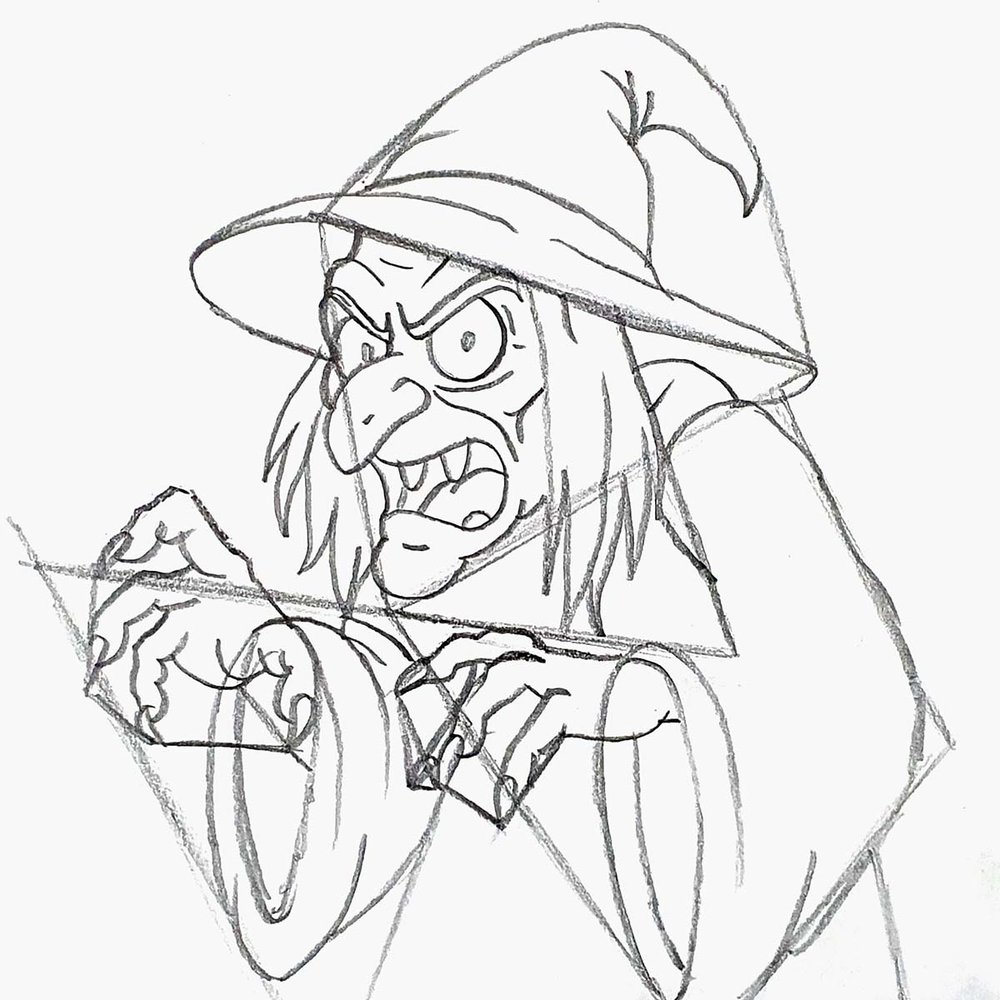
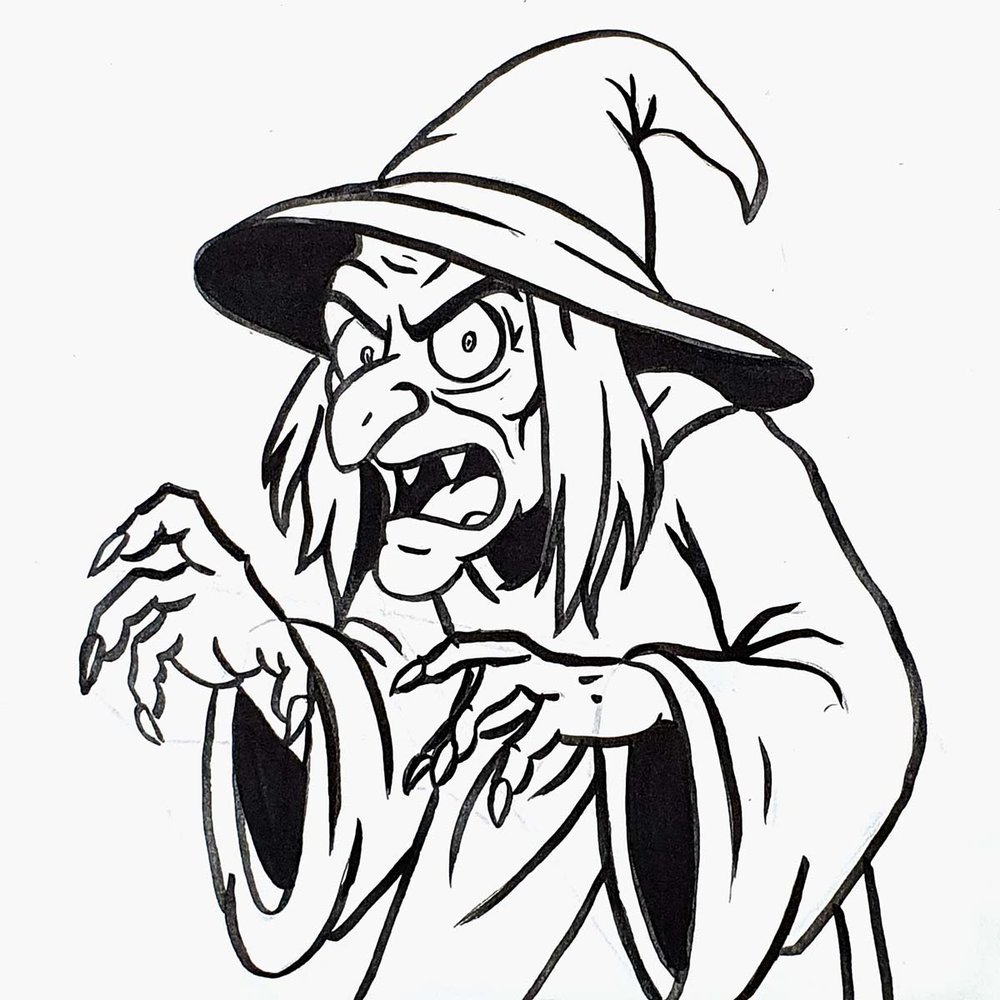
Step 6: Outline The Witch Sketch With A Black Brush Pen
After the sketch is complete, I like to outline it with a black brush pen and erase the sketch afterwards.
You can also use a fineliner if you don't have a brush pen.
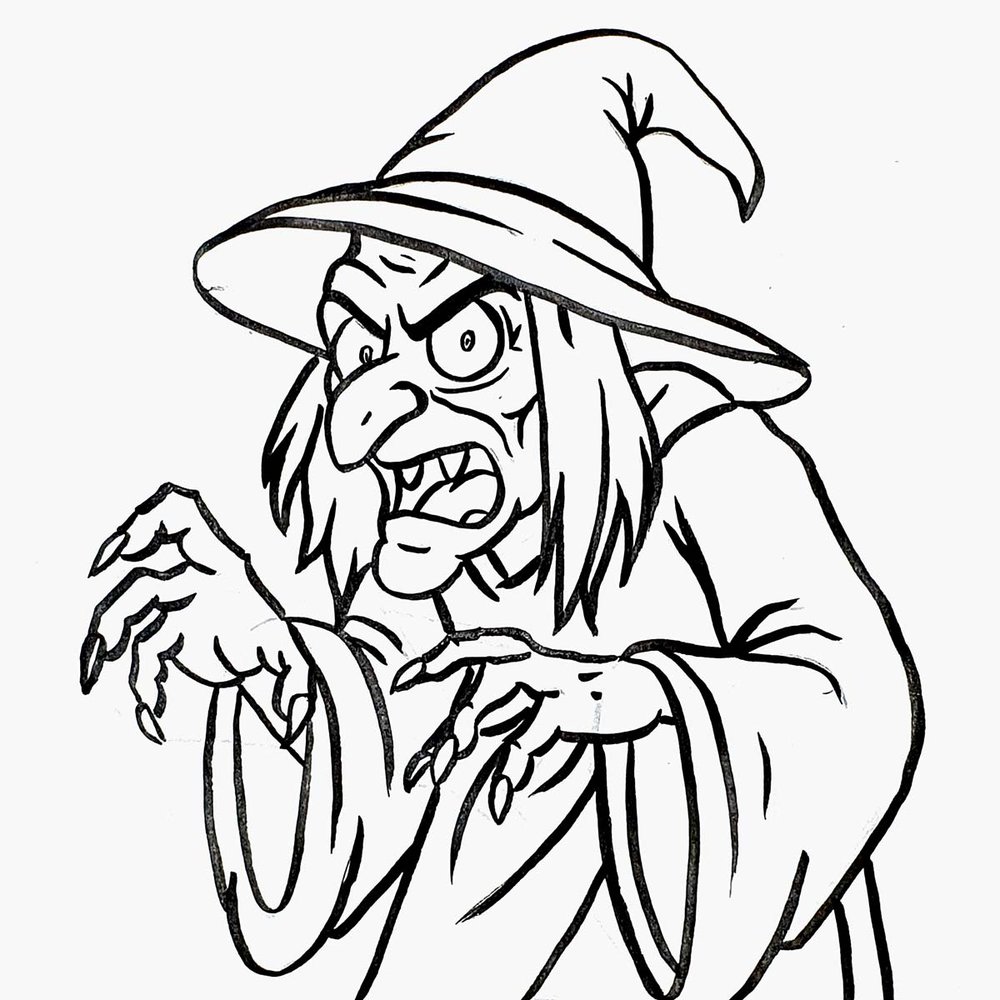
Now, it's time to bring the scary witch to life!
Step 7: Color Your Witch With Markers
To color drawings like these, I like to use my alcohol-based Ohuhu Honolulu markers.
I first colored the inside of the witch's mouth, the underside of the hat, her neck, a little piece of hair to the left of her face, and the inside of the sleeves with Black (120).
Then, I colored her face and hands with Brown Grey (Y11) and her teeth and eyes with Buttercup Yellow (Y120).
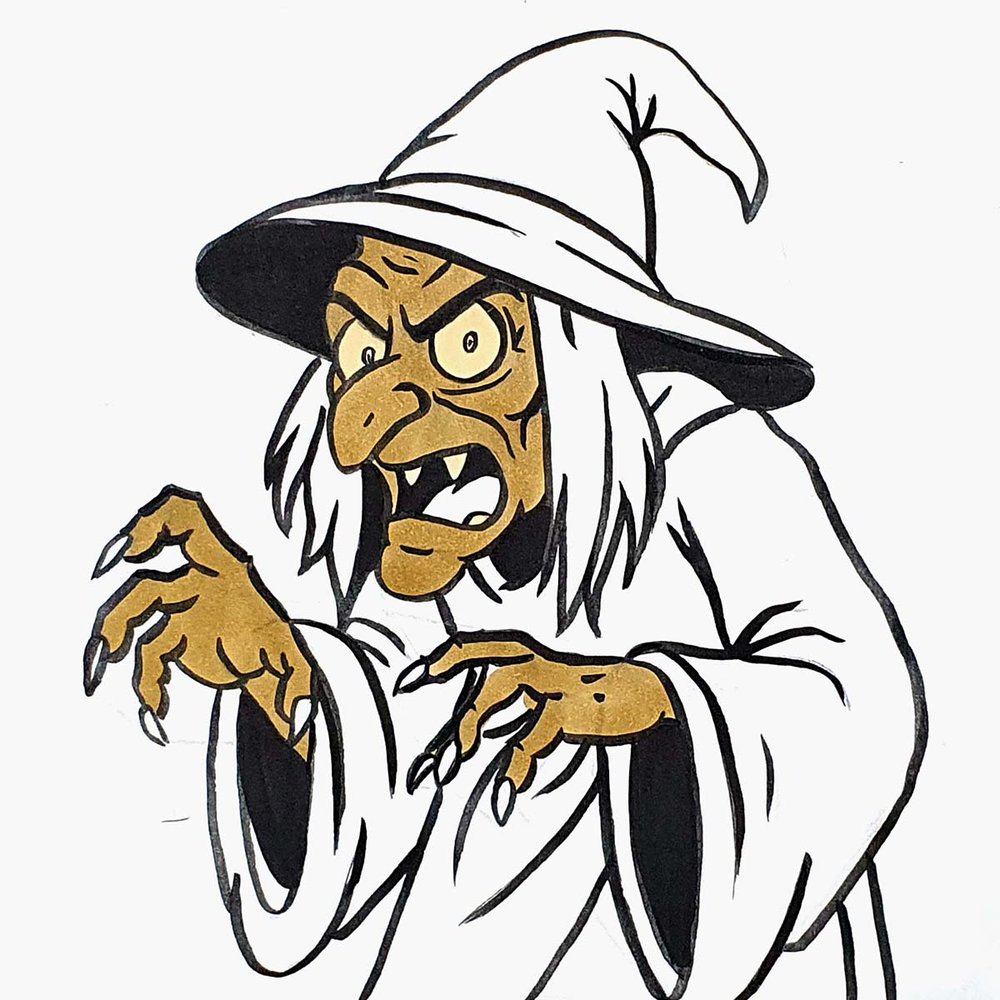
After that, I colored her mouth and pupils with Rose Buvard (R12) and added shadows to her hands and face with Light Walnut (E370).
I also colored her nails with Mahogany (Y12).
Next, I focused my attention on her clothes and hair.
I wanted to color her clothes this beautiful, dark greyish purple called, you guessed it, Dark Purple Grey (R350). However, it was a little too dark.
But I did it anyway.
I colored her hat and her robe with it.
Was it too dark?
Yes.
But I liked the color too much not to use it.
Lastly, I colored the remainder of the drawing with Warm Grey 9 (WG09).
I also used this color to add shading to her robe.
The dark colors kinda made the outline disappear, so I went over the outline one more time with the brush pen.
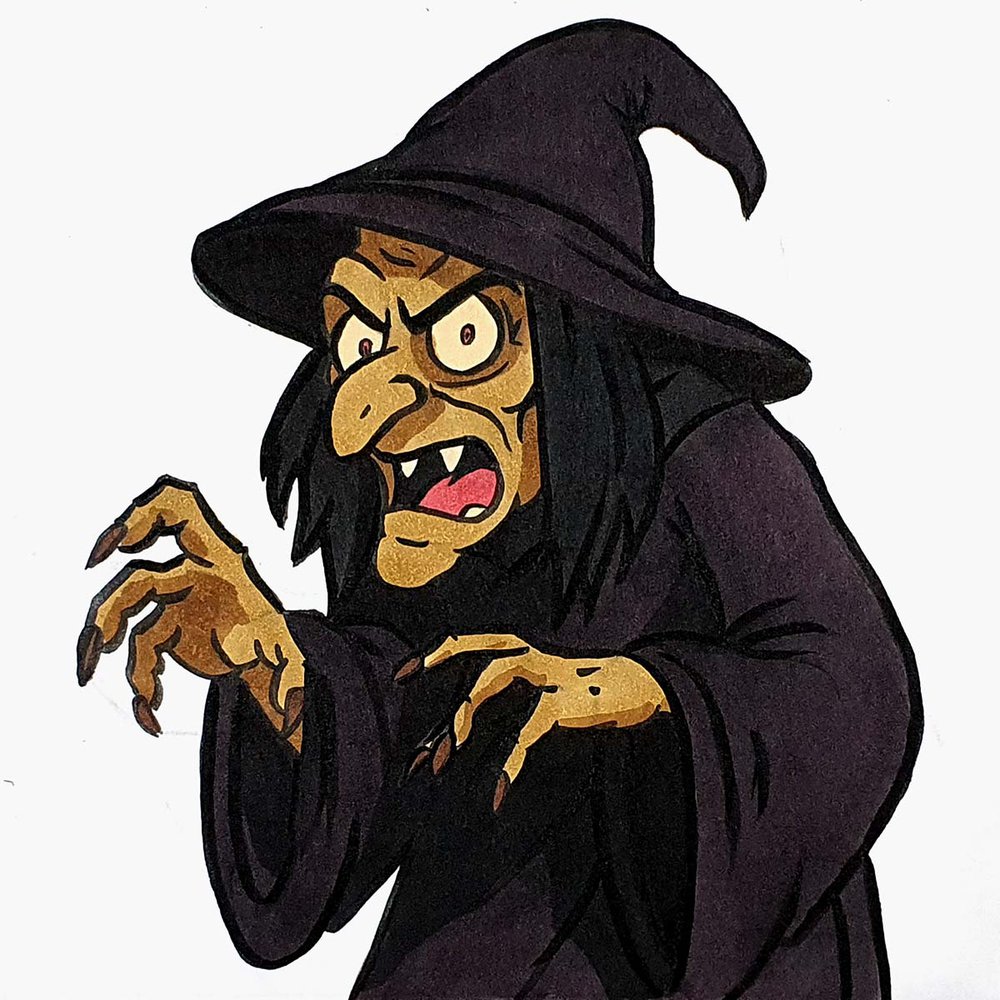
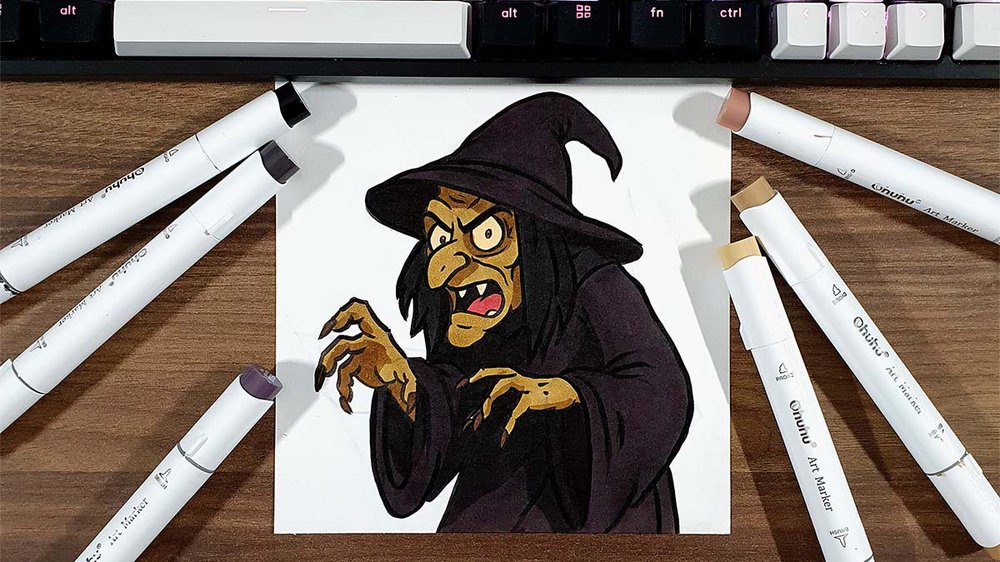
Your Scary Witch Is Complete!
And that's it! Your witch drawing is done.
I hope you had fun drawing this scary witch with me!
Don’t worry if it’s not perfect the first time. Drawing complex characters takes practice.
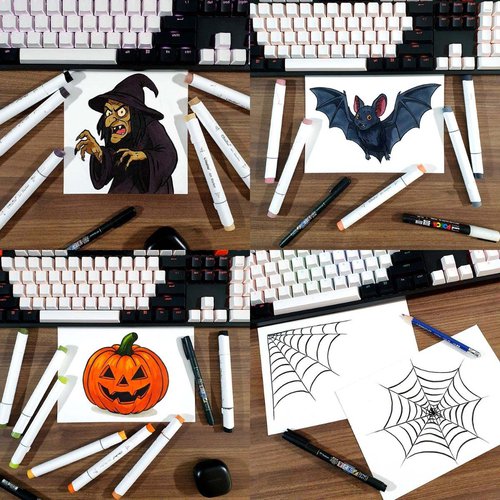
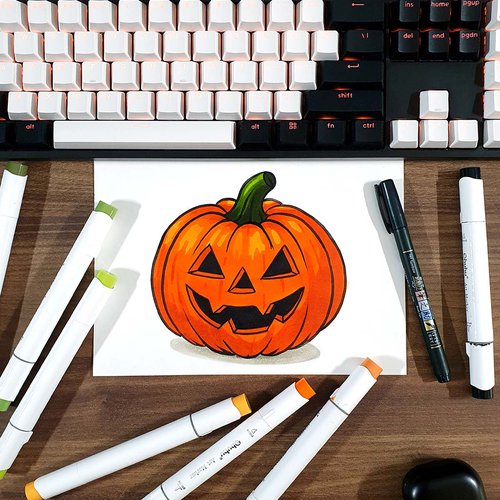
Want more spooky tutorials like this one? Be sure to check out my other Halloween-themed guides!
Happy Halloween!🎃
Tags
Articles You Might Also Like


I love bringing cars to life with alcohol markers and colored pencils.
Whether you're just starting out or looking to improve your skills, I'm here to help!
Click here to learn more about me.


Be the first to comment!
Comments
There are no comments yet.