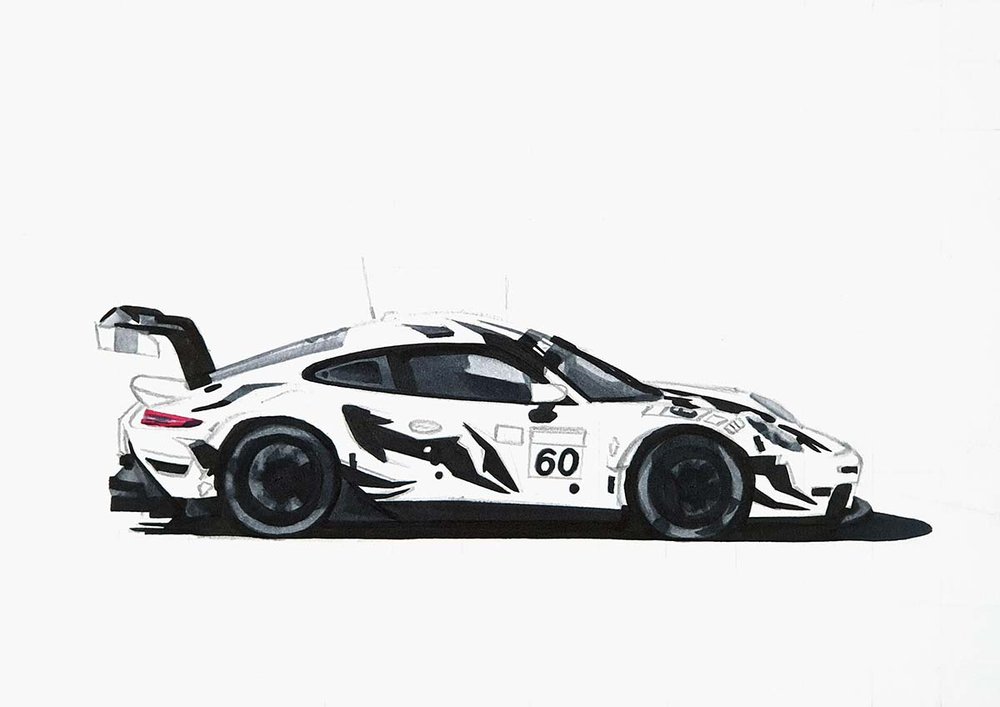
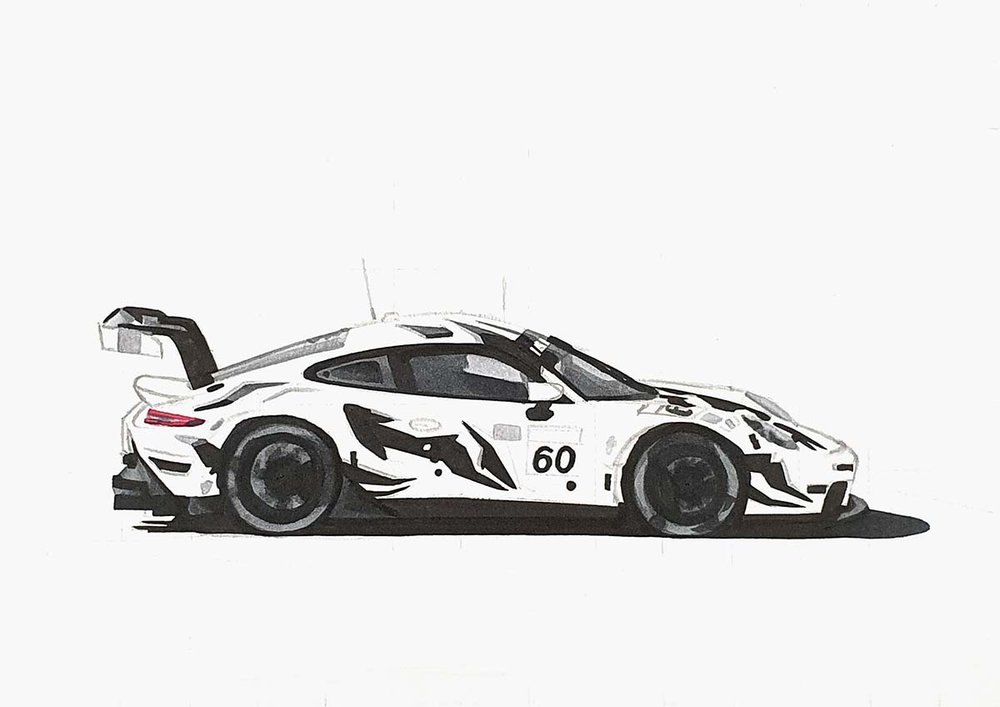
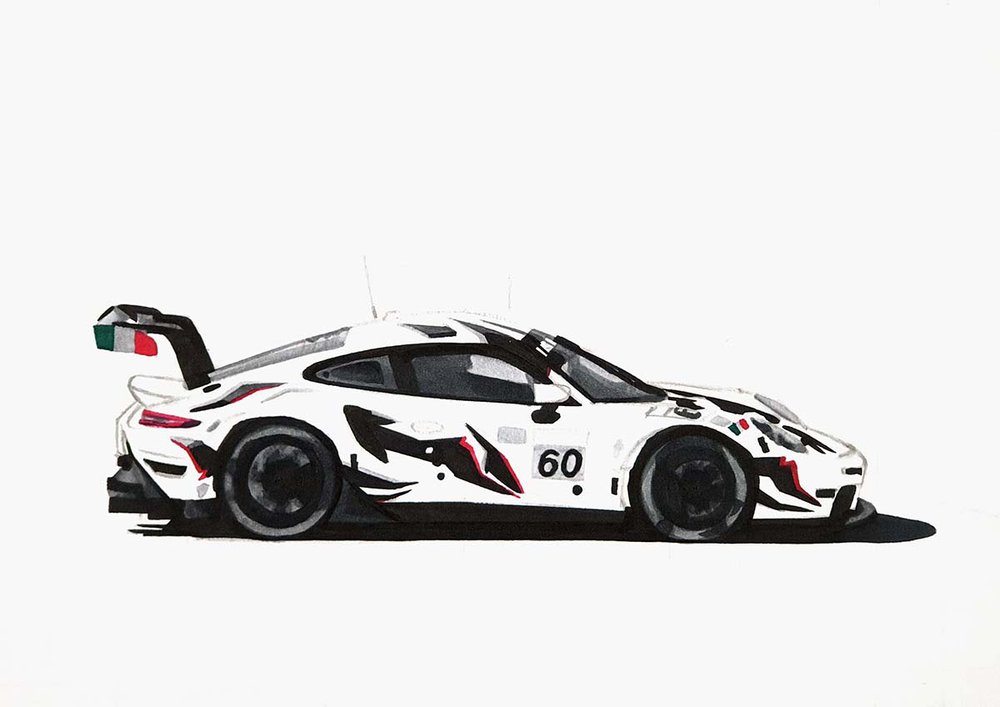
How To Draw A Porsche Race Car - Step By Step Tutorial
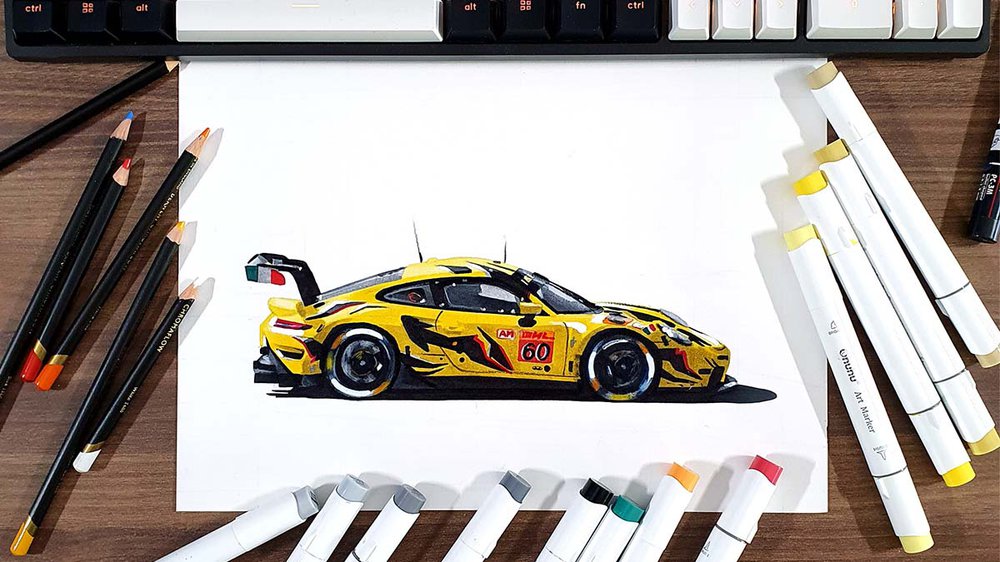
In today's car drawing tutorial, I'm going to show you how to draw a realistic Porsche race car side view with markers and colored pencils.
I've broken the whole process up into simple and easy-to-follow steps so you can easily follow along and create your own realistic Porsche 911 RSR race car.
Let's get started!
Disclaimer: In the name of full transparency, please be aware that this blog post contains affiliate links and any purchases made through such links will result in a small commission for me (at no extra cost for you).
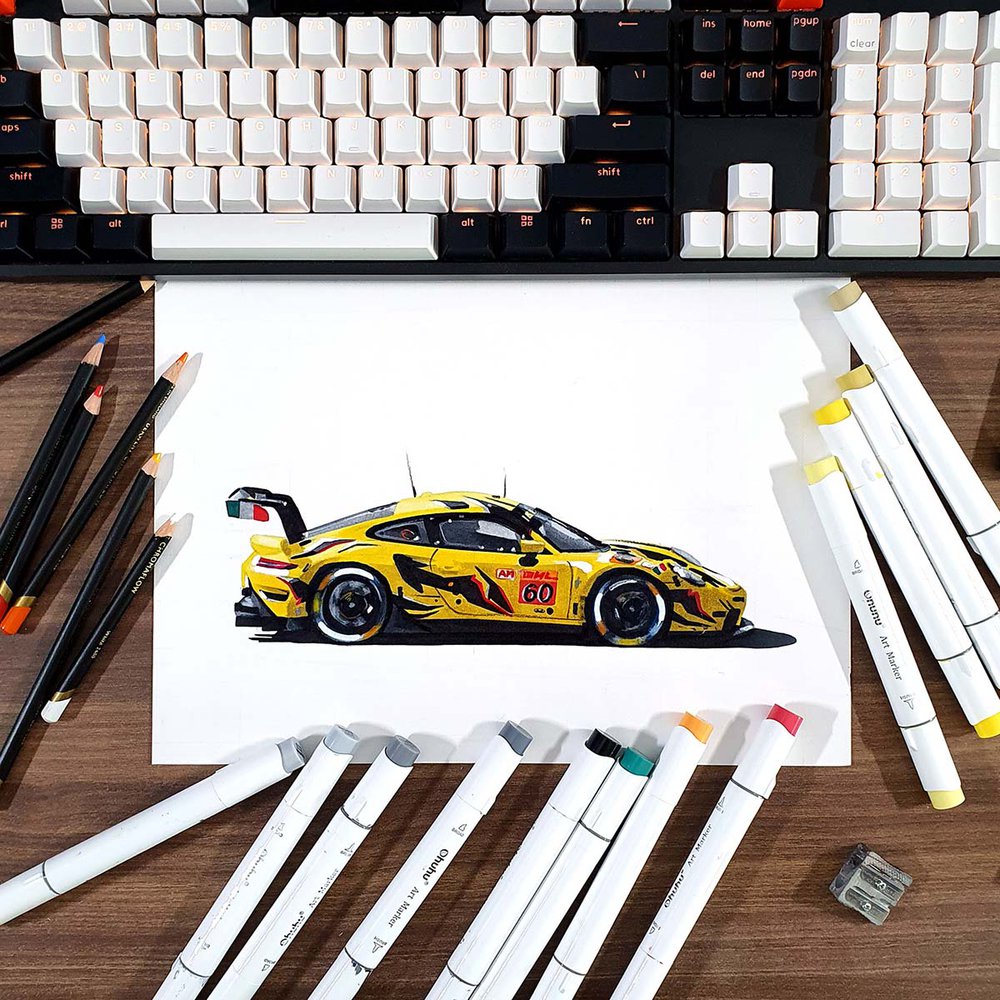
Drawing Materials I Used To Draw This Porsche Race Car
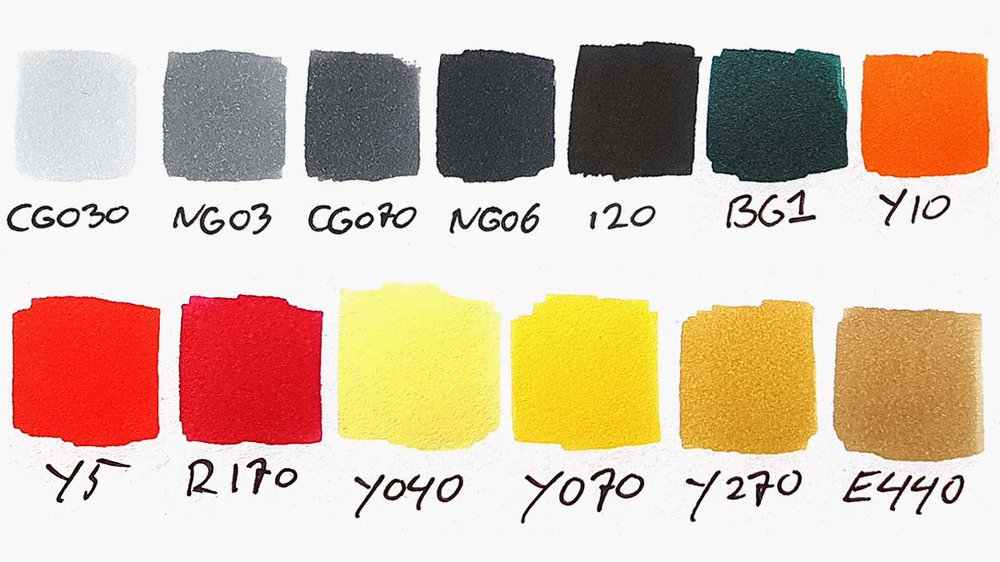
To make this drawing, I used Ohuhu Honolulu markers in the colors Colorless Blender (0), Neutral Grey 03 (CG030), Neutral Grey 3 (NG03), Neutral Grey 07 (CG070), Neutral Grey 6 (NG06), Black (120), Turquoise Green (BG1), Apricot (Y10), Rouge Orange (Y5), Lipstick Red (R170), Calamansi (Y040), Acid Yellow (Y070), Pale Ocre (Y270), and Khaki (E440).
I also used some Derwent Chromaflow colored pencils to add details. I used the White 2400, Black 2300, Amber Gold 0200, Flame 0400, Scarlet 0500, and Blue 1300 pencils.
I used a white Posca PC-3M paint marker to add white highlights.
And I used an HB pencil, a ruler, an eraser, and a kneaded eraser.
I made this drawing on A4 size Canson Illustration Manga Paper.
How Do You Draw A Porsche Race Car Step By Step?
To create a realistic Porsche race car drawing, you'll first need to find a good reference photo.
Next, you sketch the outline of the car.
After that, you color the Porsche, part by part, until it is fully colored.
And to finish it off, you add a few details with colored pencils and a few highlights with a white paint marker.
Step 1: Find A Reference Photo Of A Porsche Race Car You Like
When drawing a realistic car like the Porsche race car, using a reference photo is a must.
The reference photo will help you get more realistic proportions, lighting, and coloring.
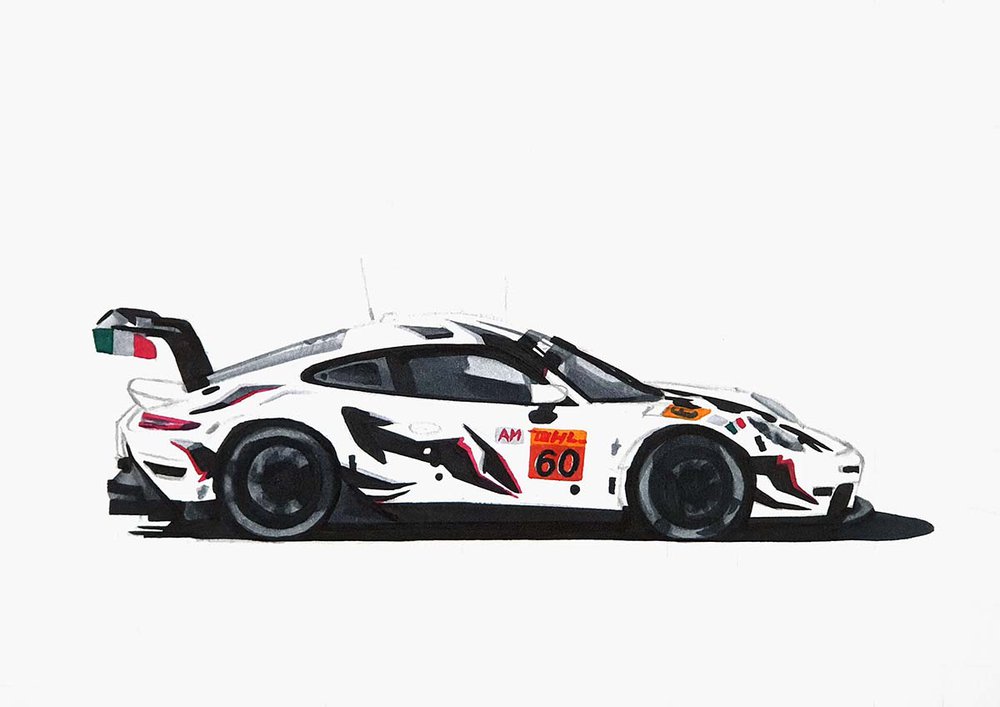
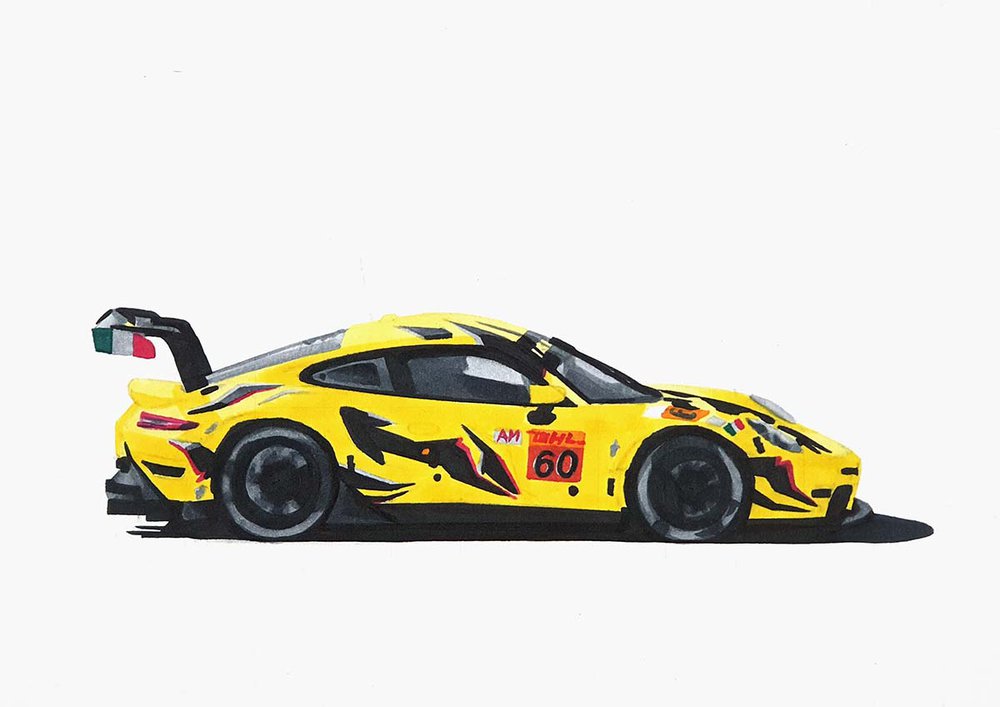
For this tutorial, I used this reference photo I found on Unsplash of a beautifully colored Porsche 911 RSR.
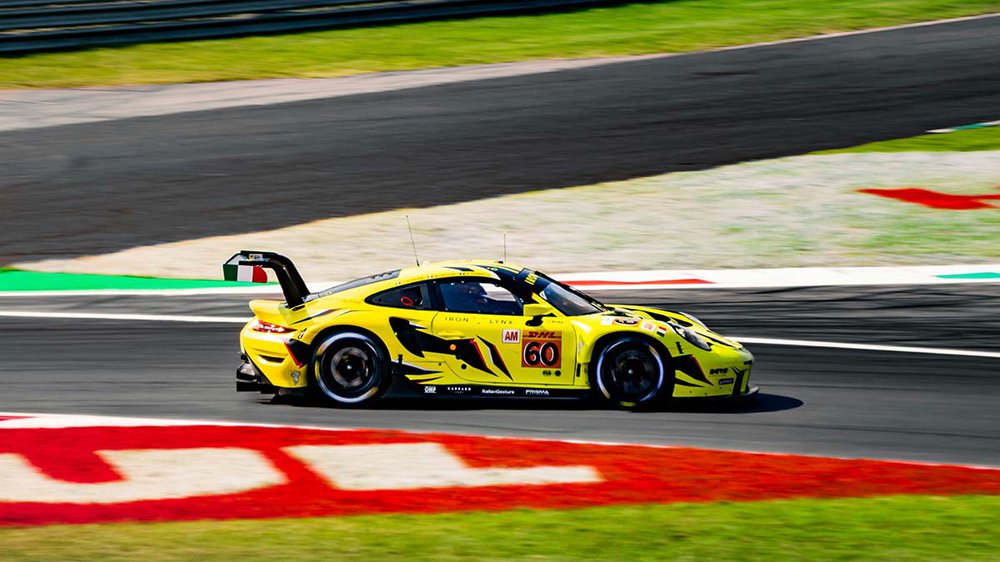
Fun fact: I actually own a Lego Porsche 911 RSR just like this one but in a different livery, as it's such a cool car and I love Porsche 911s.
Step 2: Sketch The Outline Of The Porsche Race Car
Next up, we're going to sketch the Porsche 911 RSR.
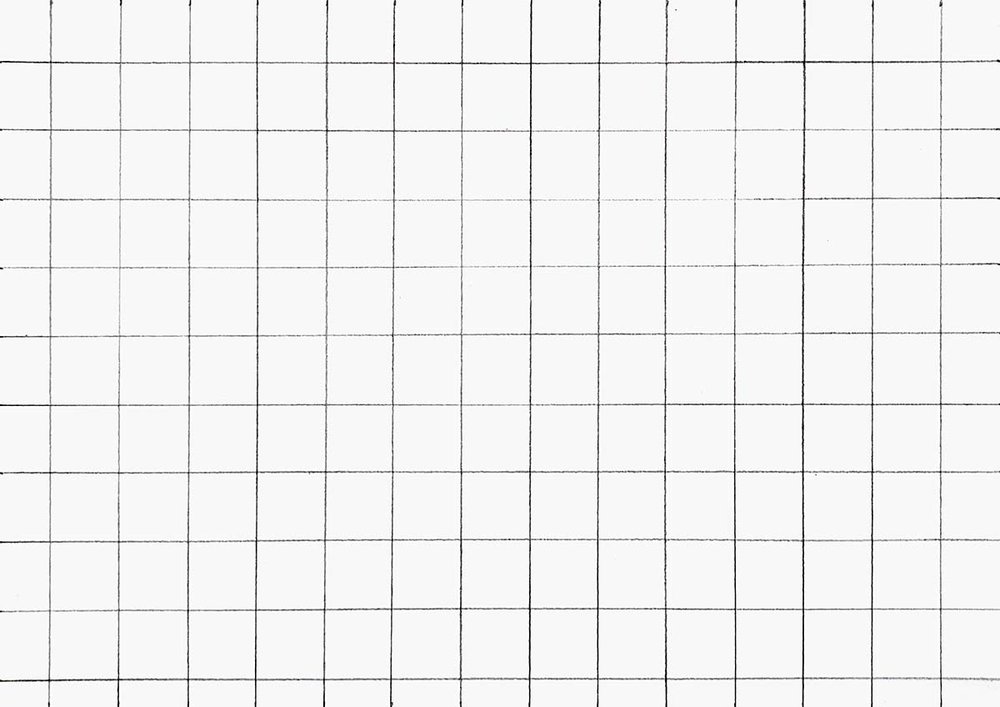
To make it easier to get realistic proportions, I like to use a sketching technique called the grid method.
If you're not sure how to use this technique, here is a detailed guide I made on how to use the grid method.
The first thing I did was resize the photo to have the same dimensions as my paper, which is 11.7 by 8.3 inches or 3508 by 2480 pixels.
I also added a grid overlay of 15 by 10.5 squares on the reference photo. This fits well on my paper as each square will be 2 by 2 cm or 0.8 by 0.8 inches.
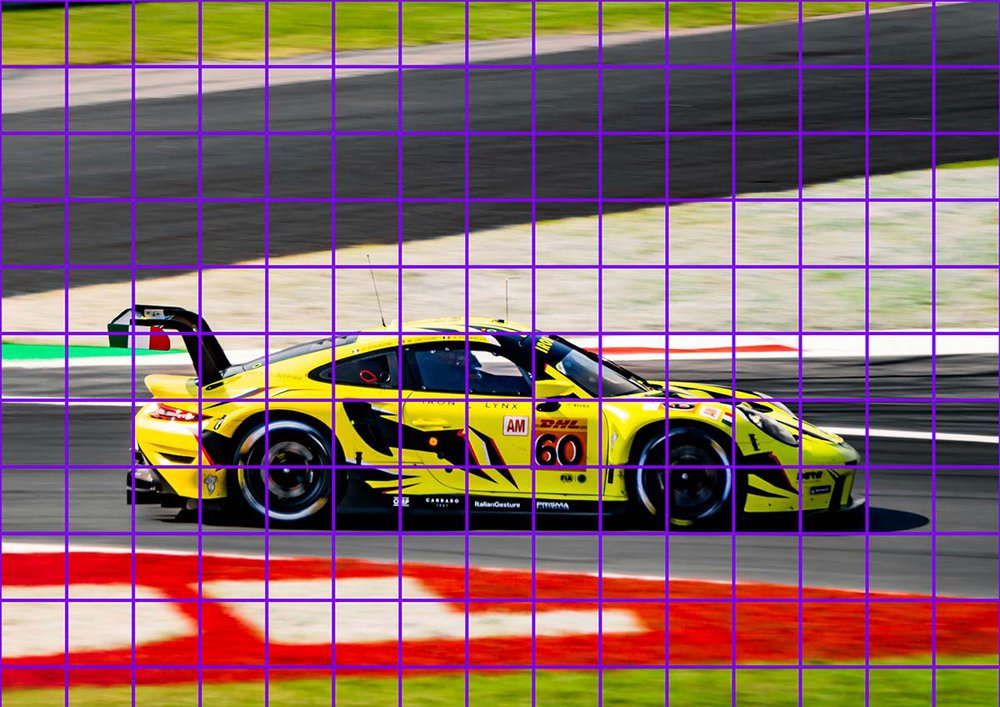
After that, I recreated this grid on my paper. As I said before, each square will be 2 by 2 cm or 0.8 by 0.8 inches, which is easy to sketch.
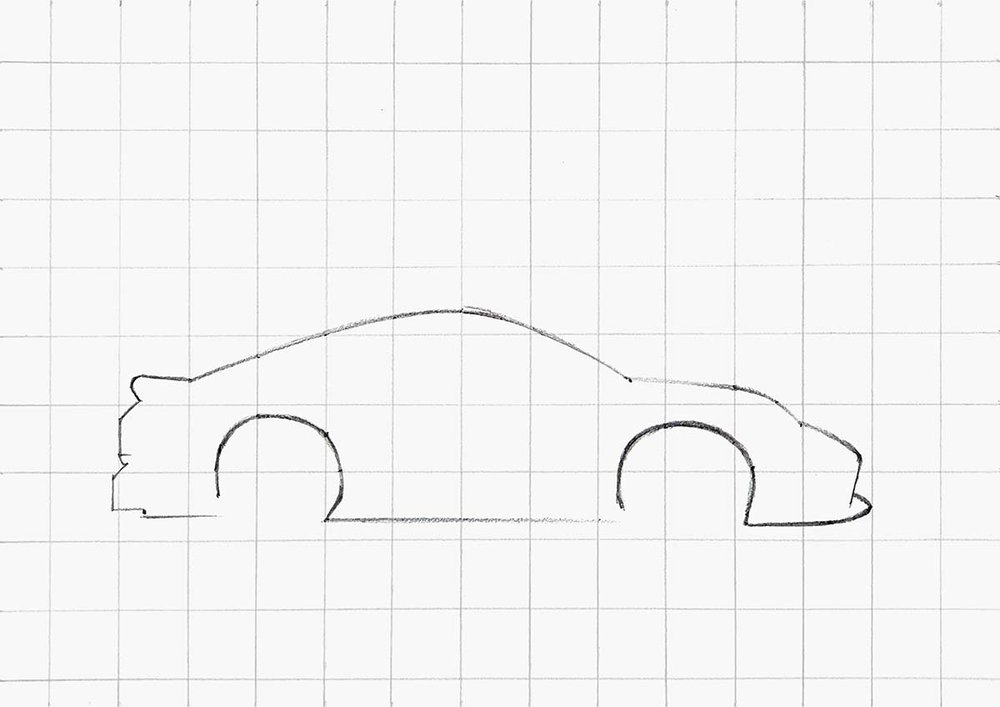
Next, I lightened the grid and started sketching the outline of the Porsche race car.
I broke the outline up into simple sections and sketched it line by line.
For each line, I marked where it starts, ends, and crosses grid lines before sketching the line in one swift motion through those points.
I did this until I had covered the whole outer edge of the Porsche 911 RSR except for the rear wing for some reason.
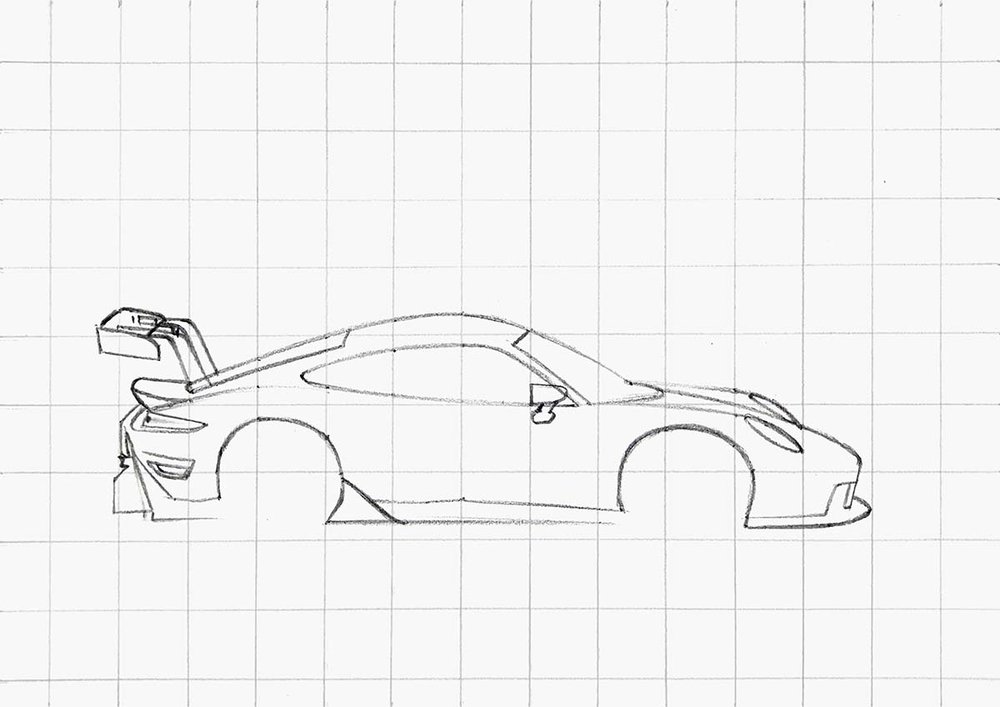
Step 3: Sketch The Parts & Details Of The Porsche Race Car
After that, I started adding all the parts to the 911 RSR like the taillights, side skirt, headlights, windows, diffuser, and of course, the wing.
I started with the bigger parts before adding the smaller details afterwards.
I left the wheels for the next step.
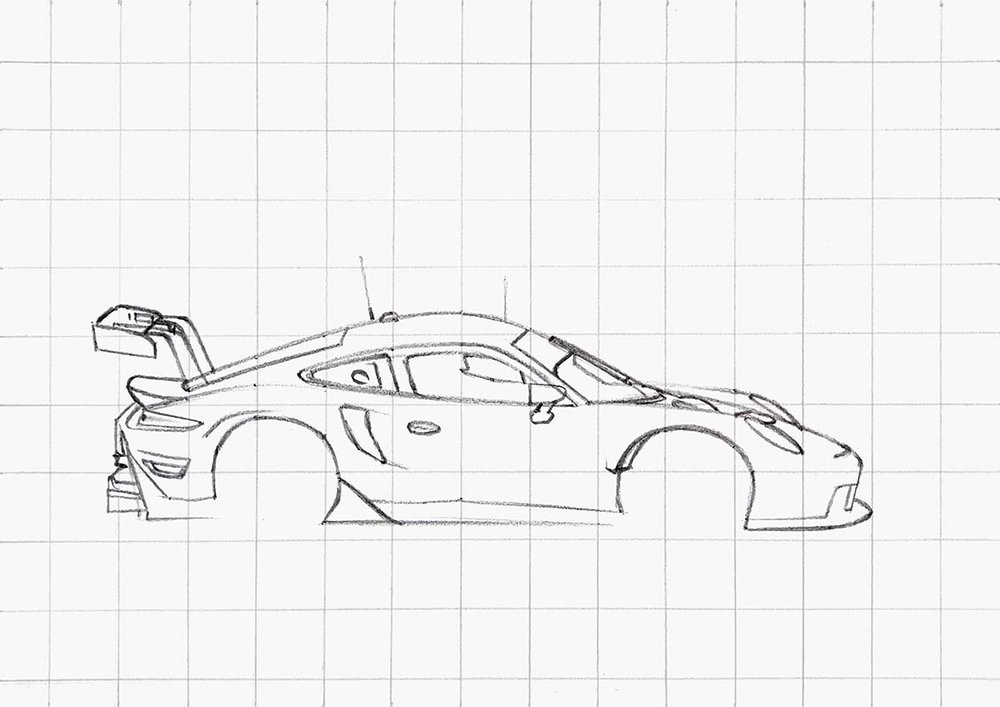
Step 4: Sketch The Wheels Of The Porsche Race Car
Next, I sketched the wheels.
These are pretty simple as we view the car straight from the side, so each wheel is just a perfect circle, and it is driving, so you can't see the spokes, just a few circles of different sizes.
To sketch the wheels, I marked most top, right, bottom, and left edges with a point, measured where the center of the wheel is, and then sketched the outline with my compass.
Well, actually, I forgot I had a compass, so I first tried to freehand these circles, and they looked terrible. It was only after I had sketched the whole wheel that I realized I should've used my compass and redid the whole wheel...
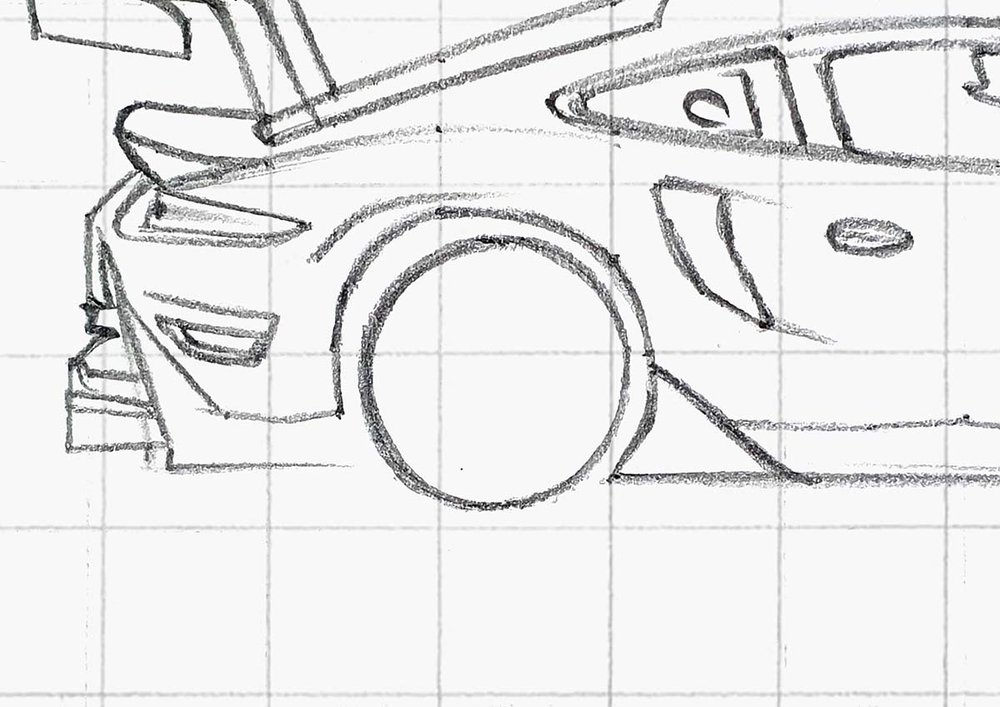
Next, I made my compass a little smaller and sketched the outer edge of the rim.

Then, I added 2 more circles: one for the outer edge of the brake disc and one for the center.
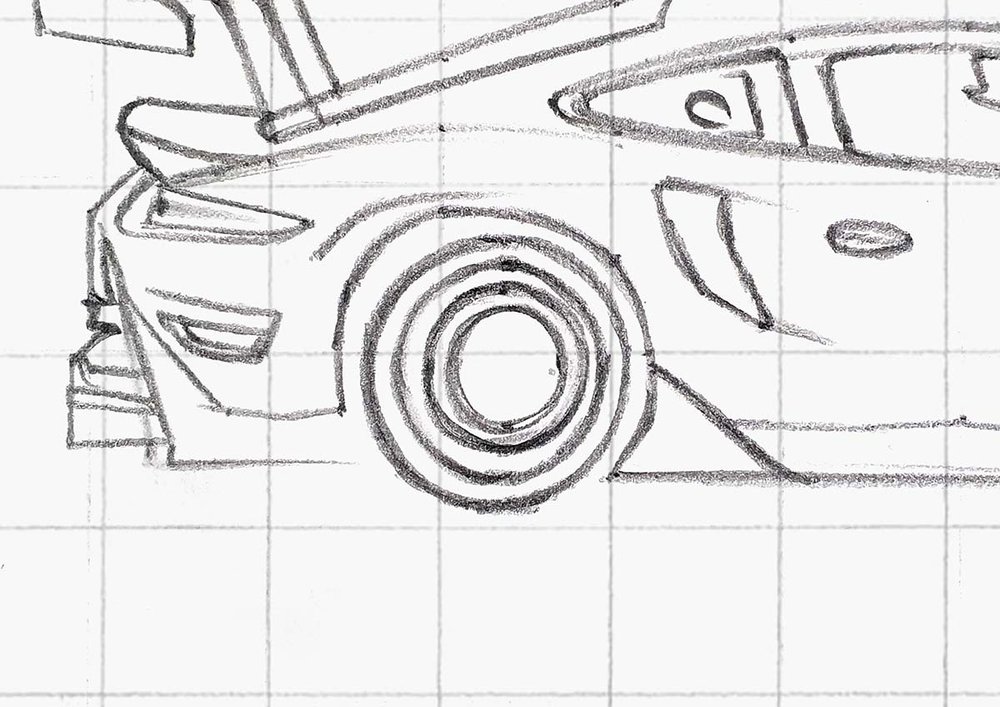
After that, I added 2 diagonal lines to mark where the brake caliper is, and I added some markings to the tire.
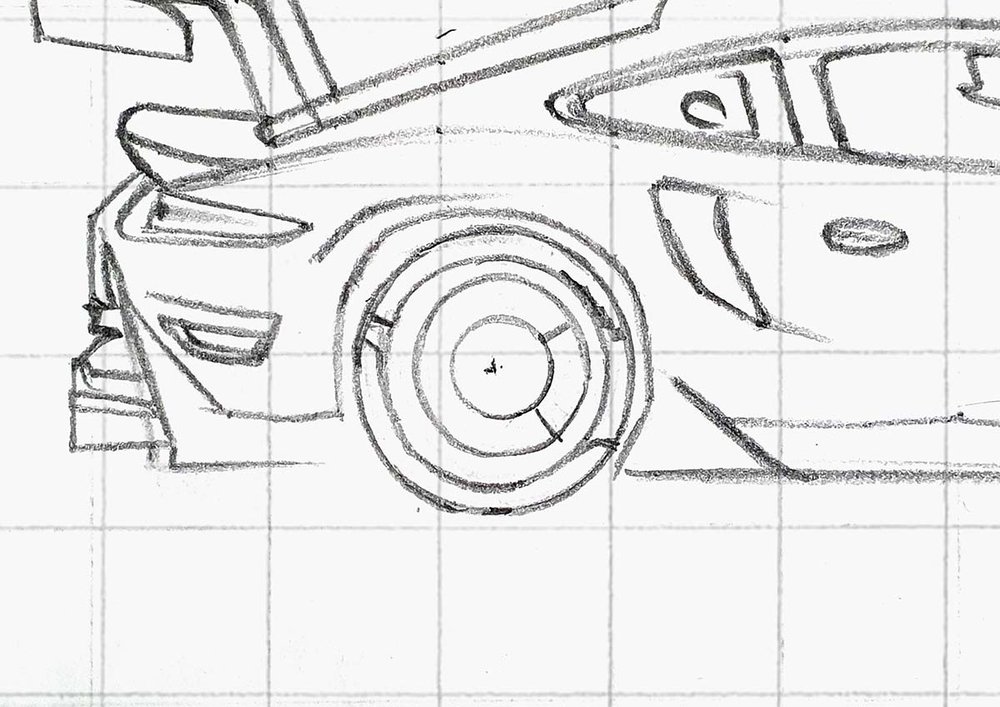
Next, I did the same for the front wheel and sketched the outline of the shadow of the Porsche 911 RSR.
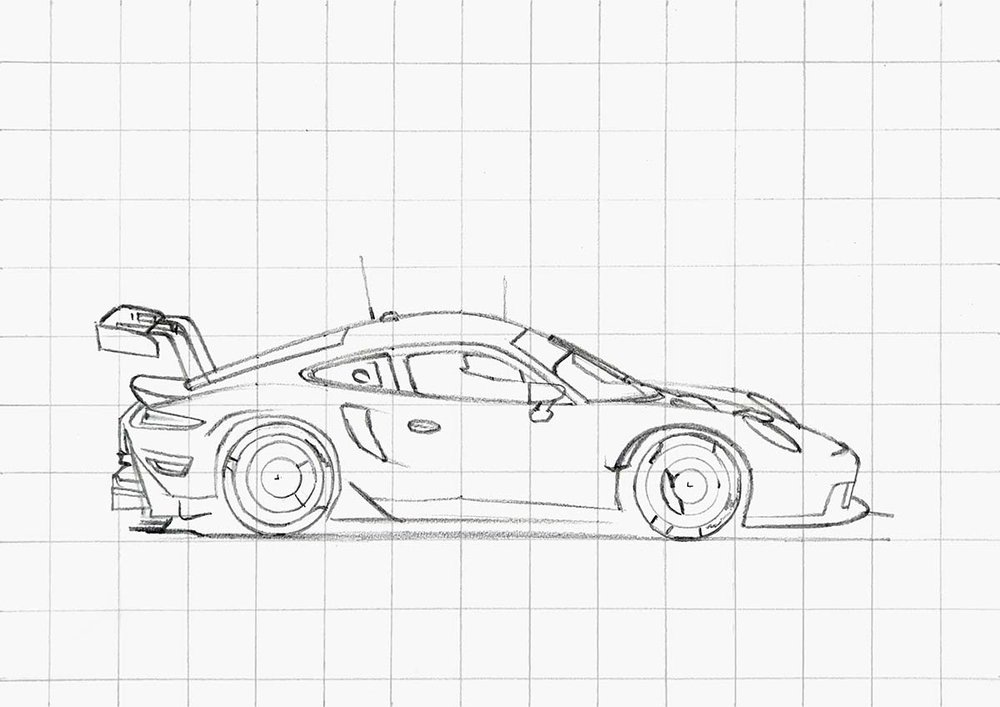
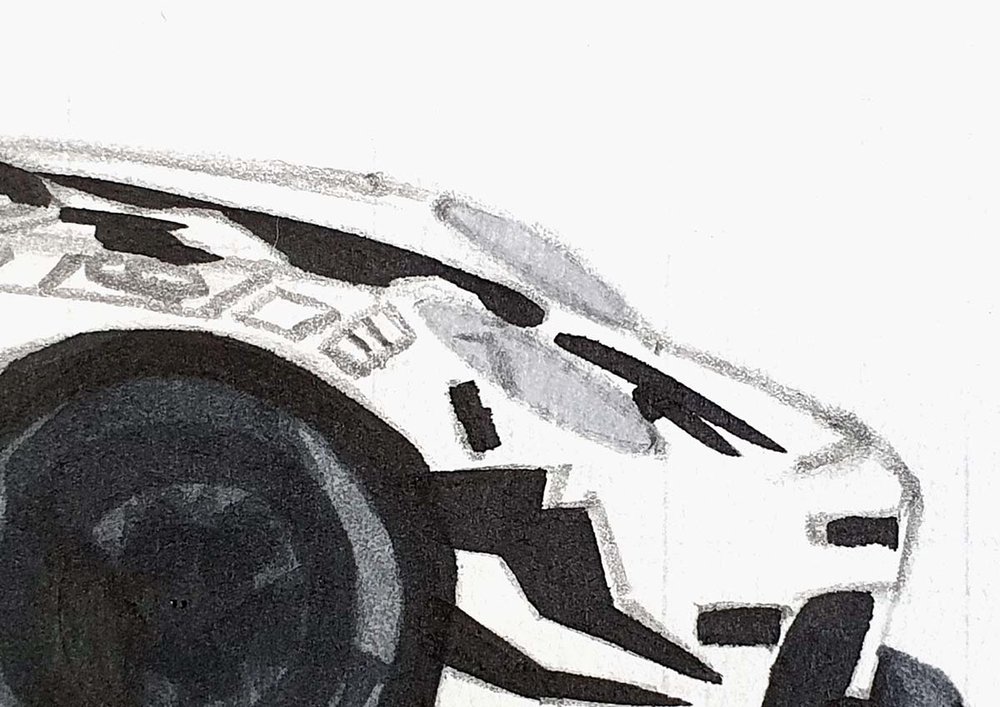
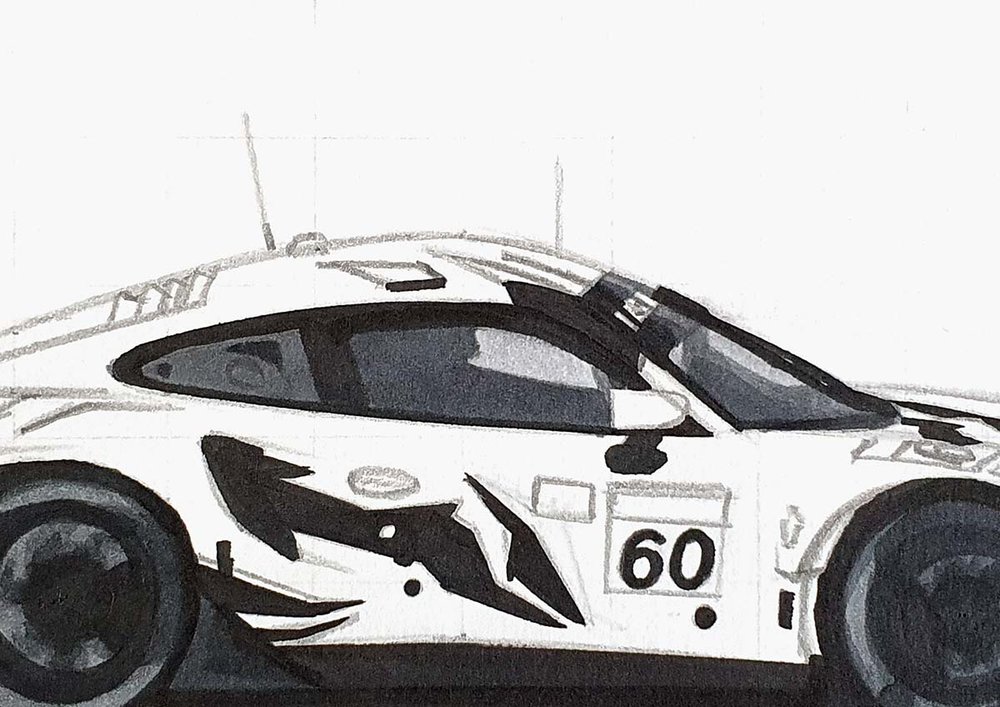
Step 5: Sketch The Racing Livery On The Porsche Race Car
To make it look like an actual race car, I sketched the livery onto the Porsche 911 RSR.
Not all shapes are perfectly placed or the right size, but that's okay as no one will ever notice.
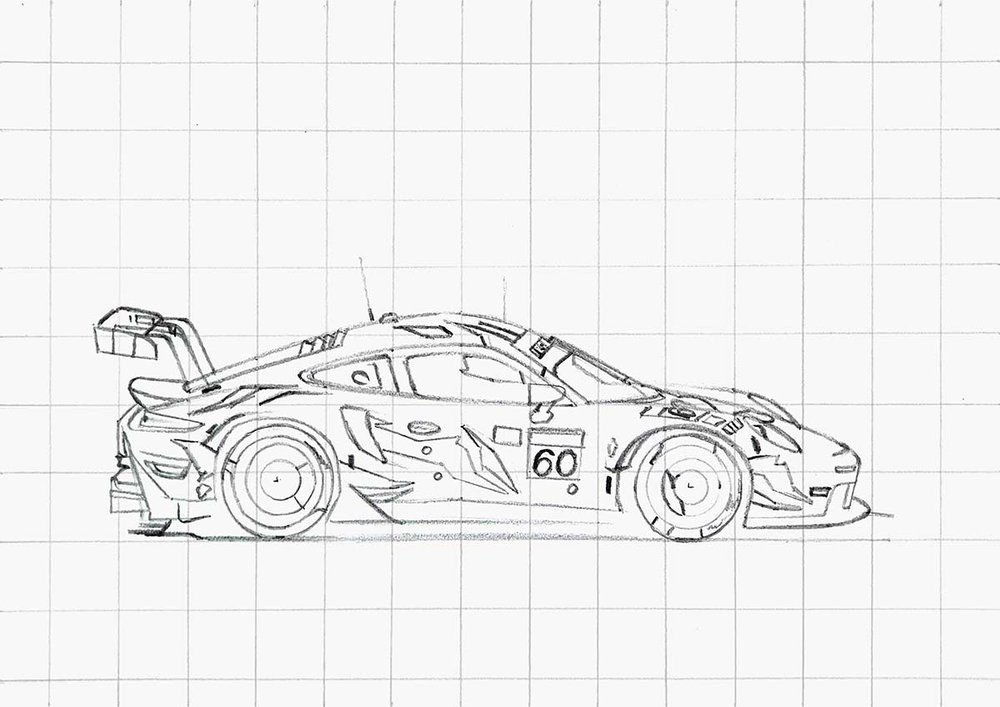
Now, the sketch is all done and ready to be colored!
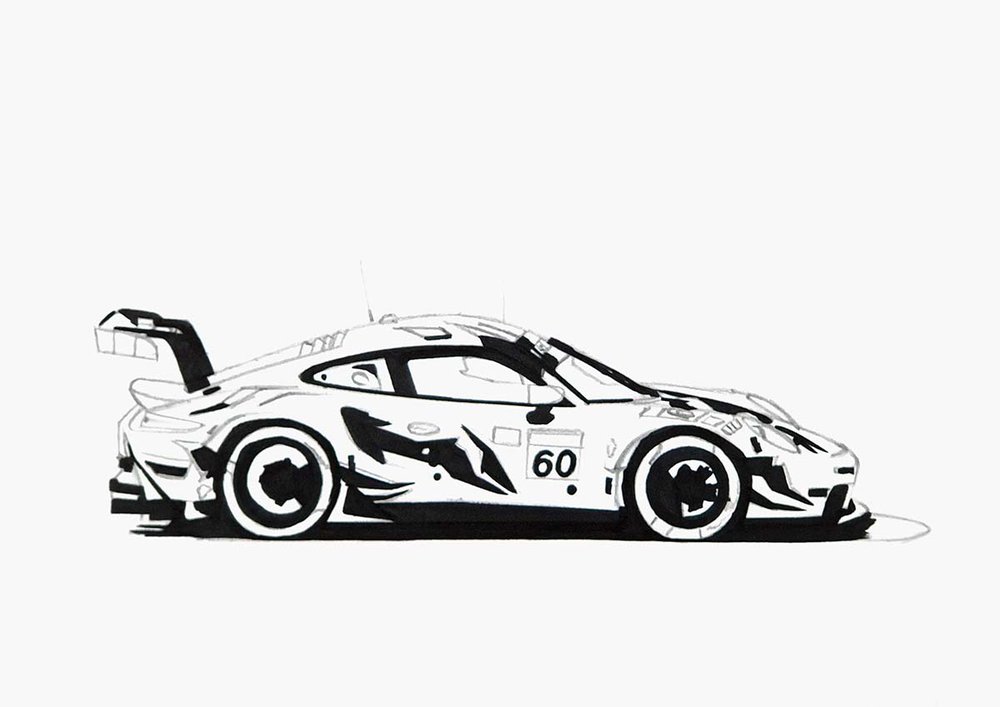
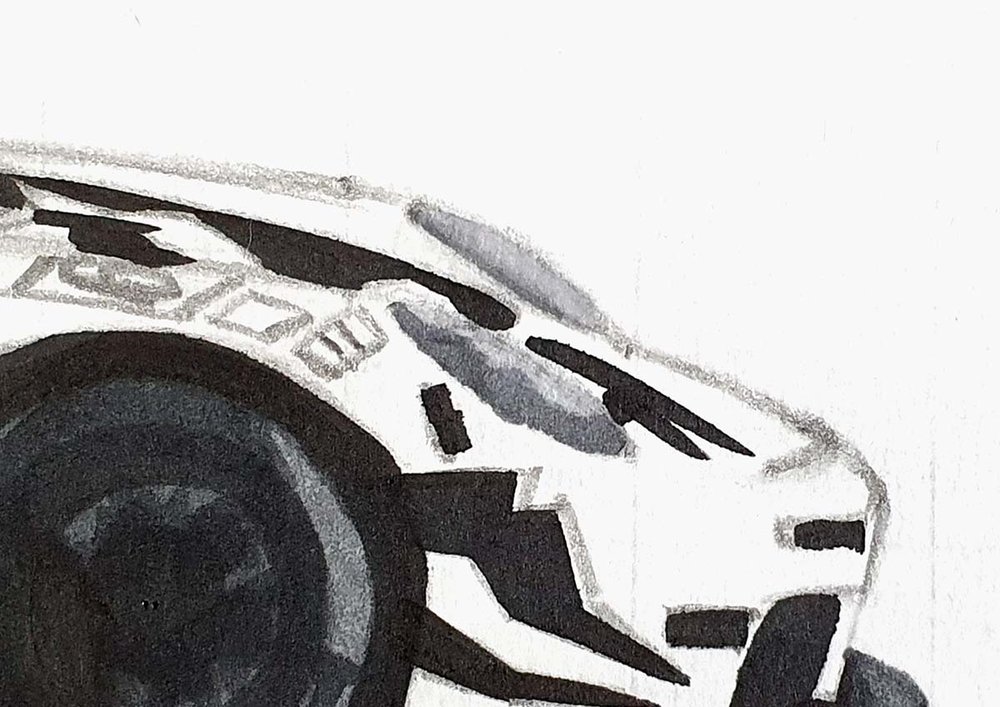
Step 6: Color All Pure Black Parts Of The Porsche Race Car
When drawing any car, I like to color all pure black parts first. This makes the rest of the car simpler to color in.
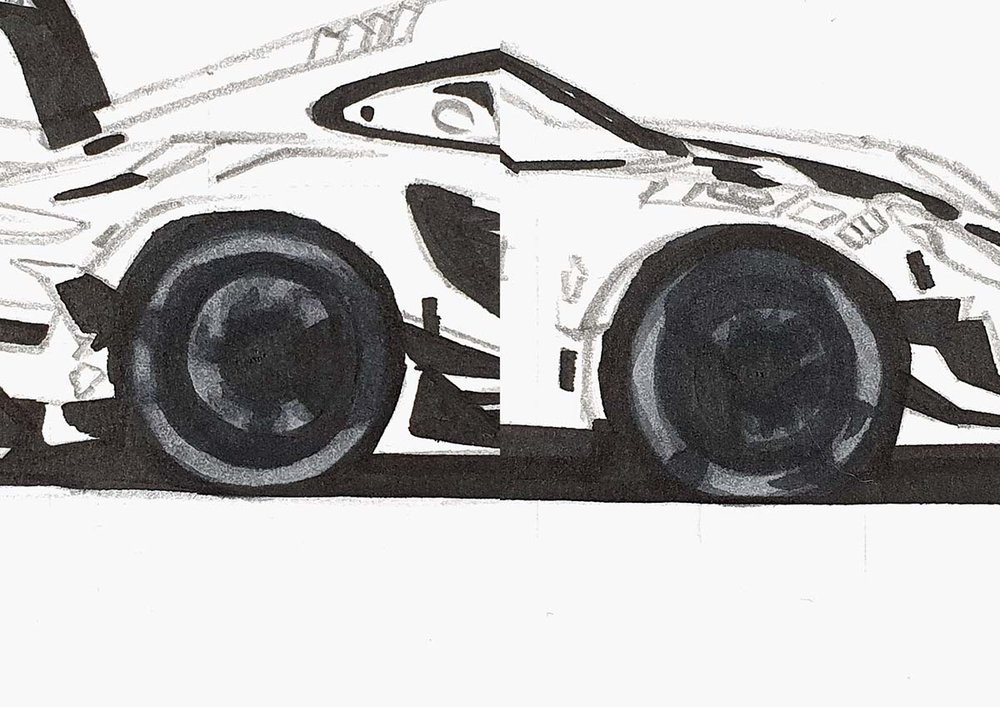
Step 7: Color The Wheels Of The Porsche Race Car
Next, I colored the wheels.
I first colored both wheels with NG03.
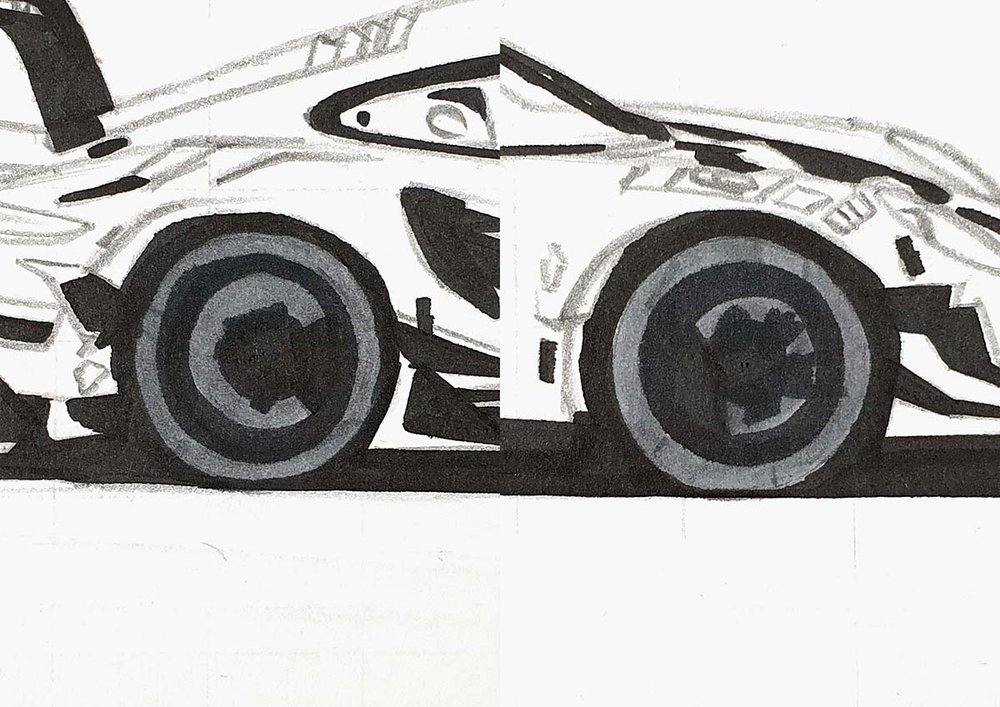
Then, I added some darker shading with CG070 to the tires and the brake discs.
On the brake discs (or actually in front of them), you can still see a bit of the spinning spokes, creating these vague, darker spots.
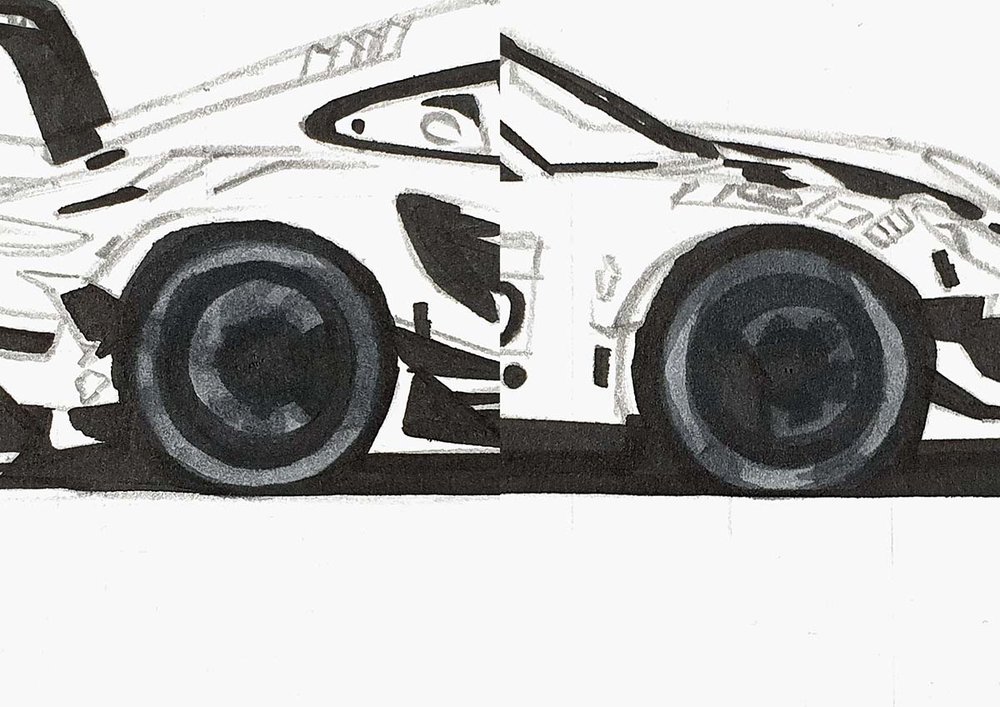
Lastly, I used NG06 to add darker shading to a few places.
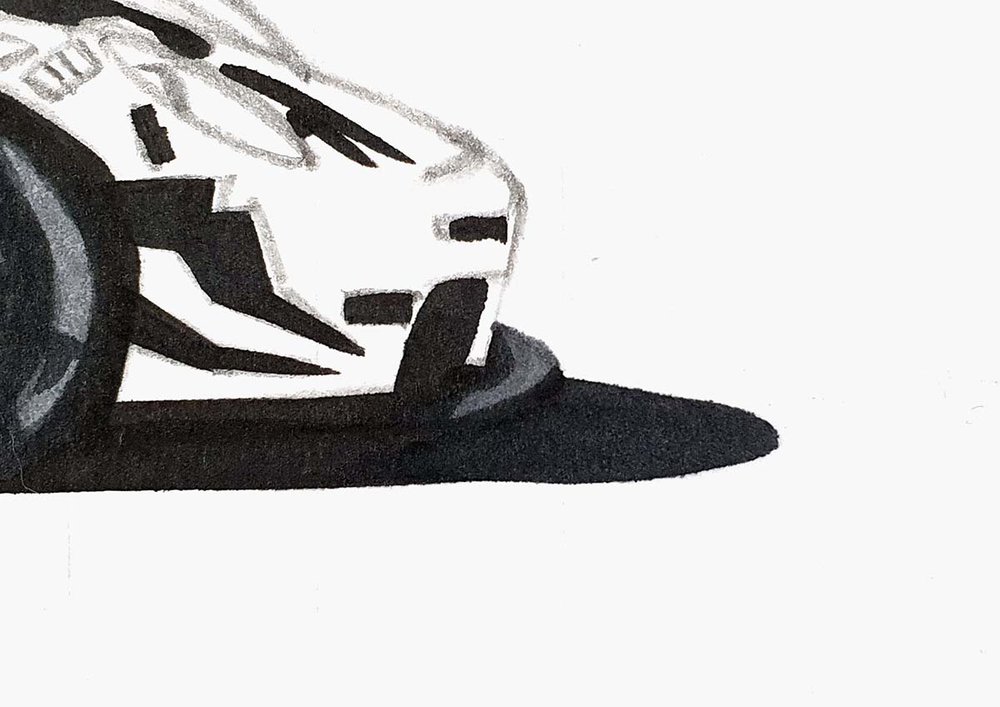
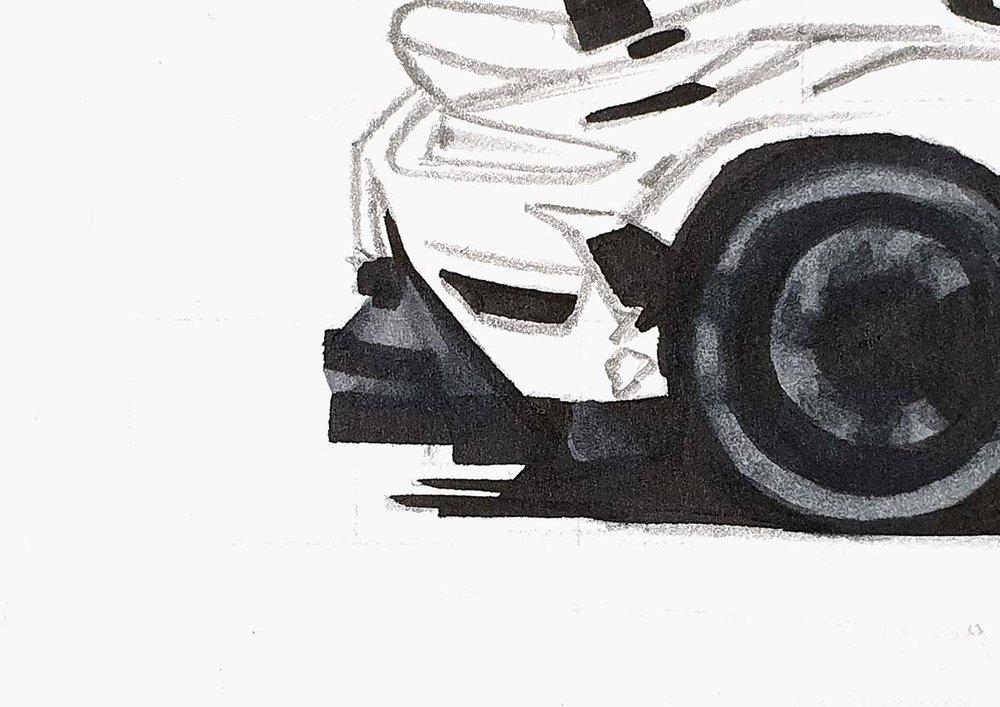
Step 8: Color The Shadow Of The Porsche Race Car
After that, I colored the front bit of the shadow that's a little lighter than black, and to do that, I used NG06.
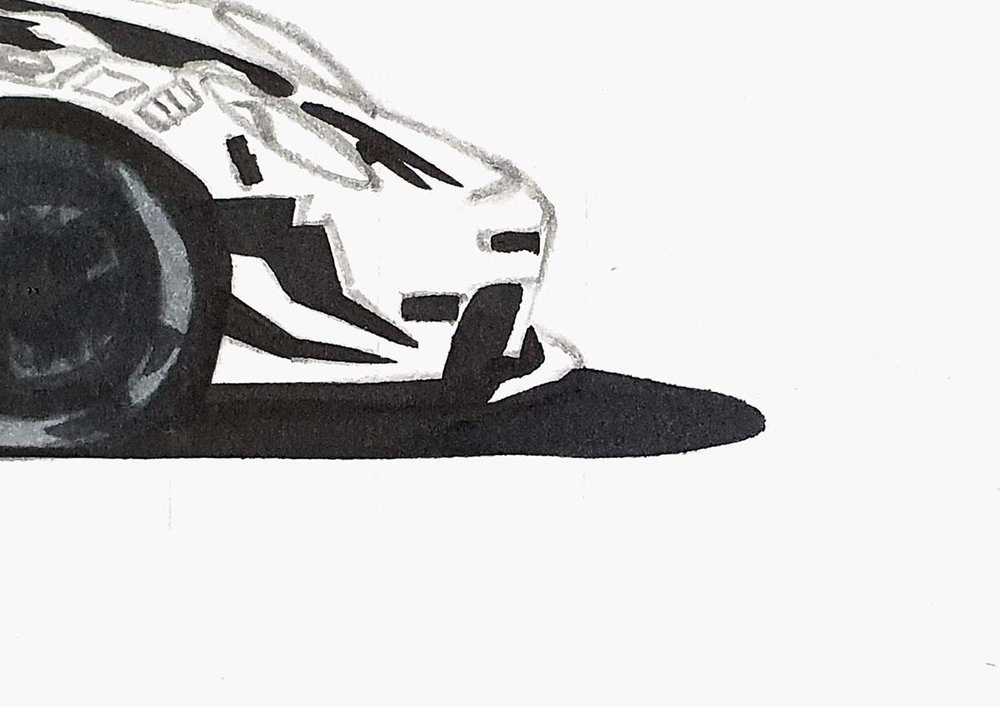
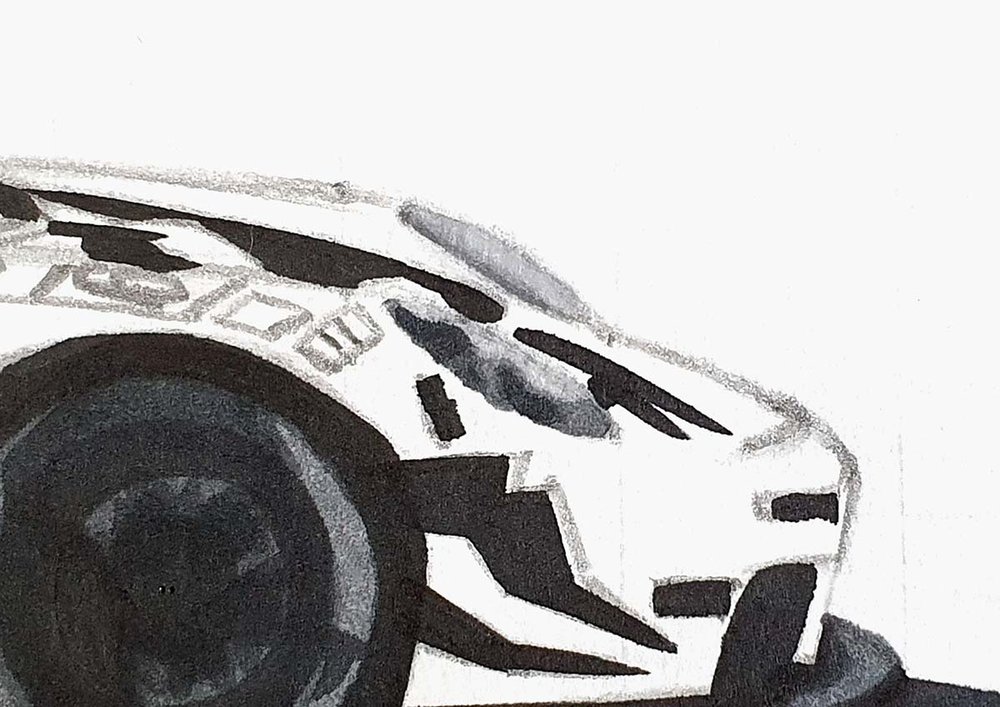
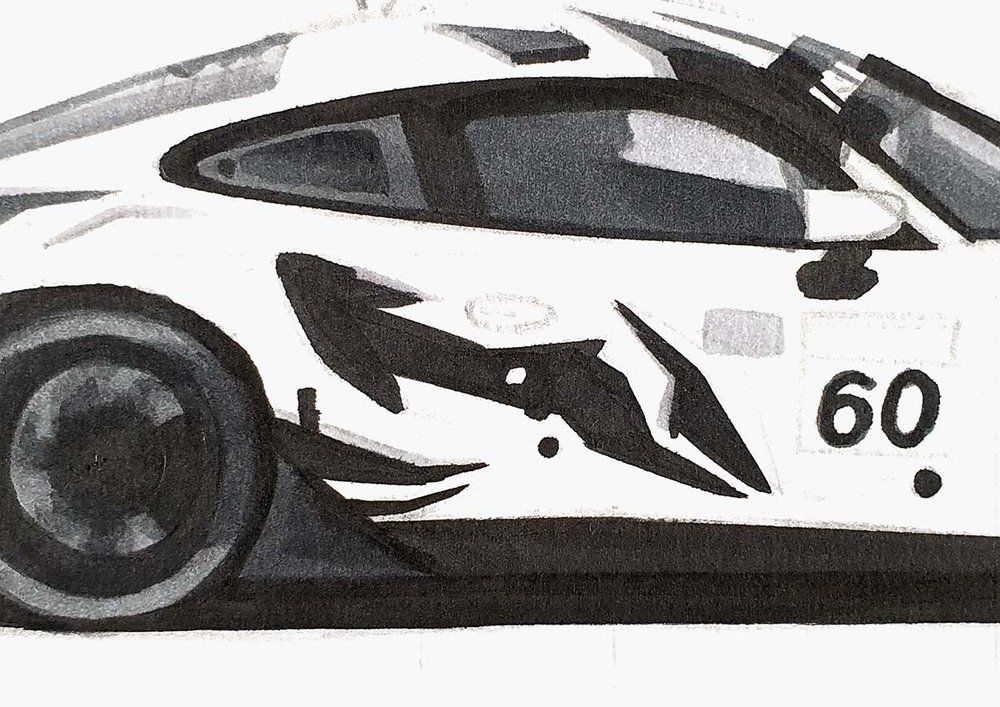
Step 9: Color The Front Splitter & The Side Aero Of The Porsche Race Car
Then, I colored the front splitter with NG03 and the fin on the side just in front of the rear wheel with NG06.
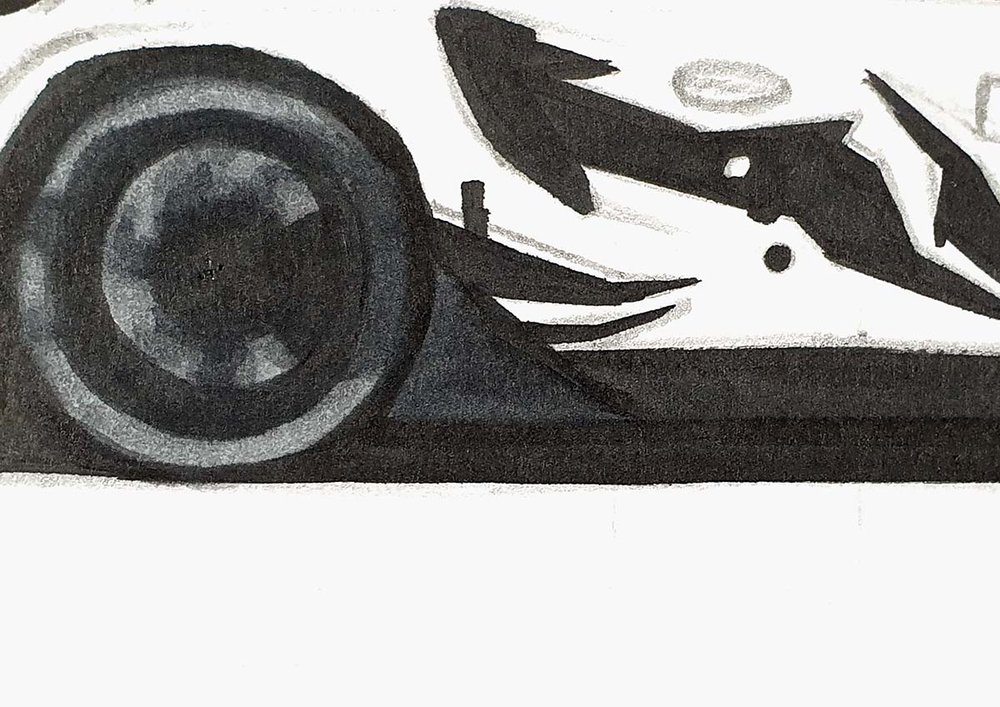
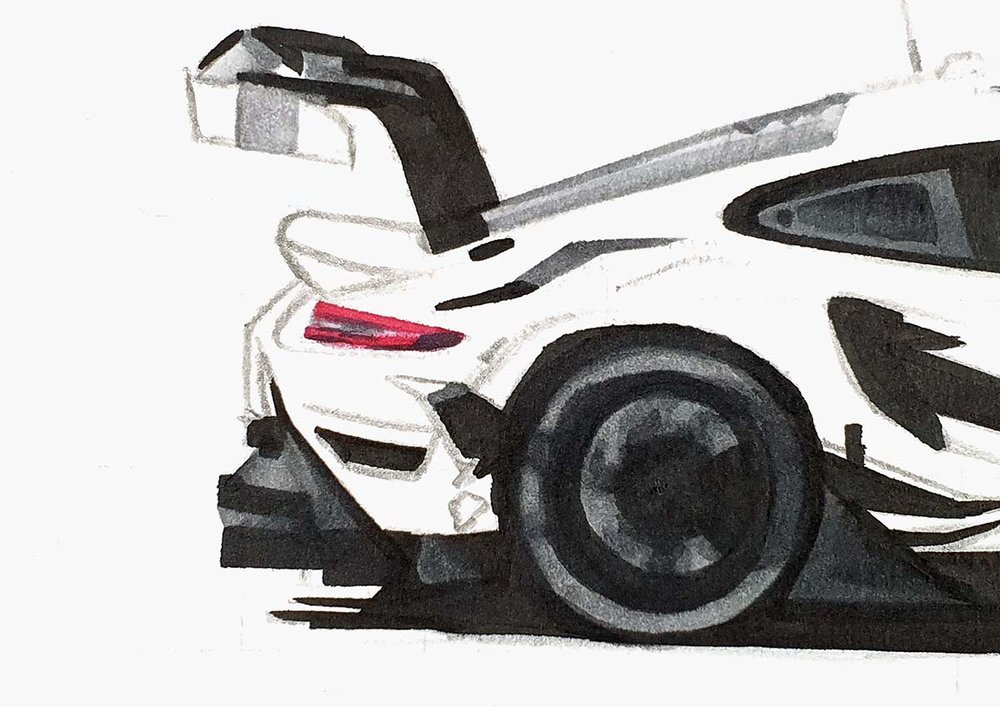
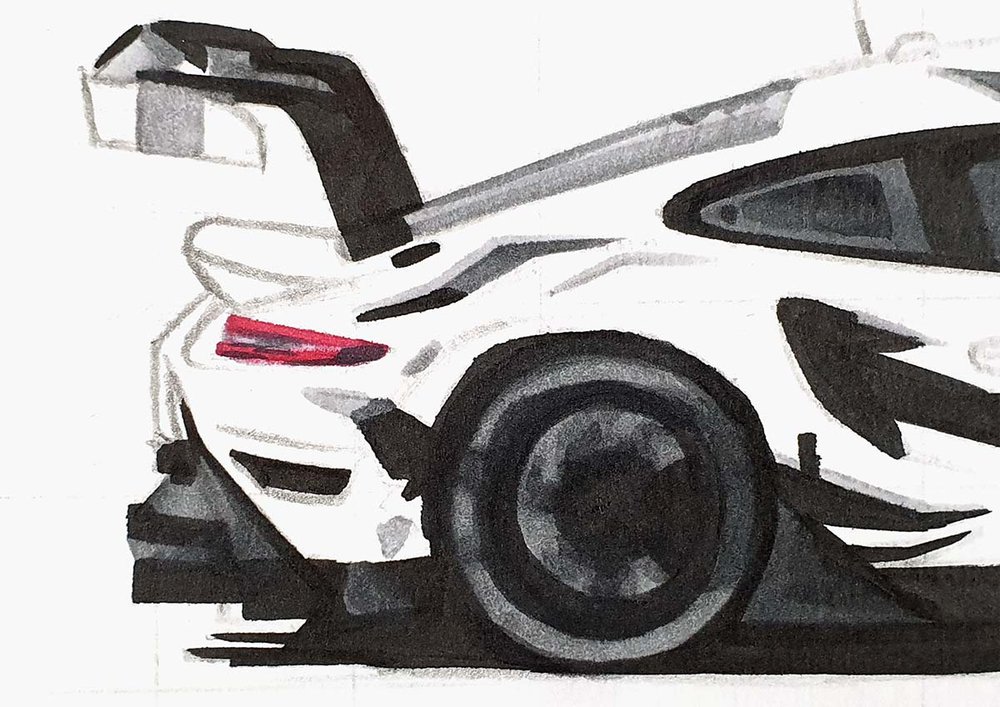
Step 10: Color The Rear Diffuser Of The Porsche Race Car
Next, I colored the rear diffuser with NG03.
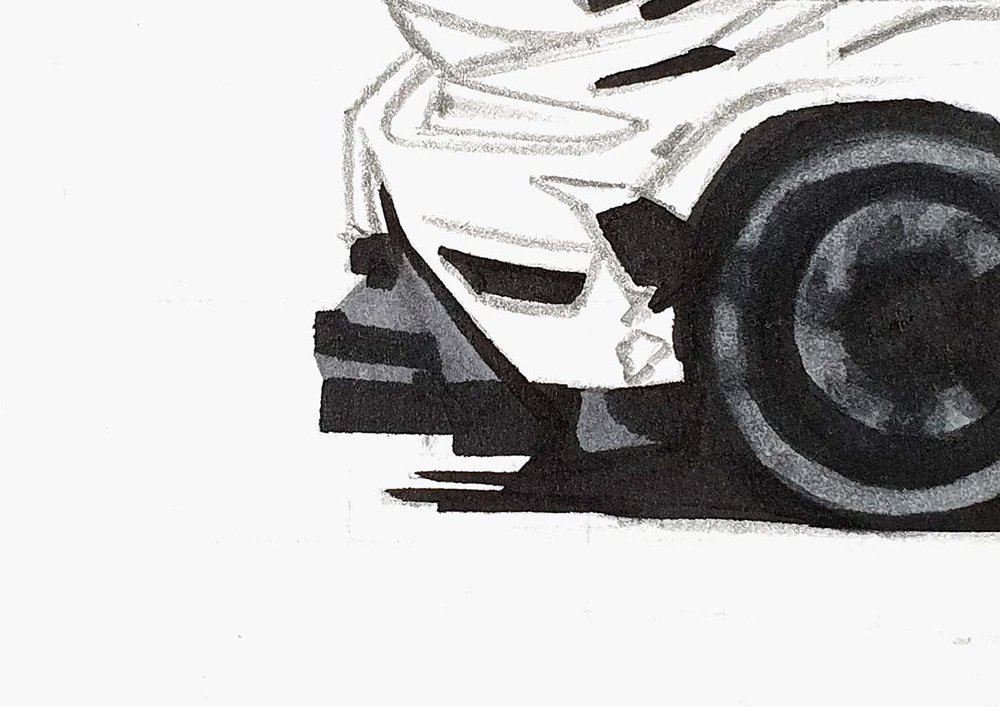
And I added some shading with CG070.
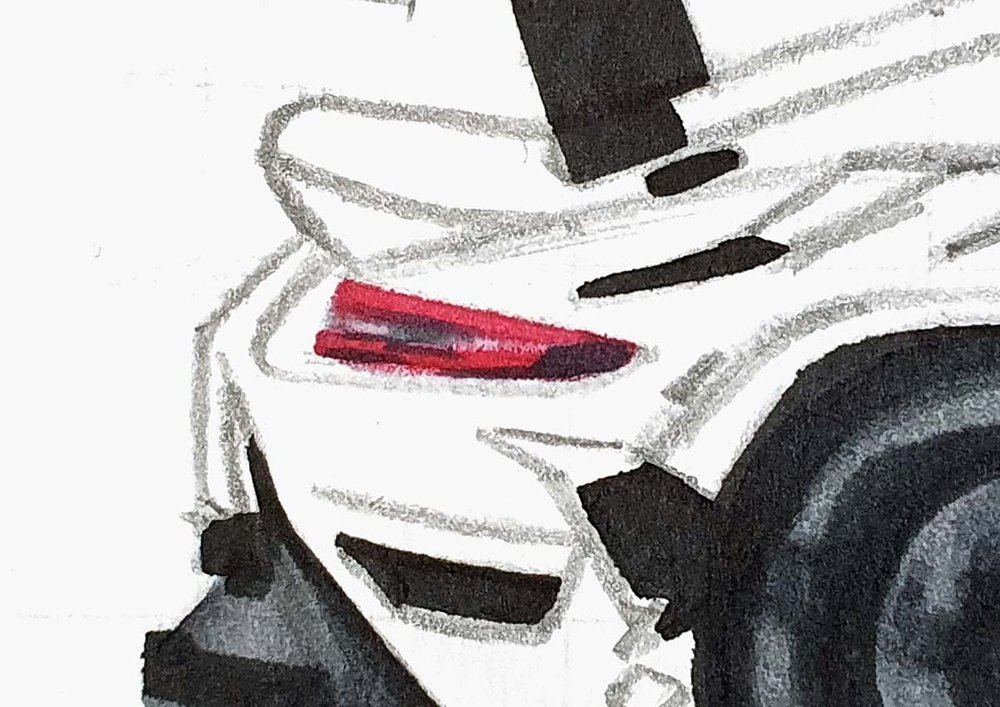
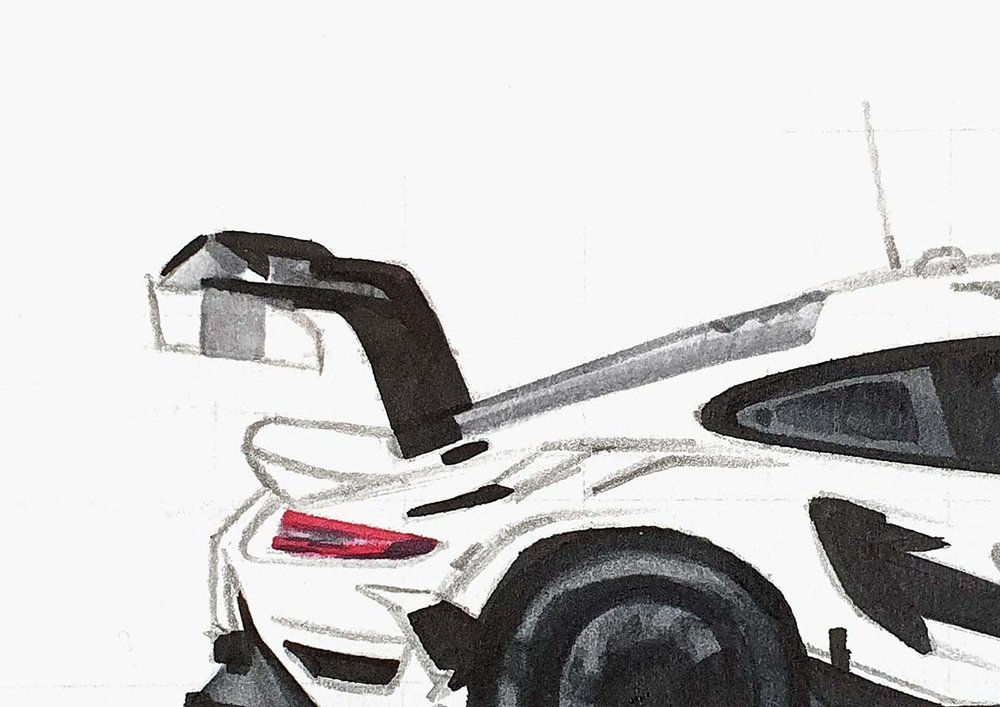
Step 11: Color The Taillights Of The Porsche Race Car
After that, I colored the red of the rear light with R170 and the light grey in the middle with CG030.
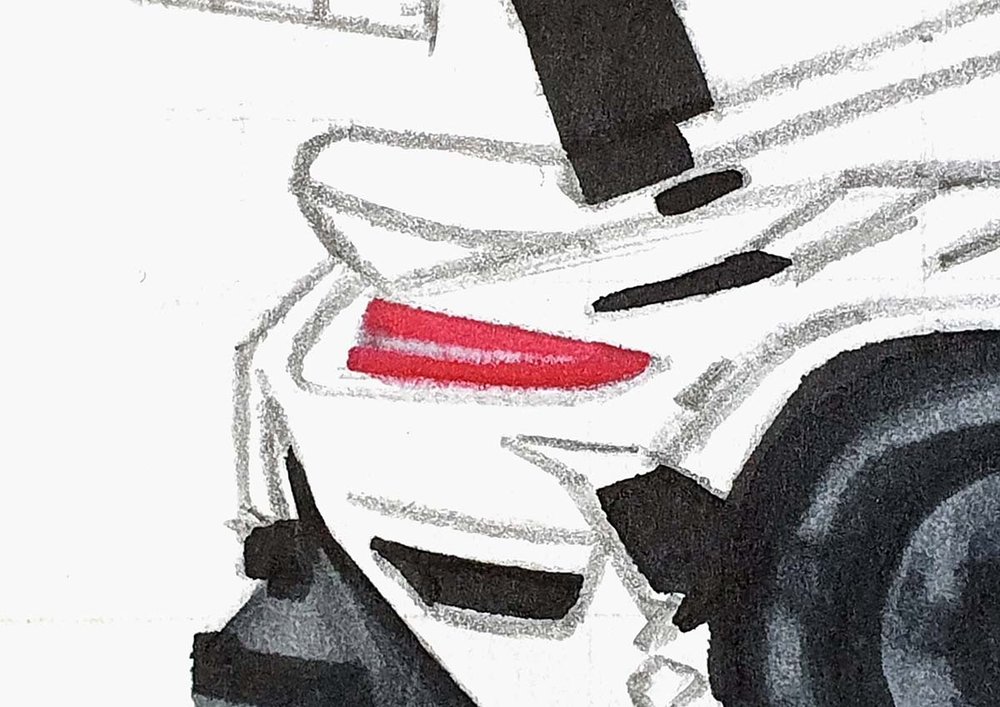
Then, I added some darker shading on the light grey part with CG070, and I added some darker reflections on the red with NG06.
Step 12: Color The Headlights Of The Porsche Race Car
Next, I colored the headlights.
I first colored both of them with CG030.
Then, I added some darker grey shading to the bottom left edge with NG03. On the top headlight, it's just a tiny edge of this darker grey.
Lastly, I used NG06 to add some dark reflections on the lower headlight.
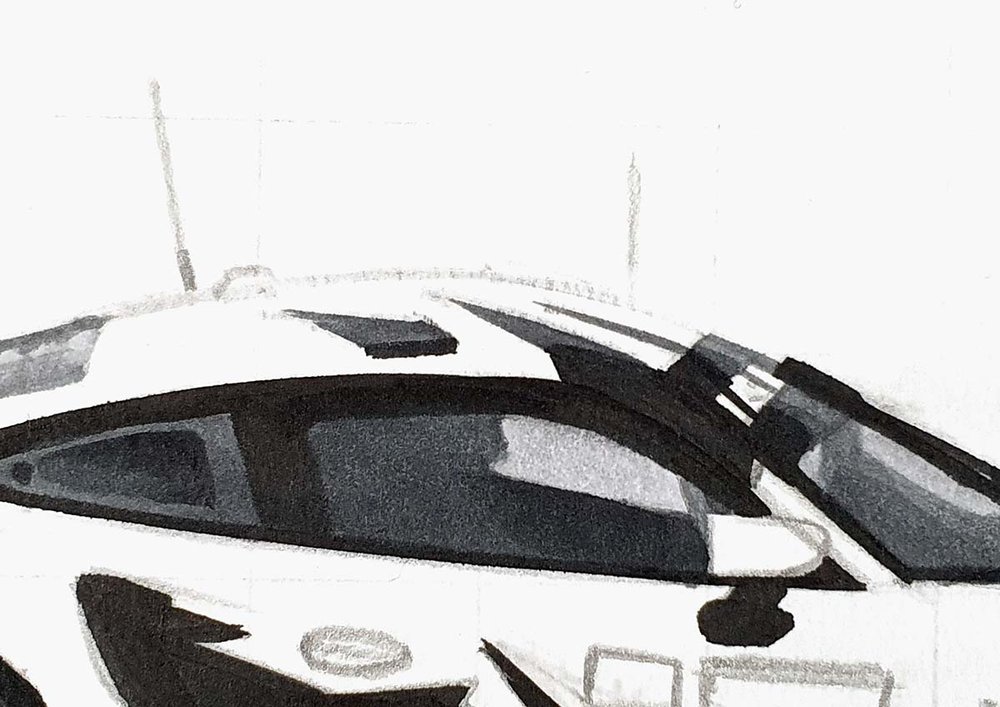
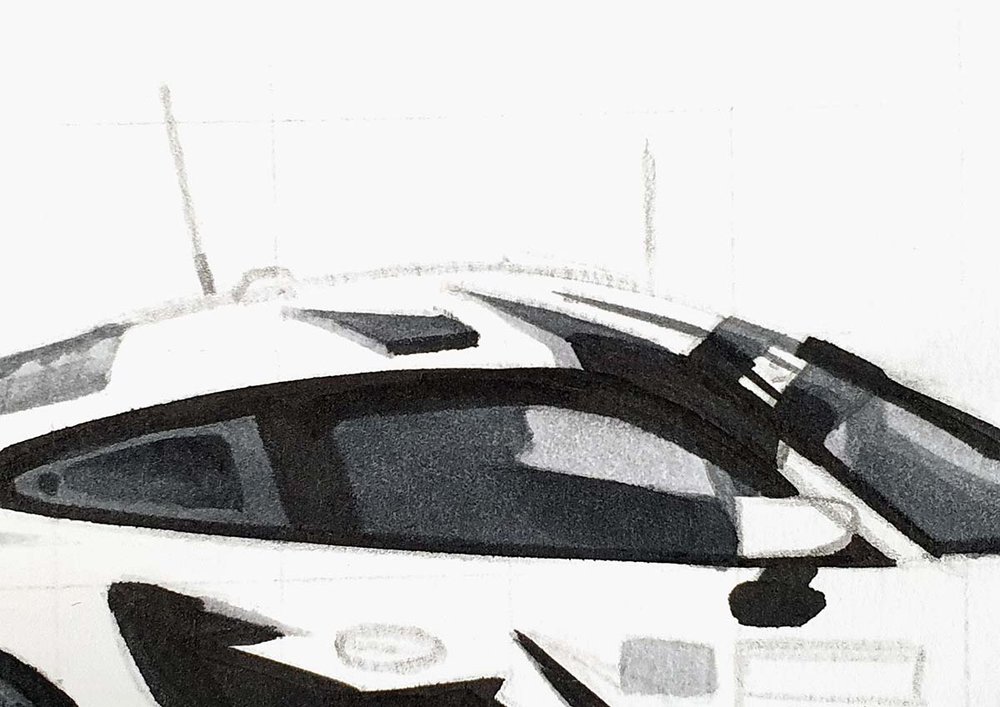
Step 13: Color The Windows Of The Porsche Race Car
Then, I colored the side windows and the windshield.
I colored the parts of the window that you can see through to the other side with CG030 and colored the rest with NG03.
Next, I used CG070 and colored the bottom and middle of the windshield, and I darkened the darker grey parts of the side windows.
To finish the windows off, I used NG06 to add dark shading to the bottom right of the front side window, and I darkened this triangular shape on the rear side window (which is technically not a window).
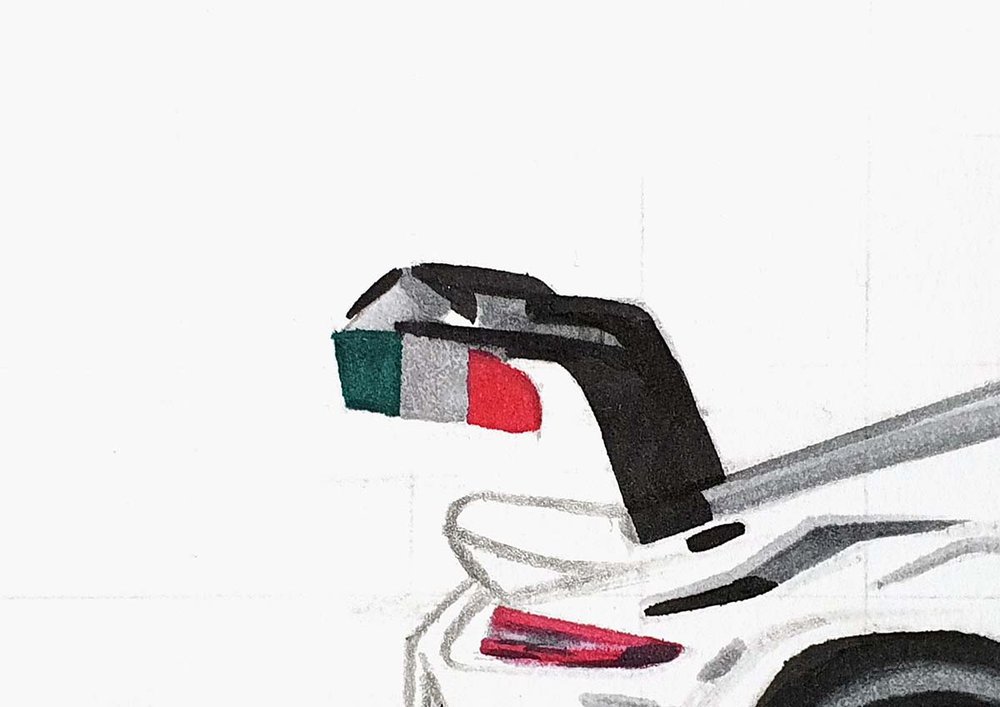
Step 14: Color The Rear Deck & The Wing Of The Porsche Race Car
After that, I moved onto the rear deck and the wing.
I first colored them both with CG030. I left the parts of the Italian flag that will be red and green uncolored.
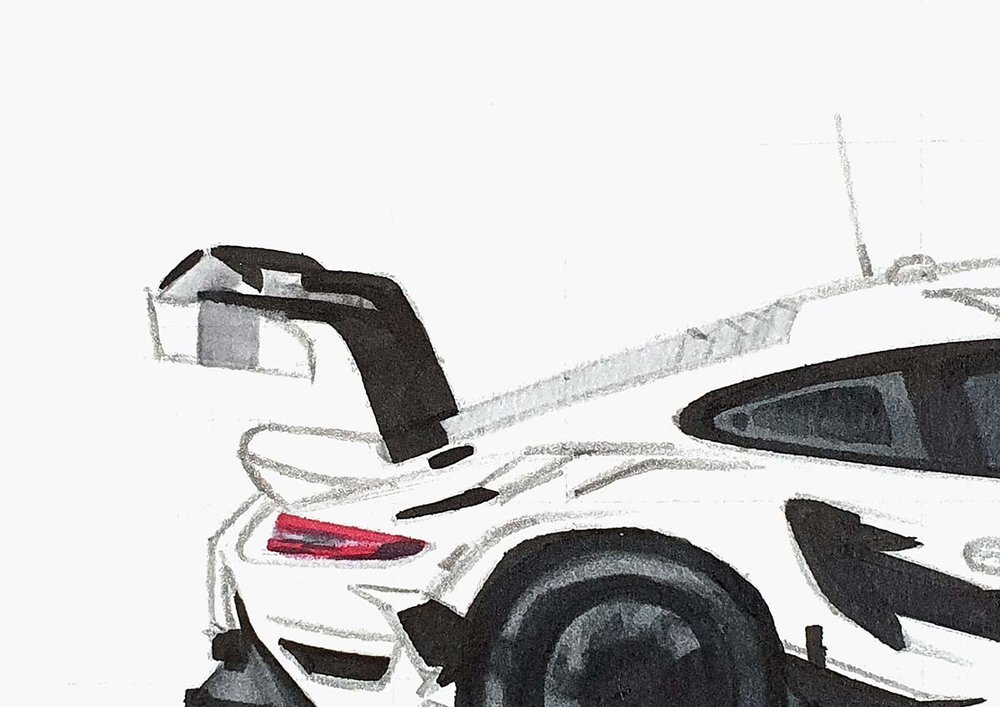
Then, I used NG03 to add shading to the bottom and top edges of the rear deck and the bit between the wing mounts.
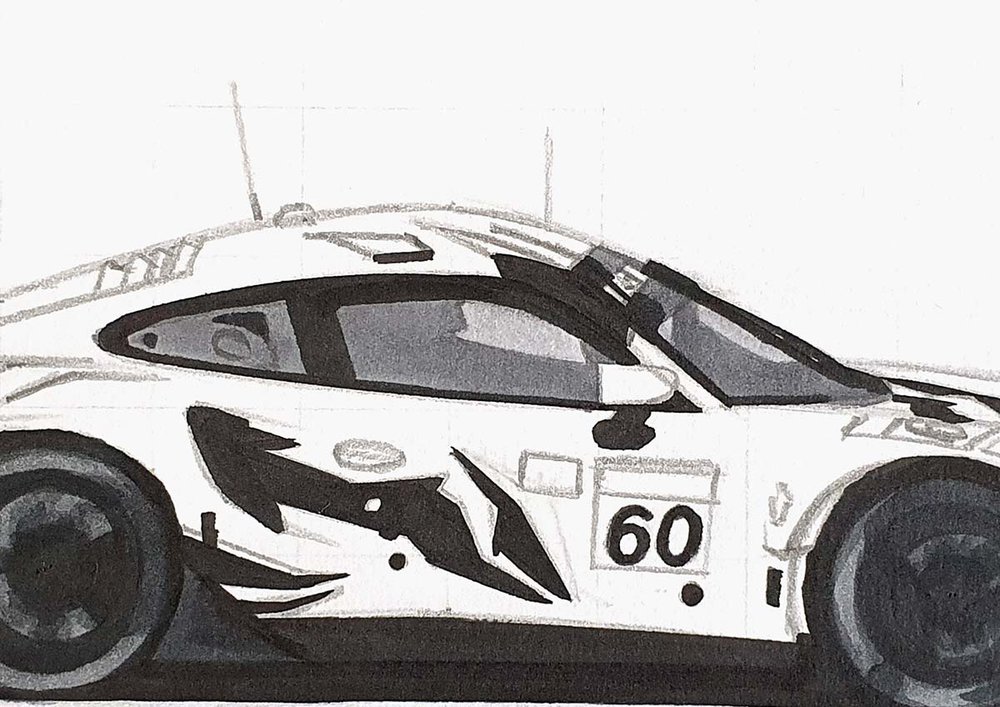
Step 15: Color The Livery Of The Porsche Race Car
Next, I focused my attention on the livery of the Porsche RSR.
I first colored the remainder of the lightning bolt-like shapes with CG070, except for this little bit on the rear of the car, which I colored with CG030 later on. I also colored the "60" on the front fender, or at least, what you can see of it.
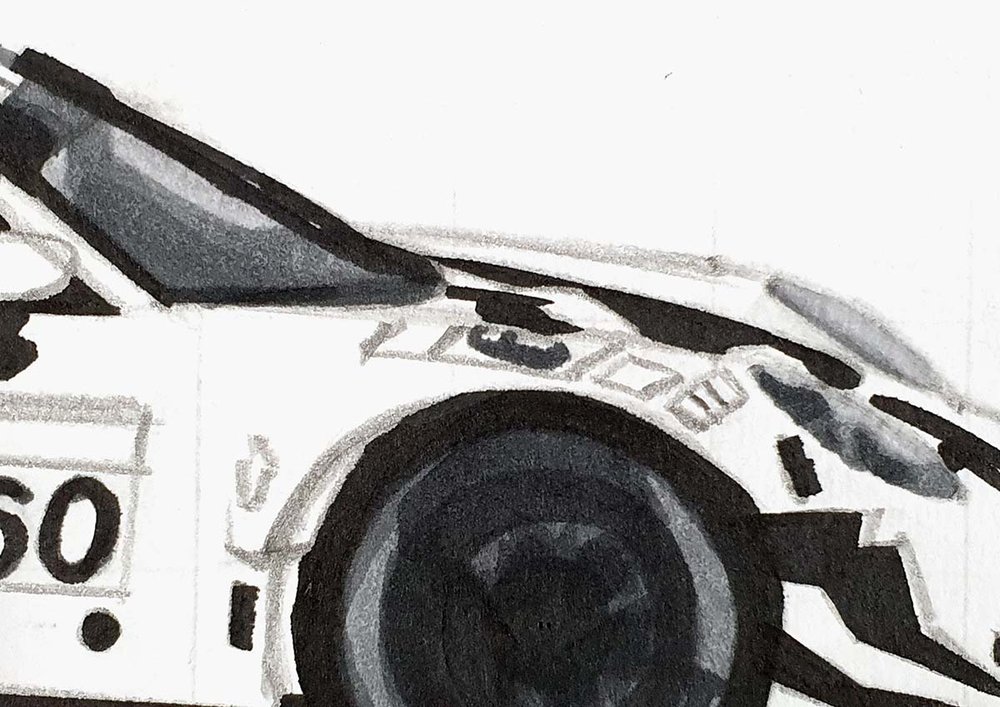
Then, I used CG030 to color all the light grey things like the Michelin man, the "white" of the Italian flag on the fender, and the remainder of this lightning bolt shape behind the rear wheel.
Some lightning bolt shapes also have a light grey or white edge, which I also colored with CG030.
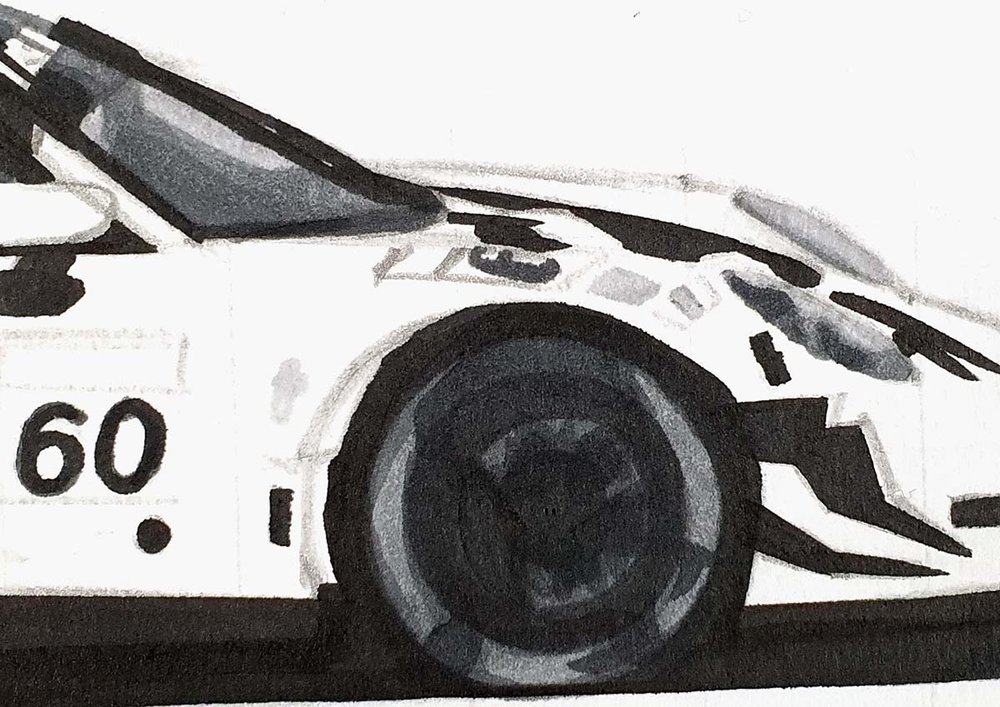
Next, I colored the red and green of the Italian flags with R170 and BG1. I also colored the red edges that some of the lightning bolt shapes have.
And I colored the background of the "60" on the side.

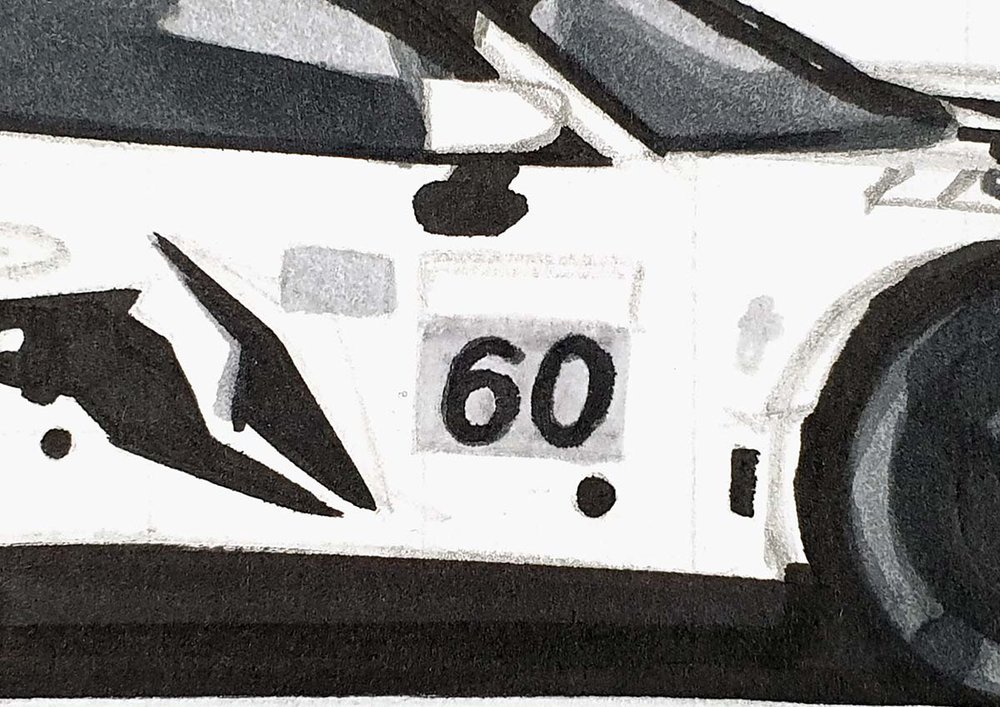
After that, I used Apricot (Y10) to color the light orange parts above the big "60" on the side on the background of the "60" on the fender, and I used Rouge Orange (Y5) to color the background of the big "60" while leaving a tiny edge of light grey to the right.
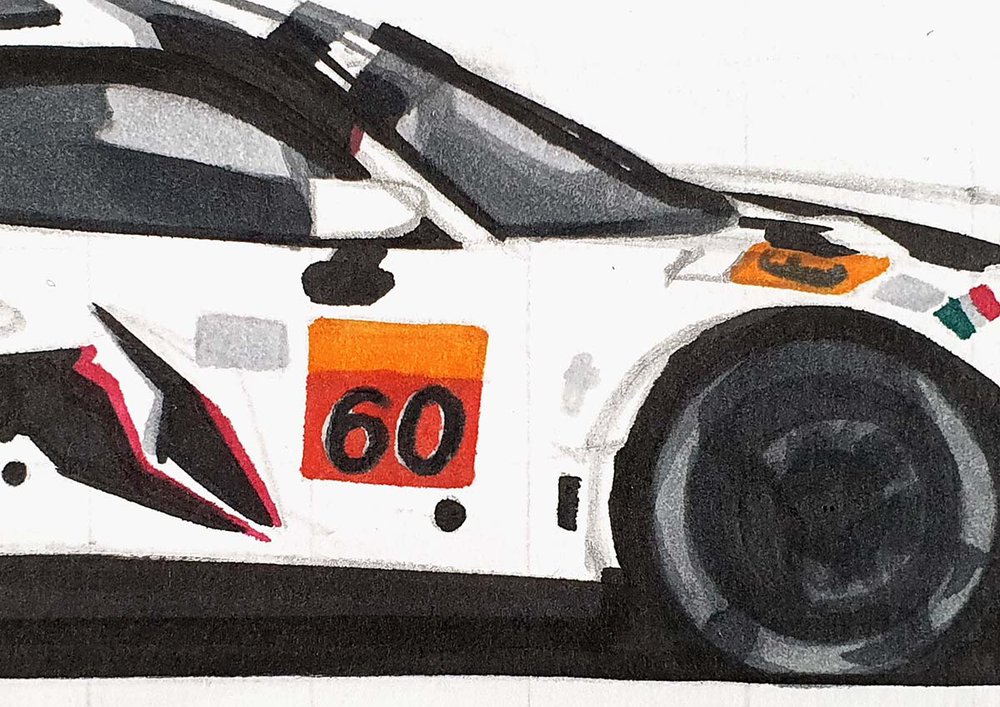
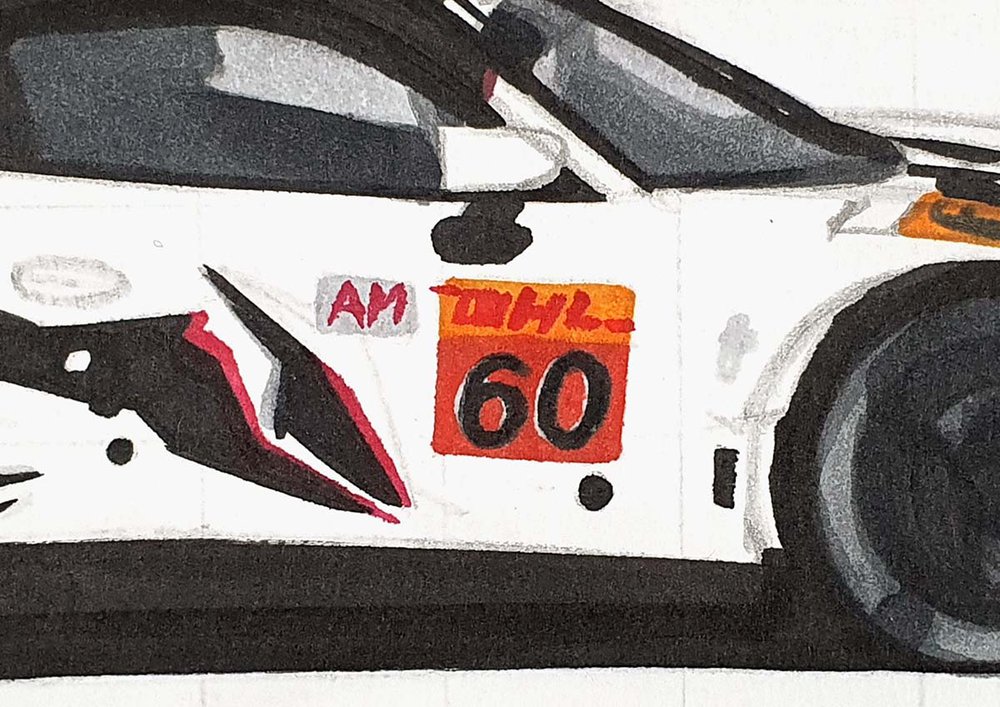
Lastly, I used R170 to add the "AM" and "DHL" lettering, which I probably should have done with a red pencil later on...
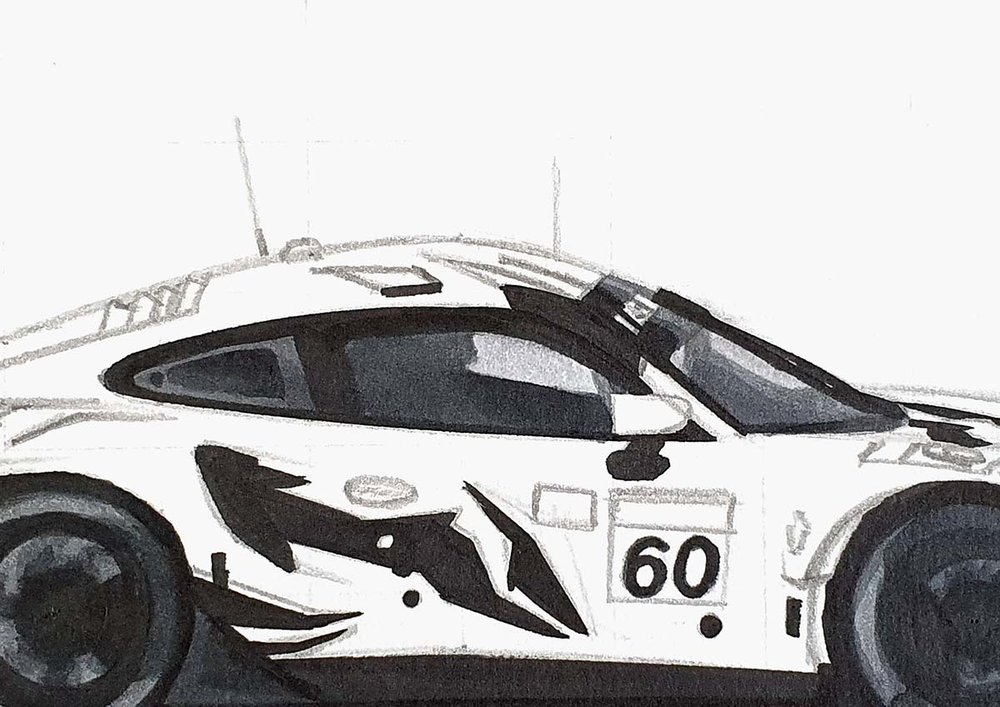
Step 16: Color The Main Body Of The Porsche Race Car
Now we're finally ready to color the main body of the car.
Honestly, finding darker shades of yellow was challenging as I normally make the darker shades more orange, but the yellow on this car didn't get more orange as it got darker. It got more saturated and darker instead.
But luckily, I had some Ohuhu markers in the perfect colors for this.
First, I colored the whole body with Y040.
Next, I used Y070 to add shading to pretty much all of the car except for the roof, the top of the duck tail spoiler, the surrounding area of the taillight, and the lighter spot between the rear deck and the rear wheel.
Next, I used Y270 to add darker shading to the lower half of the car, the shadow below the wing, and the lower half of the mirror cap.
And to finish it off, I used E440 to add even darker shading to the front bumper, the wheel arches just to the left of the front and rear wheels, the shadow of the door handle, the bottom half of the mirror cap, and the left bit of the shadow below the wing.
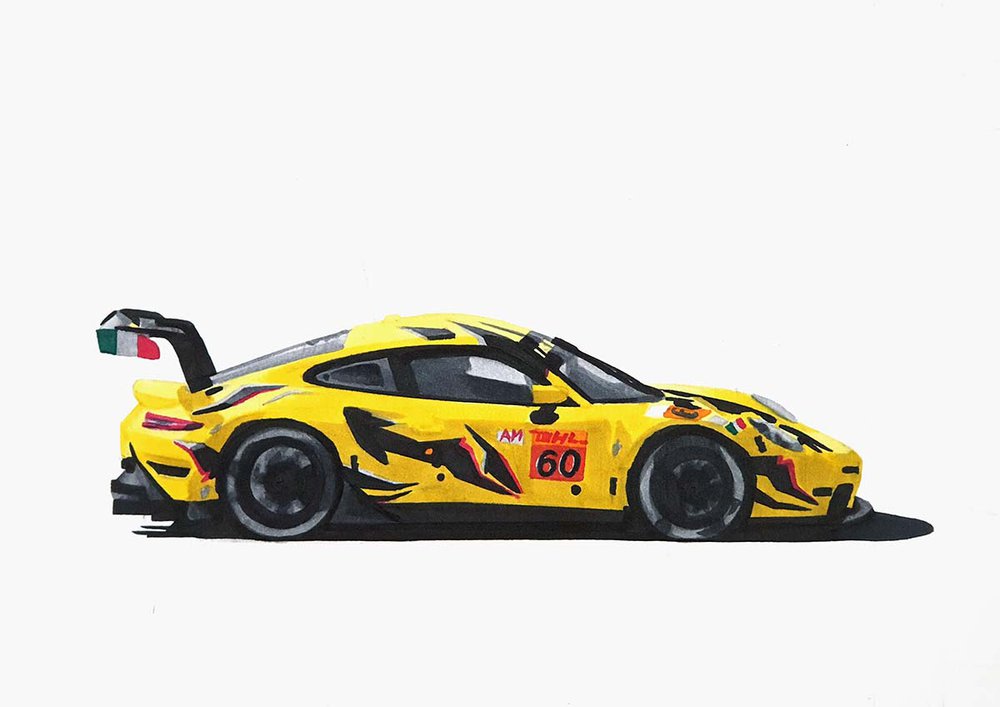
And that's the Porsche race car fully colored!
But it's not yet done.
Step 17: Add Details To The Porsche Race Car Drawing With Colored Pencils
At the moment, it's lacking a lot of the details.
To add those, I like to use colored pencils.
This time I used a few more colored pencils to get the details and colors right than just the white and the black pencils.
I used black to color the door edges, the left/bottom edge of the headlights, the antennas, and some small black parts of the livery.
I used white to color the white stripes on the tires, the highlights on the brake discs, the bolt-like shapes on the side windows, and some small bits here and there.
I used Amber Gold 0200 to color the yellow bits of the tires.
I used Flame 0400 to color the orange bits of the tires.
I used Blue 1300 to color the blue edge of the white stripes on the tires.
And I used Scarlet 0500 to refine the red edges of the thunderbolt shapes and the lettering.
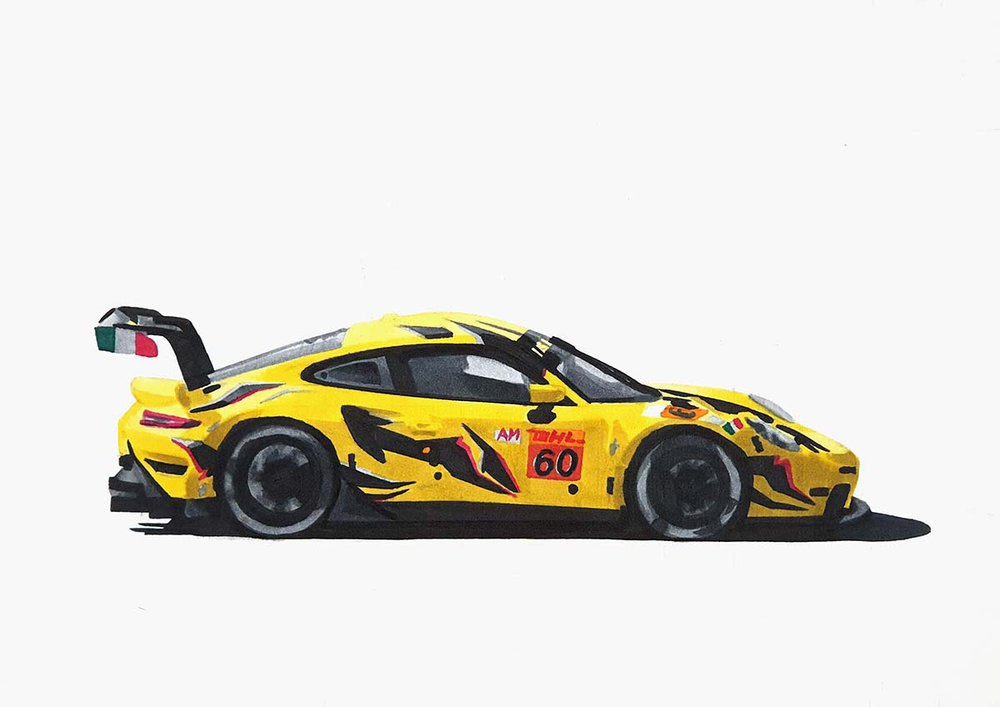
Step 18: Add Some White Highlights To Your Porsche Race Car Drawing
To finish the Porsche race car drawing off, I used a white paint marker to add a few highlights on the car.
I added some in the headlight, below and to the left of the taillight, the side windows, and the tires/wheels.
And now it's done!
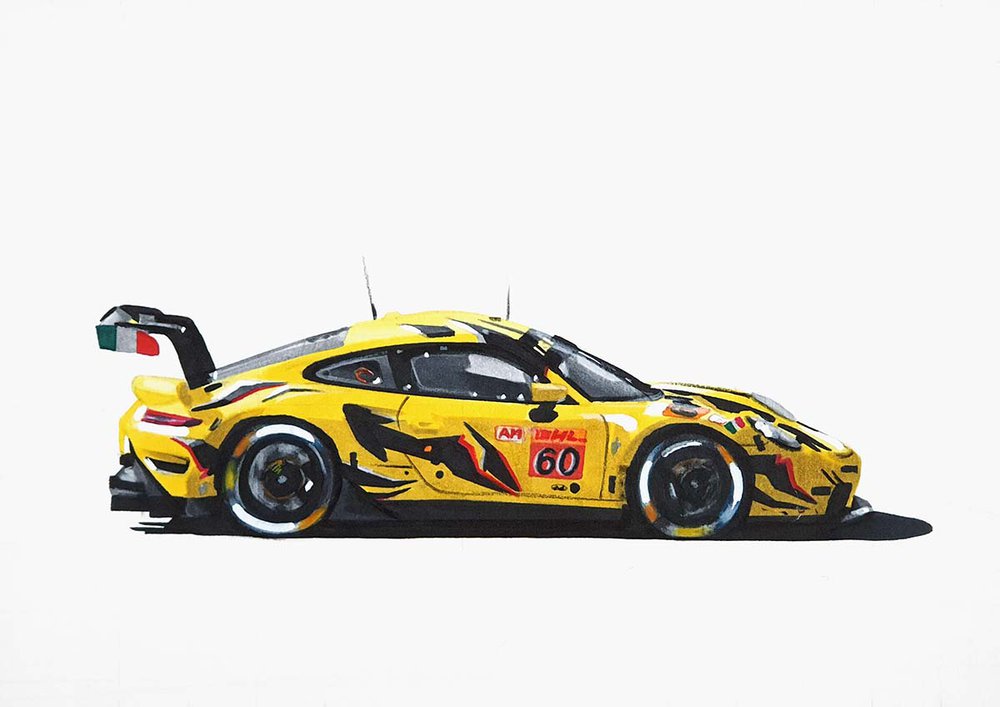
And that's how you draw a realistic Porsche 911 RSR race car.
I hope you liked this car drawing tutorial. It's a bit longer and more complex than usual because of the racing livery. But I couldn't draw a race car without a racing livery.
I think it's well worth it.
I hope you enjoyed it!
Thank you.
Tags
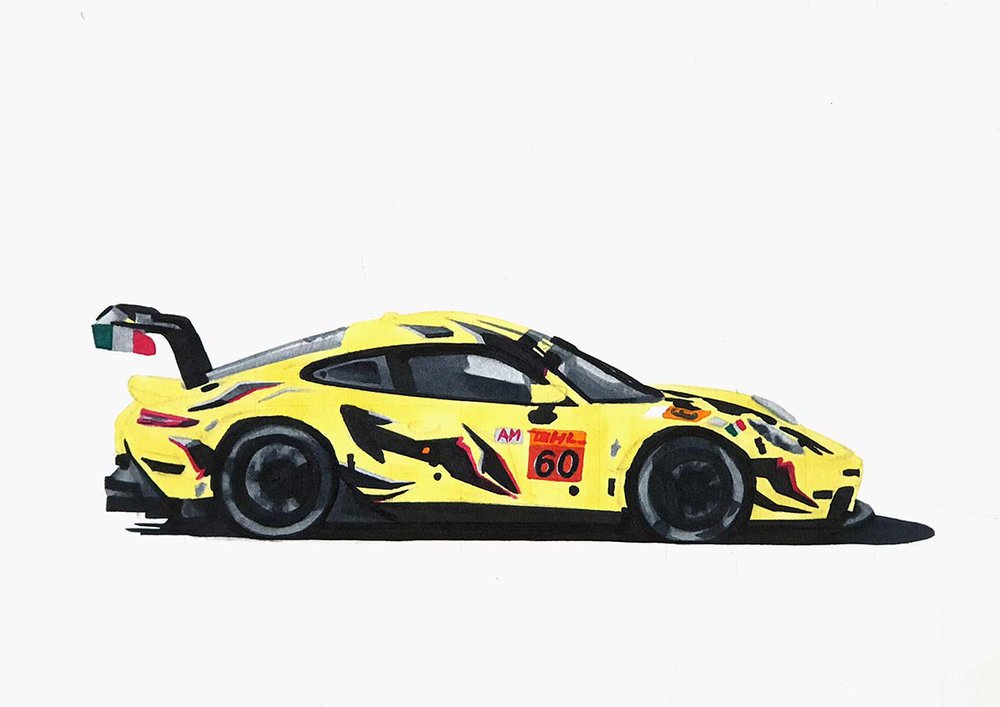
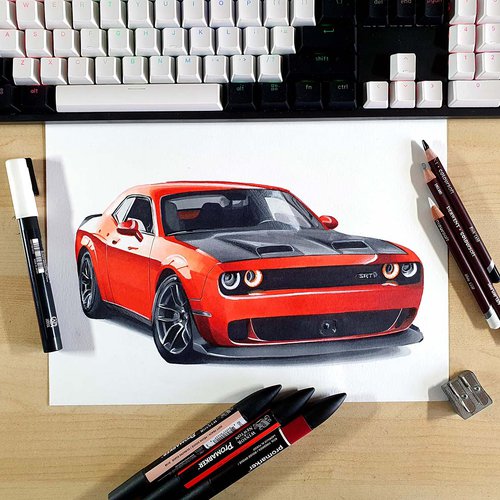
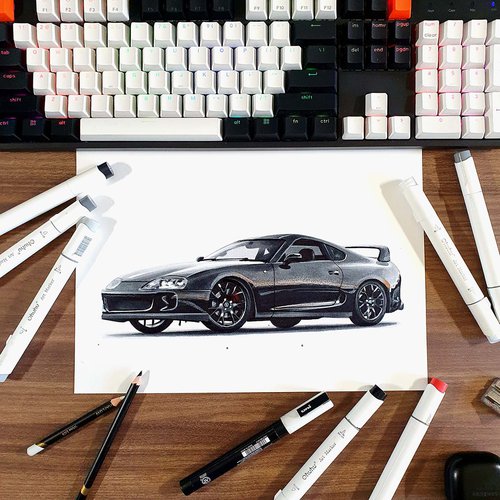
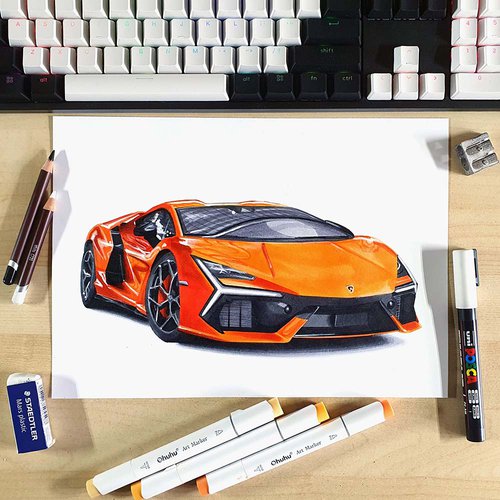
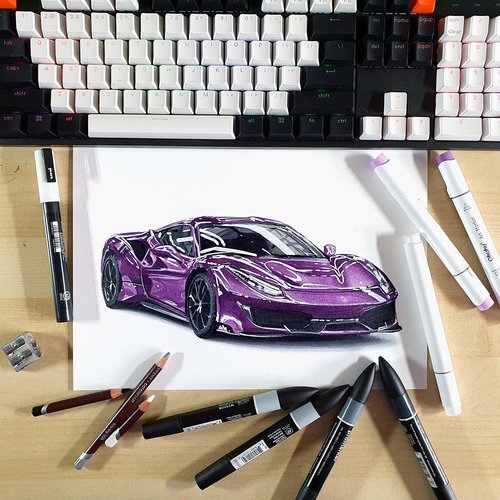
Articles You Might Also Like

.jpg__500x500_q85_crop_subsampling-2.jpg)


I love bringing cars to life with alcohol markers and colored pencils.
Whether you're just starting out or looking to improve your skills, I'm here to help!
Click here to learn more about me.


Add a comment
Comments
Really nice! I'm 13 and I have never drawn cars this realistic. Thanks to this, I finally drew one this realistic.