How To Draw A Marigold - Simple & Realistic Step-By-Step Guide
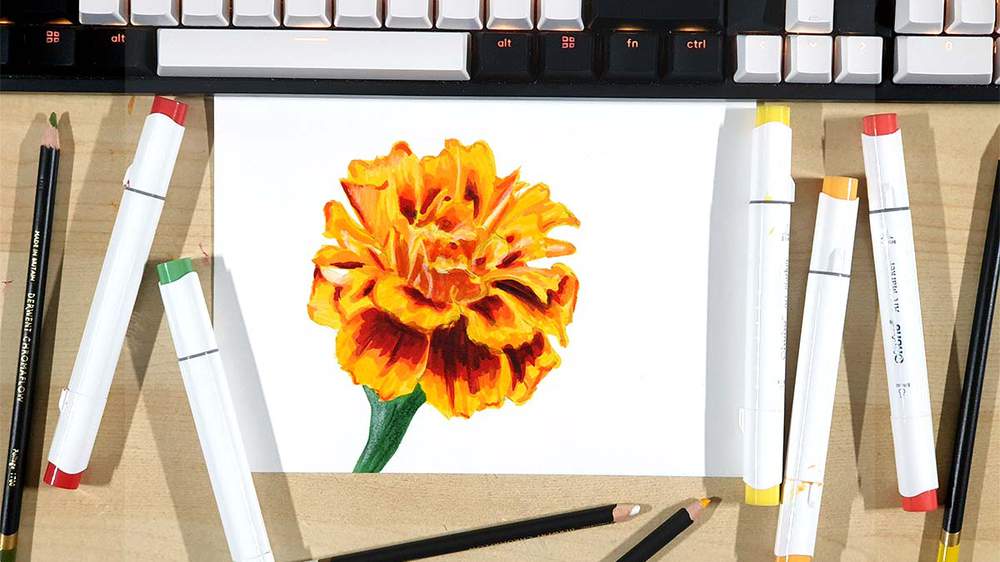
Want to draw a marigold but don't know how to?
In this tutorial, I'm going to show you exactly how to draw a marigold.
I've broken the drawing process up into simple and easy-to-follow steps, so you can easily make your very own marigold drawing.
Let's get started!
Disclaimer: In the name of full transparency, please be aware that this blog post contains affiliate links and any purchases made through such links will result in a small commission for me (at no extra cost for you).
The Drawing Supplies I Used To Make This Drawing
To make this marigold drawing, I used a combination of alcohol markers and colored pencils.
I used the Ohuhu Honolulu markers in the colors G470 Pine Tree Green, Y070 Acid Yellow, YR170 Chrome Orange, R070 Agate, R180 Bright Red, and YR172 Tiger Lily.
If you're on a tighter budget, these Caliart markers seem like a good and cheap alternative.
I used the Derwent Chromaflow pencils to add some details. To do that, I used 2400 White and 2300 Black.
And I made this drawing on my favorite marker paper: Canson Illustration Manga. I cut one sheet of paper in half to make it A5-size.
The Reference Photo I Used For This Drawing
To make this drawing, I used this reference photo of a beautiful marigold on Unsplash.

How Do You Draw A Marigold?
To draw a marigold, you first sketch the basic outline. Then, you sketch the petals and the stem. Next, you color the marigold with markers, building the colors up from light to dark. And to finish it off, you add a few details with colored pencils.
Step 1: Sketch The Basic Outline Of The Marigold
To make sketching a marigold a bit easier, I like to first create a basic outline of the flower.
I start by marking the top, right, left, and bottom edges.

Based on these markings, I sketch a rough outline.
The marigold isn't perfectly round. The outline consists of a bunch of straight lines as the tips of the flower are quite straight.
My rough outline sketch looks like this:

Step 2: Sketch The Petals Of The Marigold
With the basic outline now in place, it's a lot easier to sketch the petals of the marigold more accurately.
I started by sketching the bottom petals first as they have simpler shapes and are less dense.
I looked at the reference photo and tried to base the placement of the petals on the rough outline.

Next, I added the petals directly above using the same method.
Some petals have quite a complex outline. For those you can first sketch the basic shape of the petal, and then add the details and ridges.

I continued this until I had sketched all the petals.
I also sketched the base of the flower.


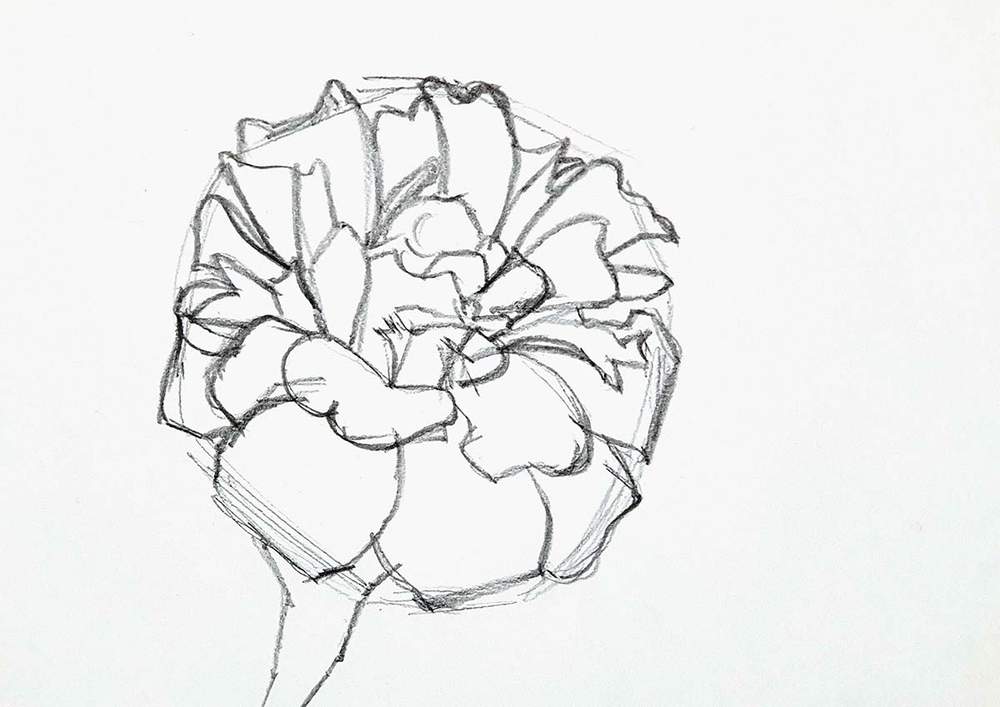
Your sketch doesn't need to be perfect. Marigolds can look a thousand ways and still look like marigolds. Don't worry too much if your petals don't look like the ones in the reference or if some don't fit.
Step 3: Color The Marigold With Markers
Now that the sketch is done, we can start coloring the marigold.
But before that, I like to lighten my sketch with an eraser. This prevents my sketch from showing through the marker ink.
After that, I colored the flower with Y070 Acid Yellow and the stem with G470 Pine Tree Green.

Next, I used YR170 Chrome Orange to start adding some depth to the marigold by coloring the second-lightest parts.

After that, I used R070 Agate to add some more depth and start building the shadows up a bit. I used this color more towards the base of the petals while leaving most of the tip lighter.
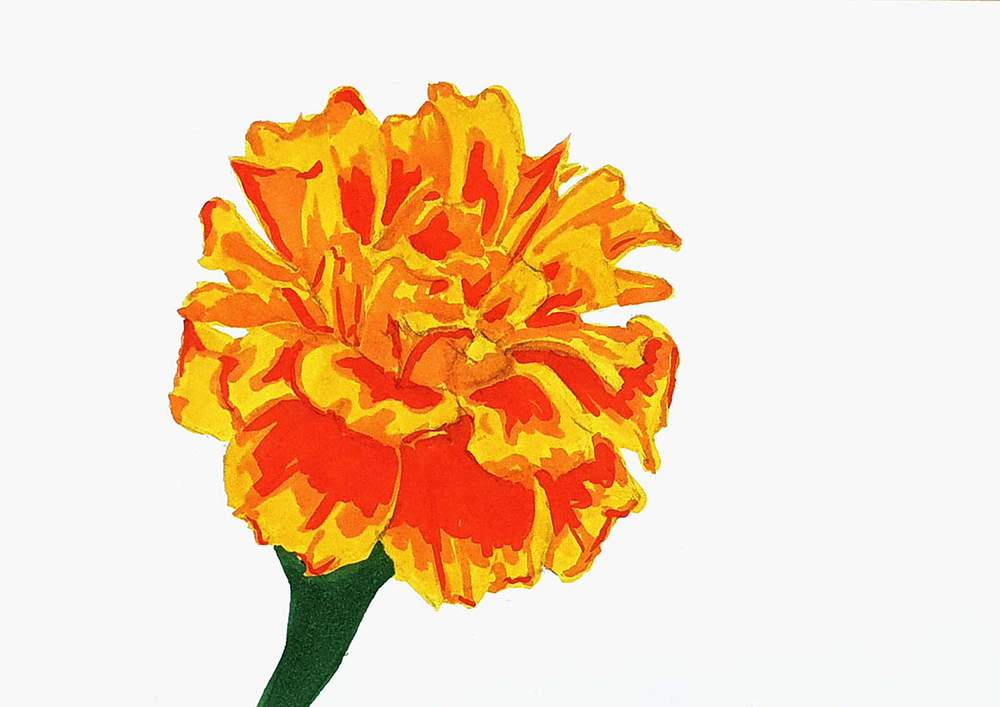
Lastly, I used R180 Bright Red to color the darkest bits of the petals.

Step 4: Add Details To Your Marigold Drawing With 2 Colored Pencils
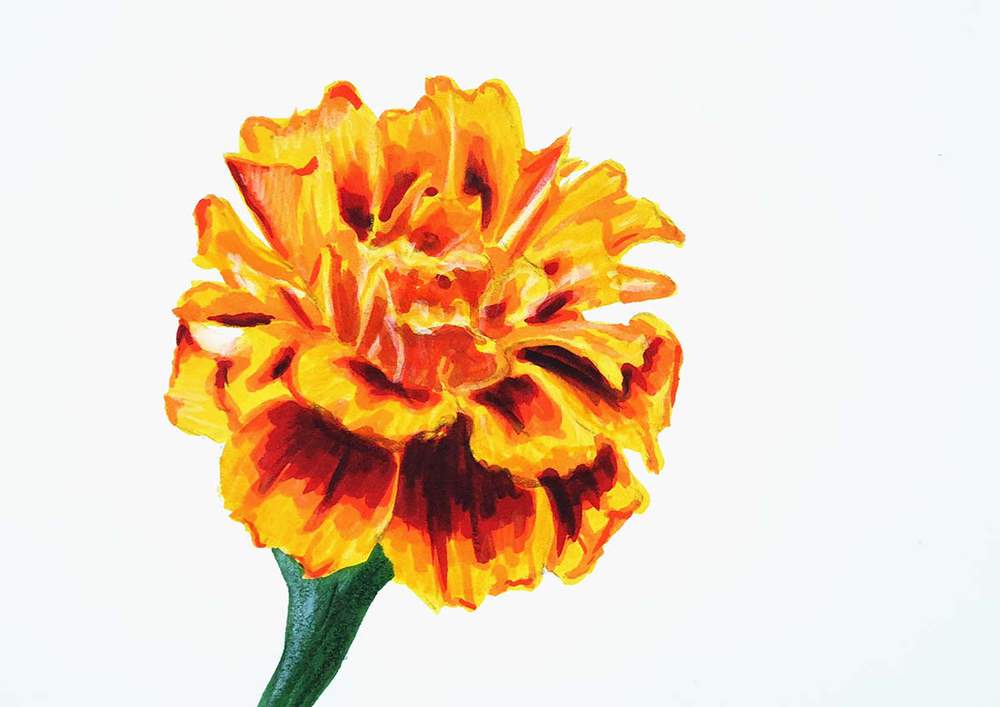
After that, I used a black and a white colored pencil to add the details.
I used the black to add some ridges to the dark parts of the petals by coloring lines starting from the base of the petals and fading out toward the tip.
I mostly did this to the bottom few petals.
I also used the black pencil to add some shadow to the right side of the stem. I made it a bit textured by adding dome darker lines.
And I used the white colored pencil to highlight some of the edges of the petals. I did this mainly in the center of the marigold.
I also used the white pencil to highlight the left side of the stem.

Step 5: Add Some Shadows In The Center Of The Marigold
When looking at it for some time, I thought there was something missing.
The center didn't look how I wanted it to.
So I added some more definition to the petals there by adding a shadowy yellow color to the underside of the petals while leaving the edge lighter yellow.
This helped a lot and made it look so much better in my opinion.
And That's How I Drew This Marigold (And You Can Too)
I hope you enjoyed this tutorial and were able to follow along!
If so, let me know how it went and what parts you found difficult.
Thank you and I'll see you in the next one!









Be the first to comment!
Comments
There are no comments yet.