How To Draw A Hibiscus Flower - Super Simple Step-By-Step
In today's flower drawing tutorial, I'll show you how to draw a simple yet realistic hibiscus flower.
Each step is detailed and easy to follow so you can make your own hibiscus flower drawing.
Let's get started!
Disclaimer: In the name of full transparency, please be aware that this blog post contains affiliate links and any purchases made through such links will result in a small commission for me (at no extra cost for you).
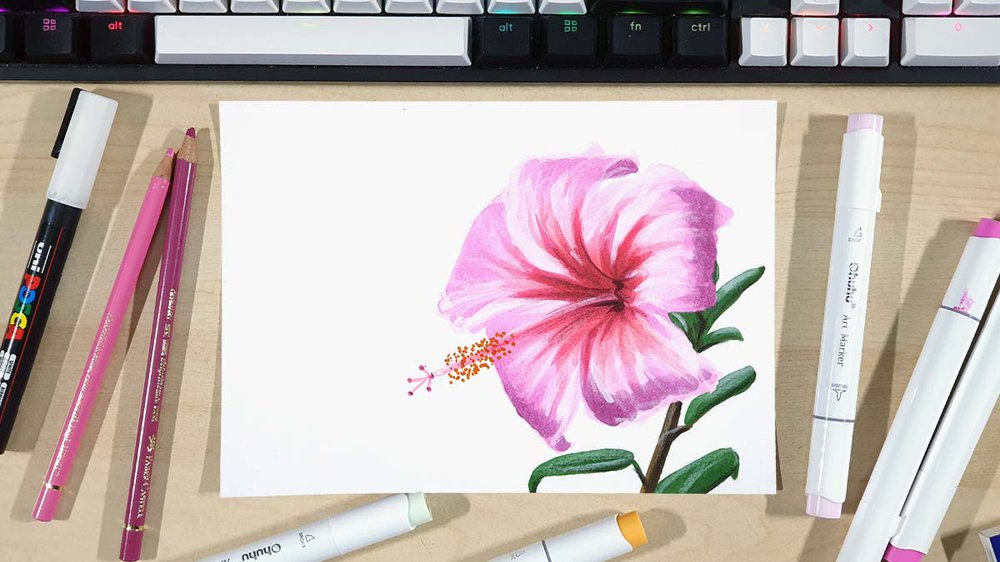
The Drawing Supplies I Used To Make This Hibiscus Flower Drawing
To make this hibiscus flower drawing, I used a combination of alcohol markers and colored pencils.
I used the Ohuhu Honolulu markers in the colors E450 Fennel Seed, E460 Military Olive, G470 Pine Tree Green, RV130 Queen Pink, R190 Bougainvillaea, RV320 Apricot Pink, RV250 Peony, V150 Mallow, V160 Deep Lilac, and YR172 Tiger Lily.
If you're on a tighter budget, these Caliart markers seem like a good and cheap alternative.
I used the Derwent Chromaflow pencils to add some details. To do that, I used 2400 White and 2300 Black.
And I made this drawing on my favorite marker paper: Canson Illustration Manga. I cut one sheet of paper in half to make it A5-size.
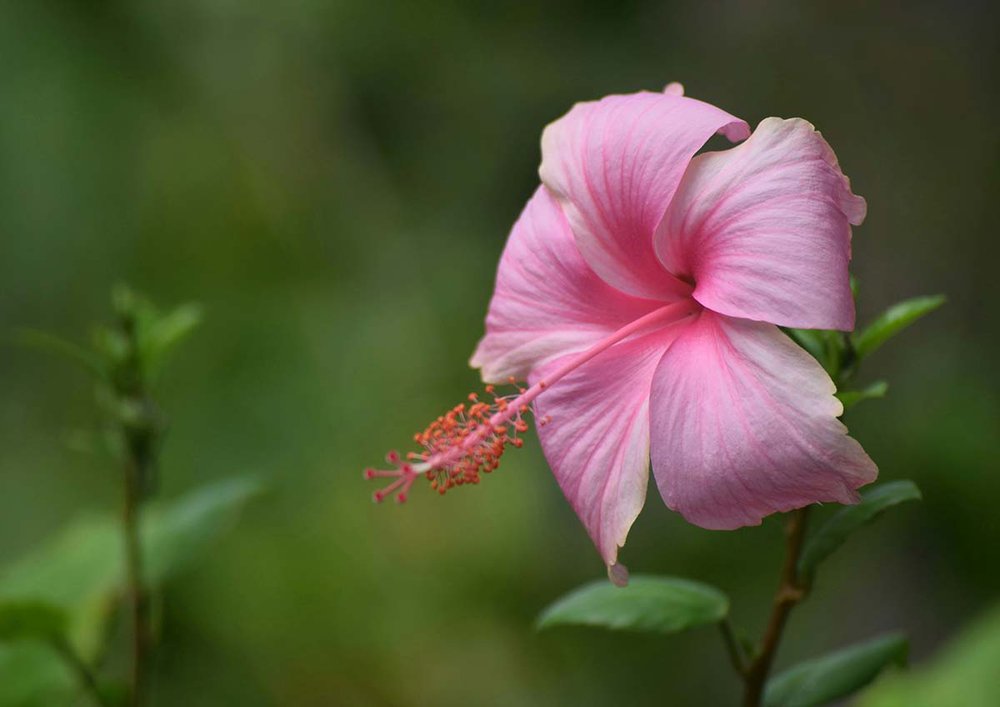
The Reference Photo I Used Of A Hibiscus Flower
When creating a realistic drawing of a flower, it's always handy to use a reference photo. This makes getting the flower to look like a hibiscus a lot easier.
To make the drawing in this tutorial, I used this beautiful picture I found on Unsplash.
How To Draw A Hibiscus Flower?
To draw a hibiscus flower, you first sketch the basic outline. Then, you sketch the petals and the stem with the leaves. Next, you color the hibiscus with markers, building the colors up from light to dark. And to finish it off, you add a few details with colored pencils.
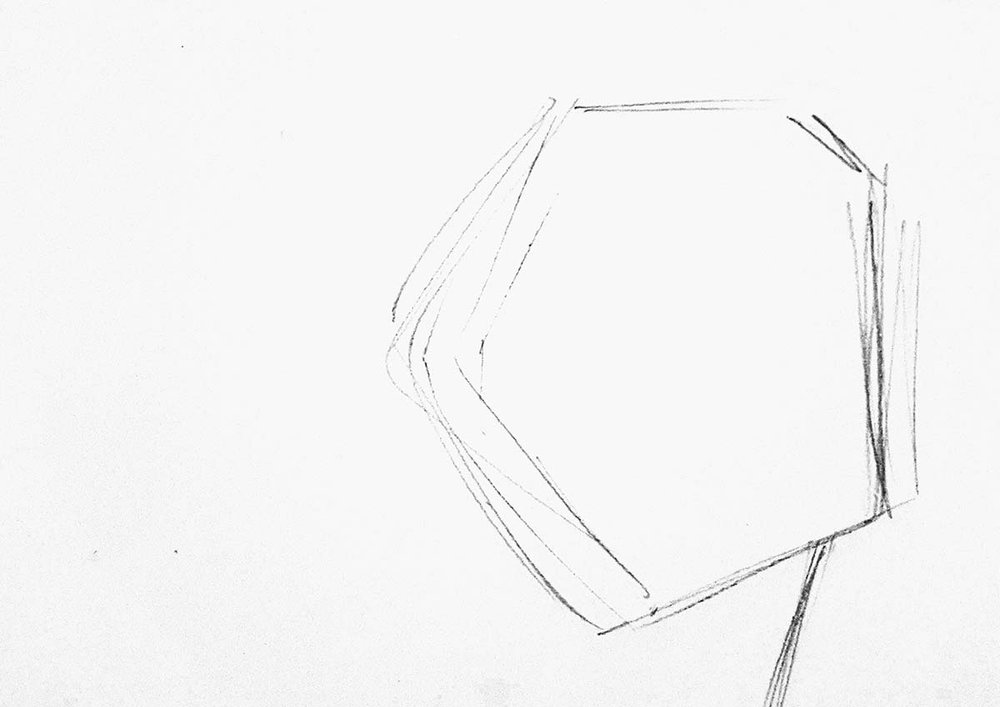
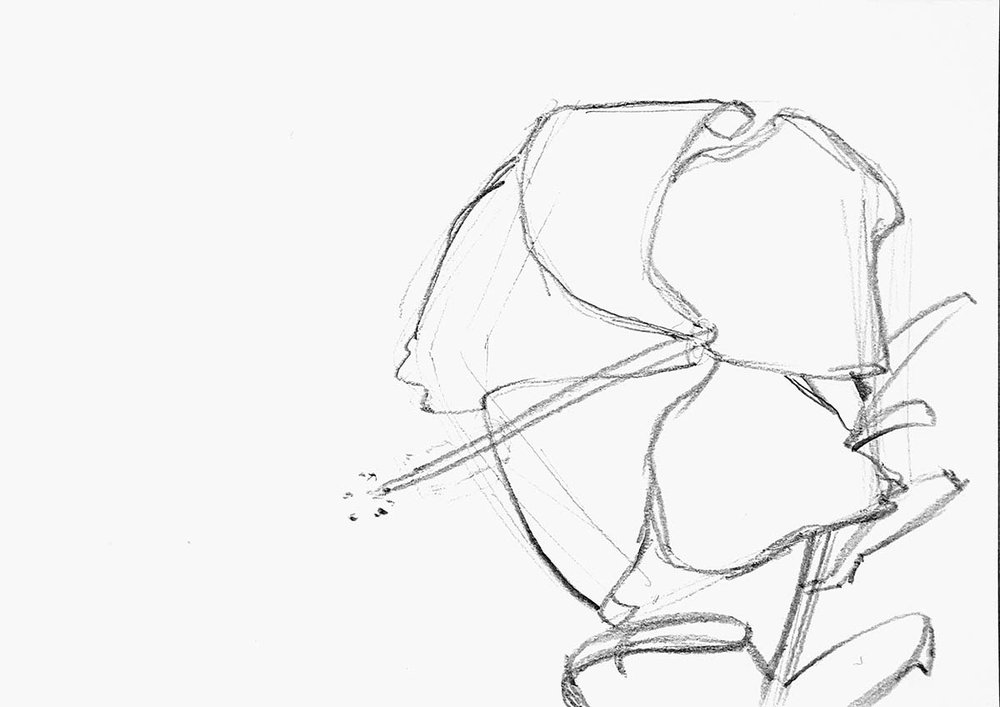
Step 1: Sketch The Basic Outline Of The Hibiscus Flower
To make sketching a hibiscus flower simpler, I like to sketch the basic outline first.
The flower itself has kind of a pentagonal shape.
I start by marking the top, right, bottom, and left edges.
Then I roughly recreated that pentagonal shape based on these points.
Next, I added the stem.
Step 2: Sketch The Hibiscus Flower And The Stem
With the basic outline now in place, it's a lot easier to sketch the petals.
I started by sketching the top one first as that one was in front of all the other petals.
I first marked the center of the hibiscus flower.
Then I marked the flat edge on the top of the petal and sketched two curved lines connecting it to the center.
I repeated this process for all 5 petals and then sketched the edges of the stem.
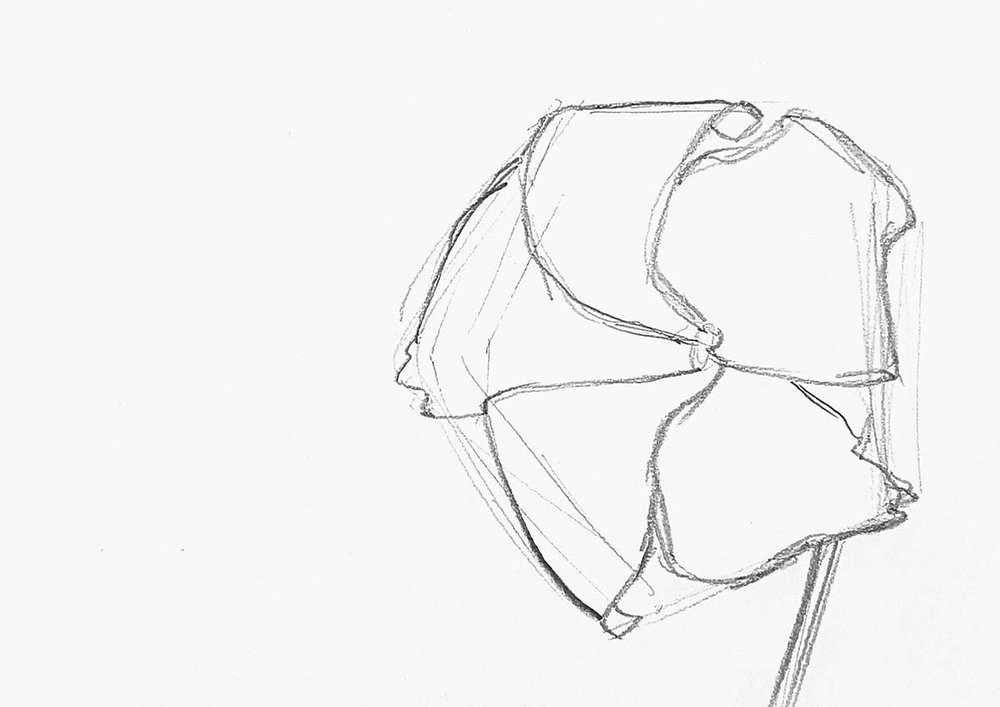
After that, I added the pistil (that long thing sticking out the center of the flower) and I added leaves on the stem.
Your sketch doesn't need to look like a perfect replica of the reference photo. Flowers like the hibiscus can look a million ways and still look realistic. The reference is just a rough guide.
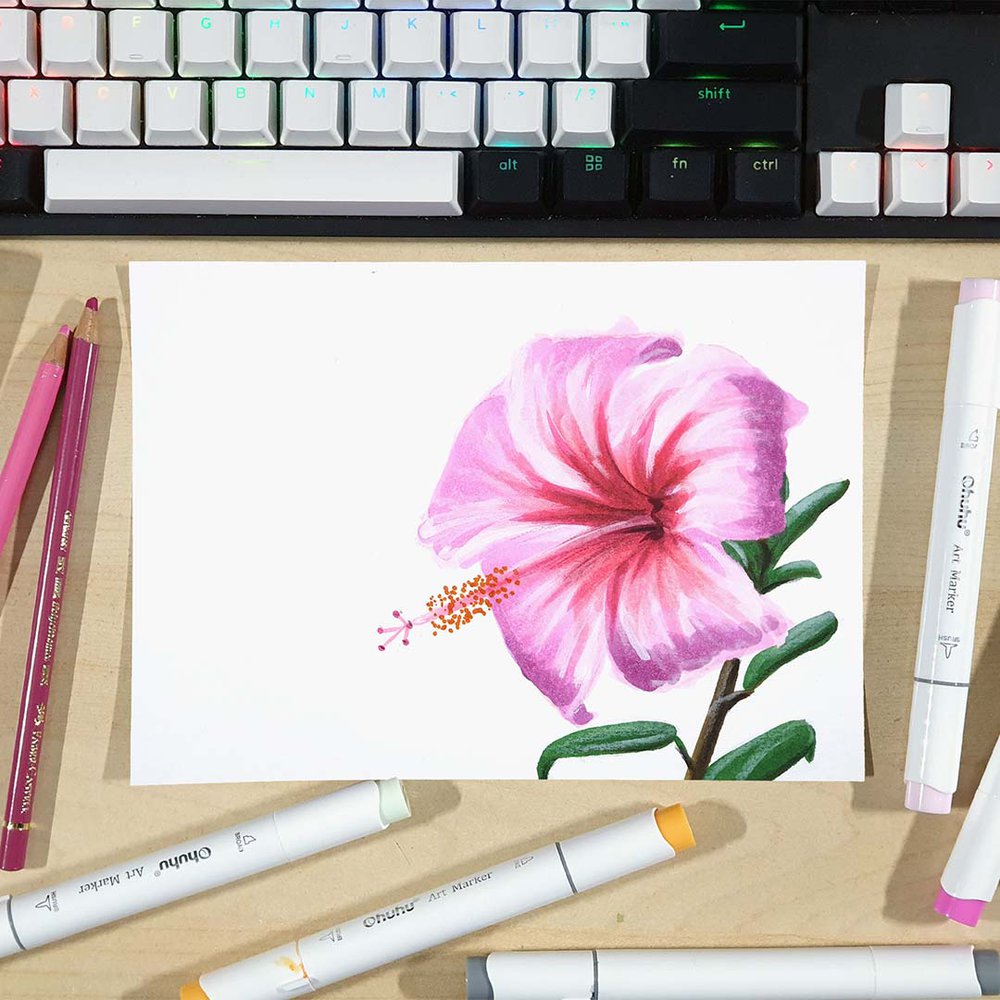
Step 3: Color The Hibiscus Flower With Markers
Now that the sketch is finished, we can start coloring the hibiscus.
But before we do that, you'll need to erase your sketch so it doesn't show through the marker ink in the end and ruin your drawing.
Now, we can start coloring.
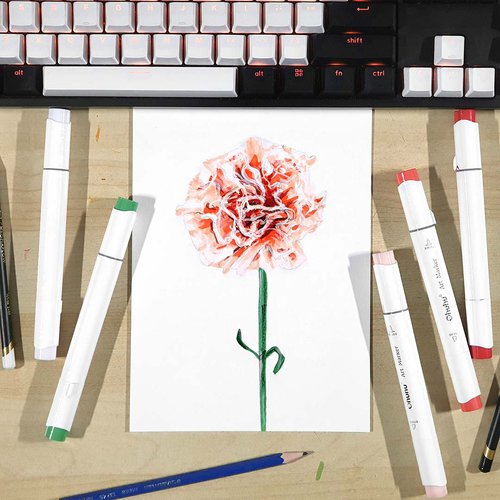
I started by coloring the whole flower with RV130 Queen Pink and I colored the stem with E450 Fennel Seed.

Next, I colored the leaves on the stem with G470 Pine Tree Green and I added a dark line on the bottom edge of them with E450 Fennel Seed.
And I colored the right edge of the stem with E460 Military Olive.

After that, I colored the center of the hibiscus with R190 Bougainvillaea. I started in the center and added lines following the shape of the petals. I used the brush nib to get a more soft effect.

Next, I did the same with RV320 Apricot Pink but this time sticking closer to the center.
I also added a dark pink edge on the bottom edge of the pistil and I added 5 dots on the end of it.

After that, I used V150 Mallow to add soft lines starting from the tip of the petals and pointing toward the center. I kept these lines very short to keep some light pink spacing between these lines and the darker pink ones we did before.

Then, I added some dark purple to the ends of the bottom and right petals and to the underside (the bit on the right of it) of the top petal. To do this I used V160 Deep Lilac.

Lastly, I add some deep pink to the center. Just a little bit. And for this I used RV250 Peony.
I also added a ton of dots toward the tip of the pistil using YR172 Tiger Lily.

Step 4: Add Details With 2 Colored Pencils
To finish the drawing of the hibiscus flower off, I added some details with a black and a white pencil.
I used the white pencils to add ridges on the petals and to add highlights to the left edge of the stem and the leaves.
I used the black pencil to add just a few light lines in the center of the flower. I also used it to add some dark shadows on the tips and bottom edges of the leaves on the stem.

That's How You Draw A Hibiscus Flower
I hope you liked my tutorial (and my drawing)!
Let me know how yours turned out and what parts you thought were difficult. This helps me improve tutorials like this one.
Thank you for visiting my tutorial and for following along!
More Articles You Might Like

Articles You Might Also Like

I love bringing cars to life with alcohol markers and colored pencils.
Whether you're just starting out or looking to improve your skills, I'm here to help!
Click here to learn more about me.


Be the first to comment!
Comments
There are no comments yet.