How To Draw A Fall Tree - Autumn-Colored Maple Tree Drawing Guide Step By Step
This guide is all about how to draw a fall-colored maple tree with falling leaves step by step from scratch, and is perfect for beginners.
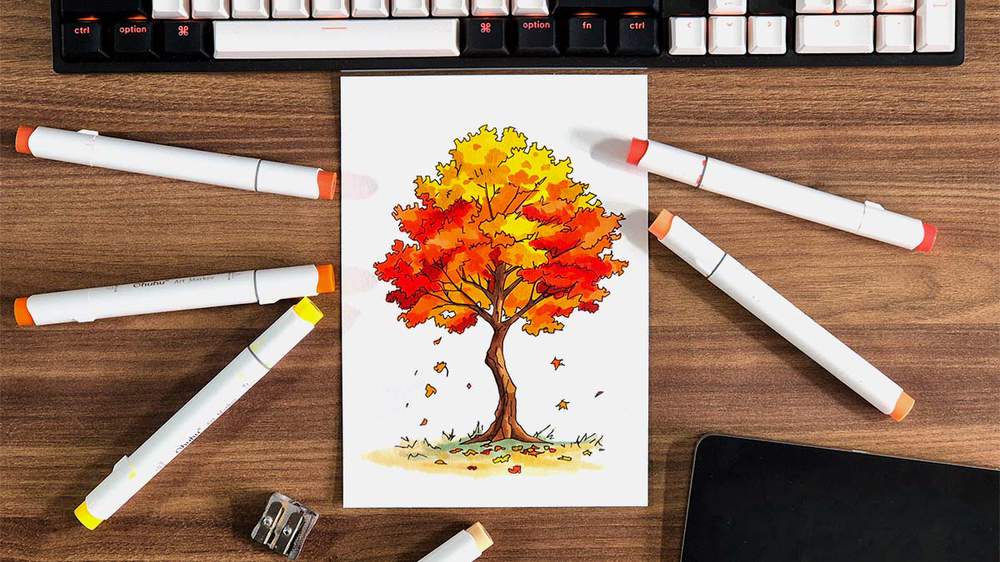
Want to create a fun and colorful fall tree drawing? In this drawing guide, I'll show you how to draw an easy fall tree step by step.
I'll show you the exact process of creating a fall-colored maple tree drawing, from sketching using basic shapes to outlining and coloring with markers, with plenty of guiding photos so you can follow along at your own pace.
Let's get started and create this beautiful fall tree together.
Disclaimer: In the name of full transparency, please be aware that this blog post contains affiliate links and any purchases made through such links will result in a small commission for me (at no extra cost for you).
In This Guide
- Drawing supplies & colors I used
- How to sketch a fall tree from scratch
- Outlining the fall tree
- How to color the fall-colored tree with markers
Drawing Supplies I Used For This Fall Tree Drawing
To sketch the fall tree, I used a regular graphite pencil with an eraser.
And I made this drawing on Canson Illustration Manga paper, which is my favorite paper for using alcohol markers on.
To outline the maple tree sketch, I used a black Stabilo Point 88 fineliner. But you can also use these Pigma Micron pens, which have a more premium feel and a wider range of sizes.
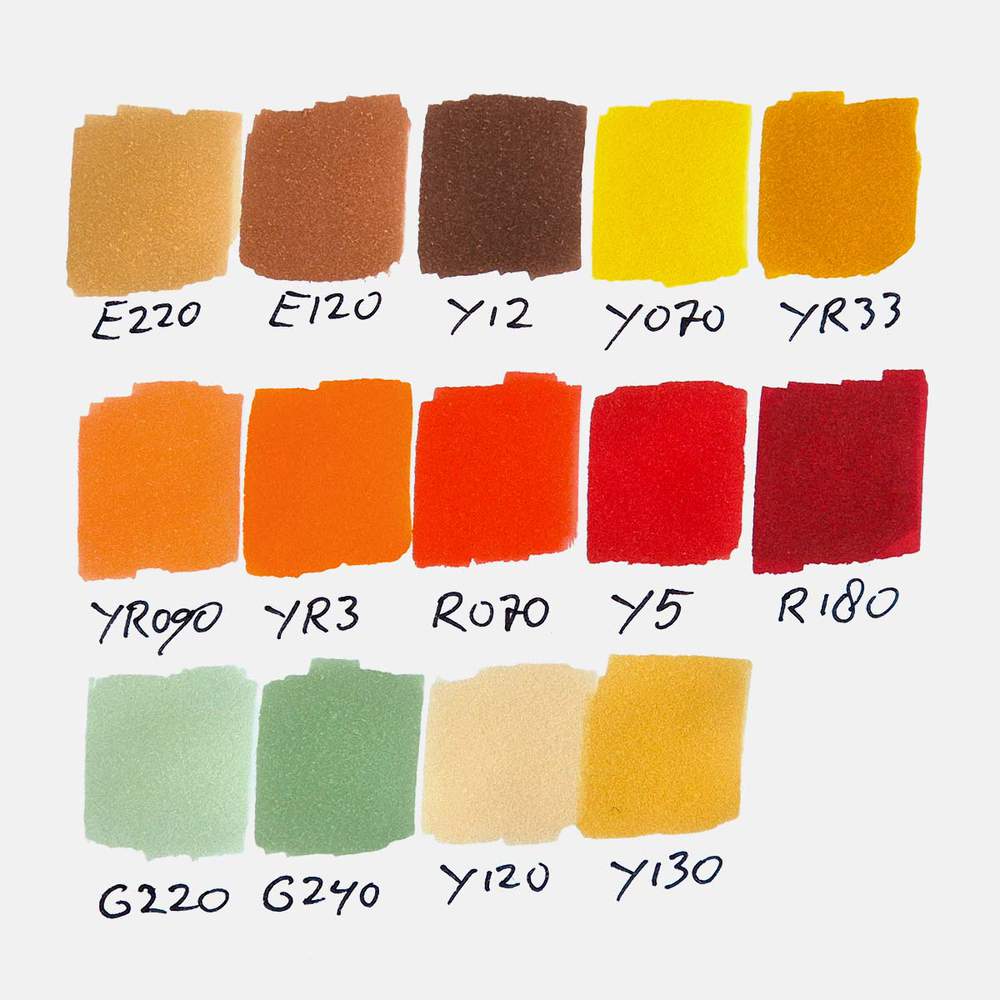
And to color this fall leaf, I used Ohuhu Honolulu markers. I used 14 colors in total: Sand (E220), Reddish Brass (E120), Mahogany (Y12), Acid Yellow (Y070), Melon Yellow (YR33), Peach Pie (YR090), Orange (YR3), Agate (R070), Rouge Orange (Y5), Bright Red (R180), Lime Green (G220), Beige Green (G240), Buttercup Yellow (Y120), and Mustard (Y130).
You can buy these colors separately or as part of the 320 set.
Below, I've added an image with all the color swatches so you can match your markers to the ones I used if you already own some.
How To Draw A Fall Tree Step By Step
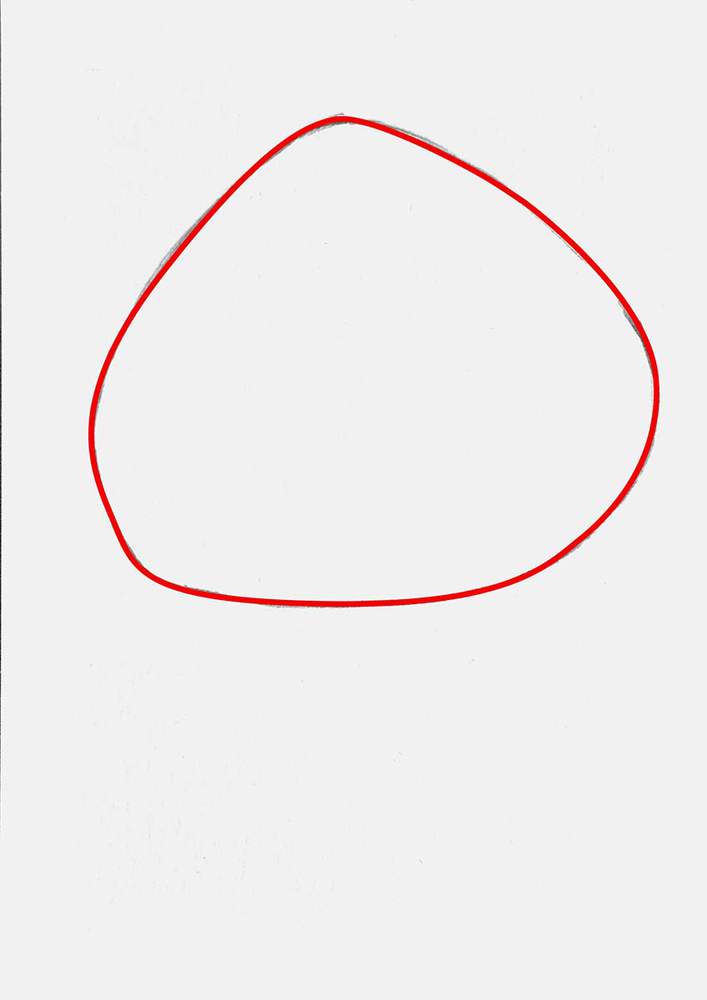
Step 1: Draw The Shape Of The Canopy Of The Maple Tree
The first step of drawing a fall-colored tree is to sketch the basic shape of the canopy.
You can make the canopy shape however you like. Trees are all different and have differently shaped canopies. Some are very round, others look more like a corndog. You can do whatever you want as long as you don't make your canopy a perfect geometric shape or perfectly symmetrical.
I made the canopy for my maple tree look like a blob shape sitting on the ground, making it wider at the bottom than the top.
When sketching your canopy, make sure to leave enough space below it for the trunk of the tree.
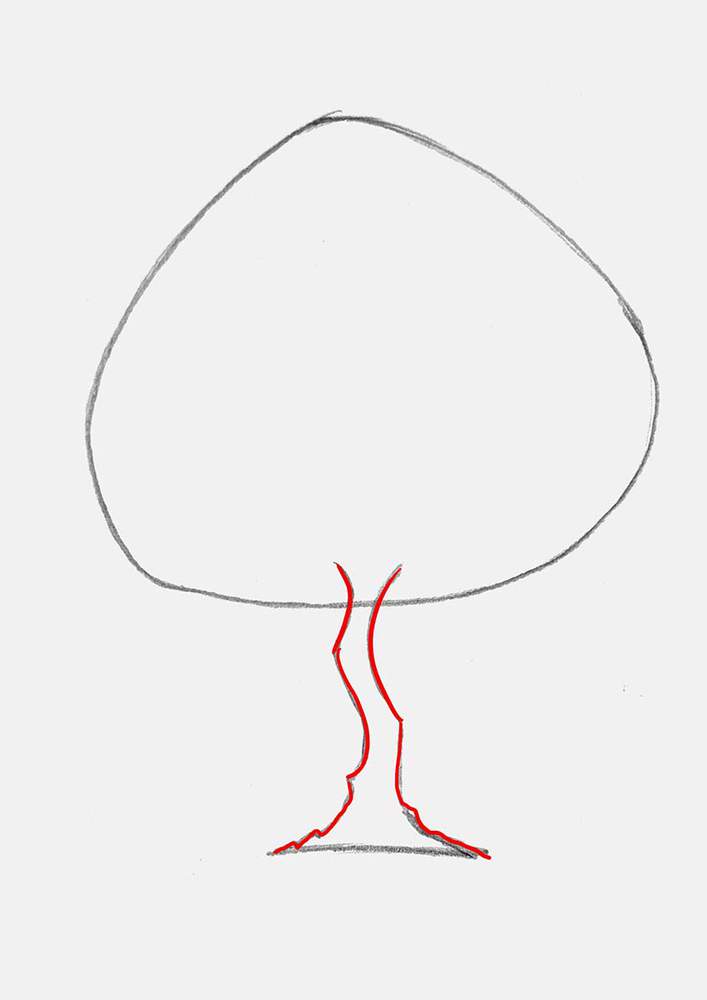
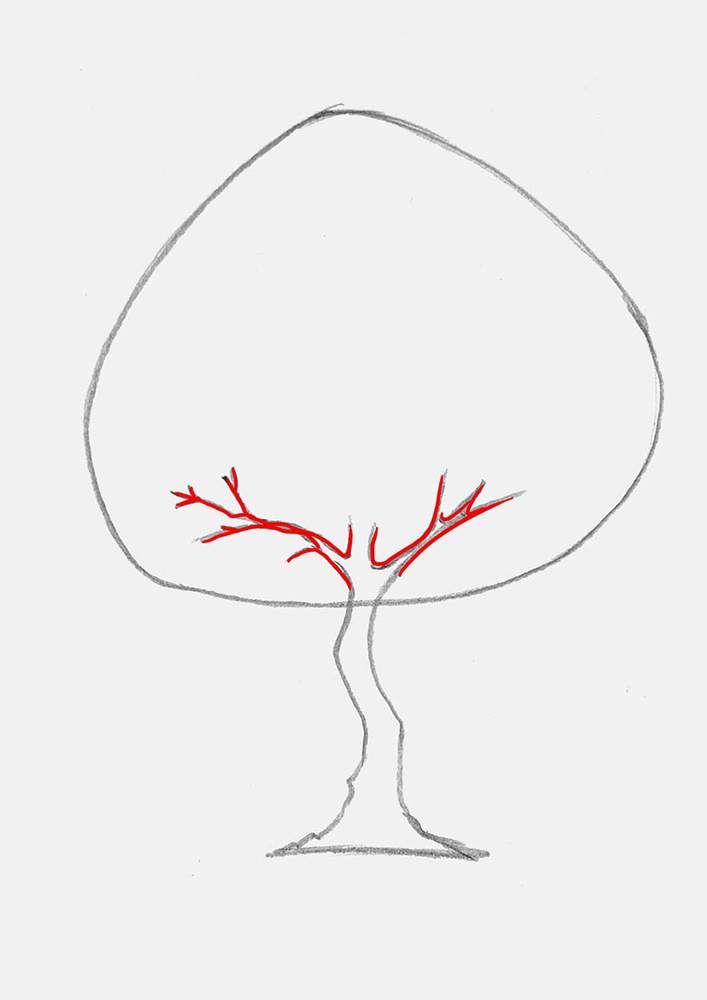
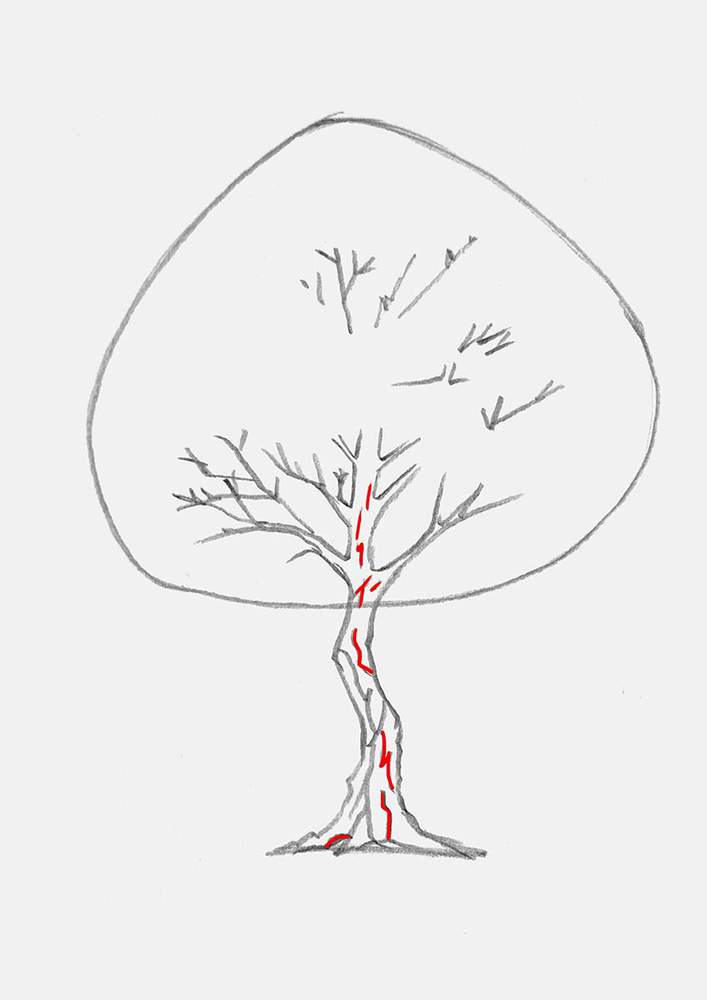
Step 2: Sketch The Tree Trunk & The Branches Of The Tree
After creating your unique canopy shape, we're going to draw the tree trunk connecting your cluster of floating leaves to the ground (to make sure it doesn't float away in the autumn storms, of course).
I started by marking out the base of the tree. It's just a straight, or in my case, a slightly curved line towards the bottom of your paper.

After that, I added both sides of the tree trunk.
When doing this, I made sure to add some bumps and sharp angles, especially on the starts of the roots. I also like to make my trees look older and a bit crooked, instead of perfectly straight. But if you want to make yours perfectly straight, go for it. There are plenty of trees that grow straight up.
With the outline of the trunk done, I added some branches that you can see through the leaves and some that are already bare.
When drawing the branches, make sure not to make them symmetrical. Make them look organic by making them twist, giving them sharp angles, and making them wiggle about and split into smaller branches.
Also, another thing to keep in mind is that the branches are more visible at the bottom of the canopy and less at the top. Unless, of course, if you want to add a dead portion to your tree.
With the first branches in place at the bottom, my sketch looks like this:
Next, I added some more branches that go in all sorts of directions and overlap with some that I sketched before. This time, I added more branches to the left than to the right. No reason, just to spice things up a bit.
I did, however, add this one tiny branch on the middle right.
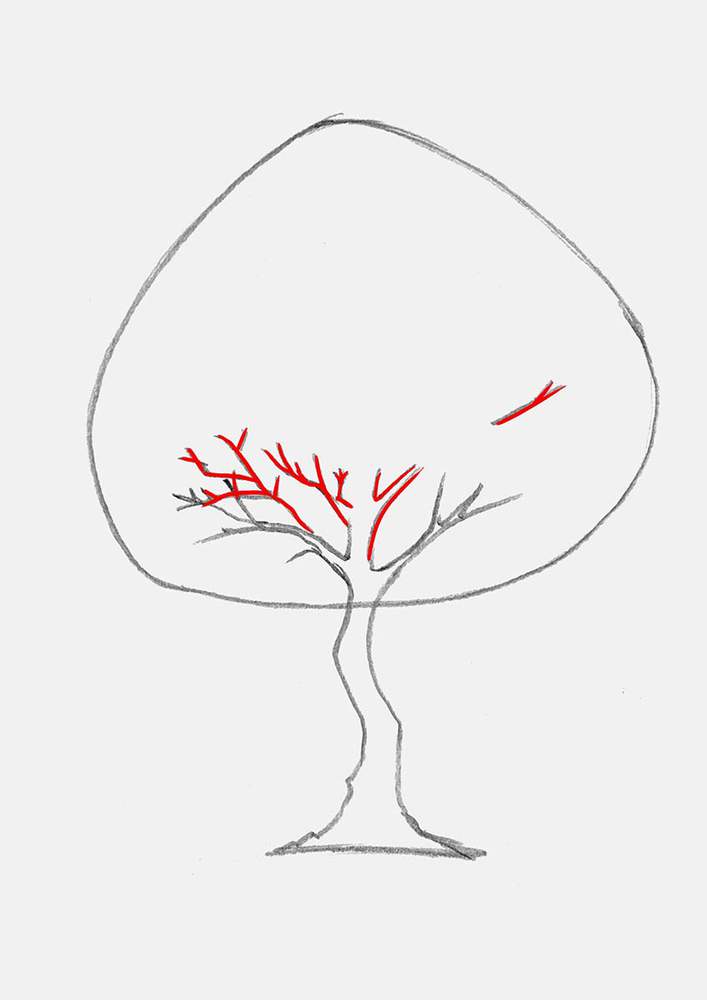
And to complete the branch structure, I added two tiny ones to the middle trunk bit, and some to the top right to balance it out a bit with the bottom left.
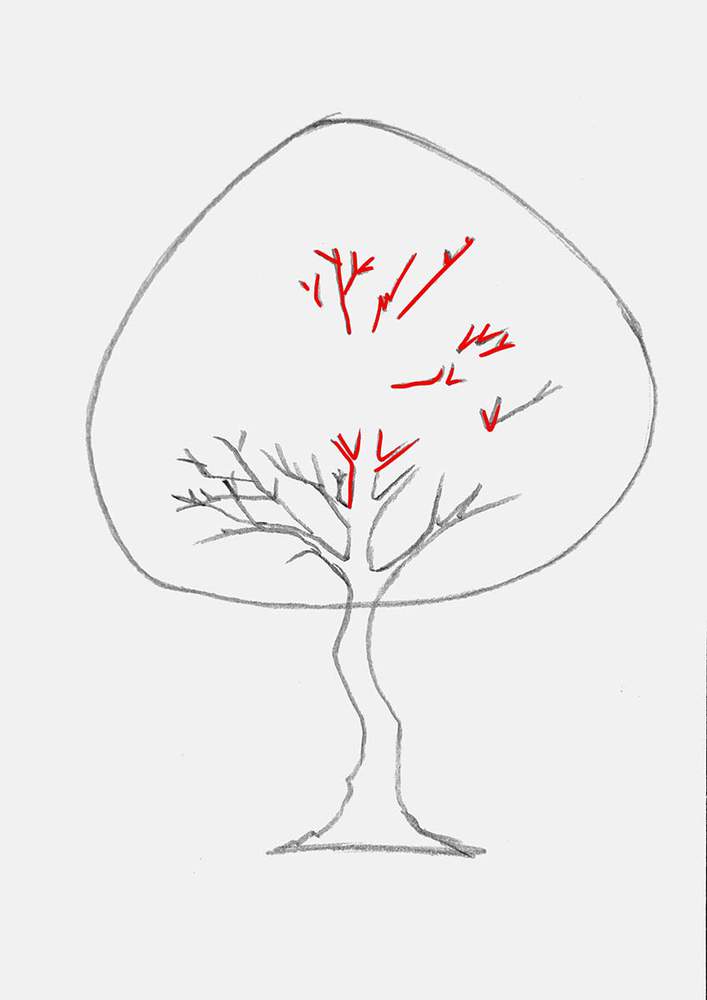
Lastly, I added the bark texture to the tree trunk.
I first added a few of the bigger texture lines, and I added another root start in the middle left of the base.
With the tree bark texture lines, I made sure to make them zigzag, wiggle, and go all over the place to make them look organic. But don't overdo them, just add 2 or 3 longer/bigger ones for now.
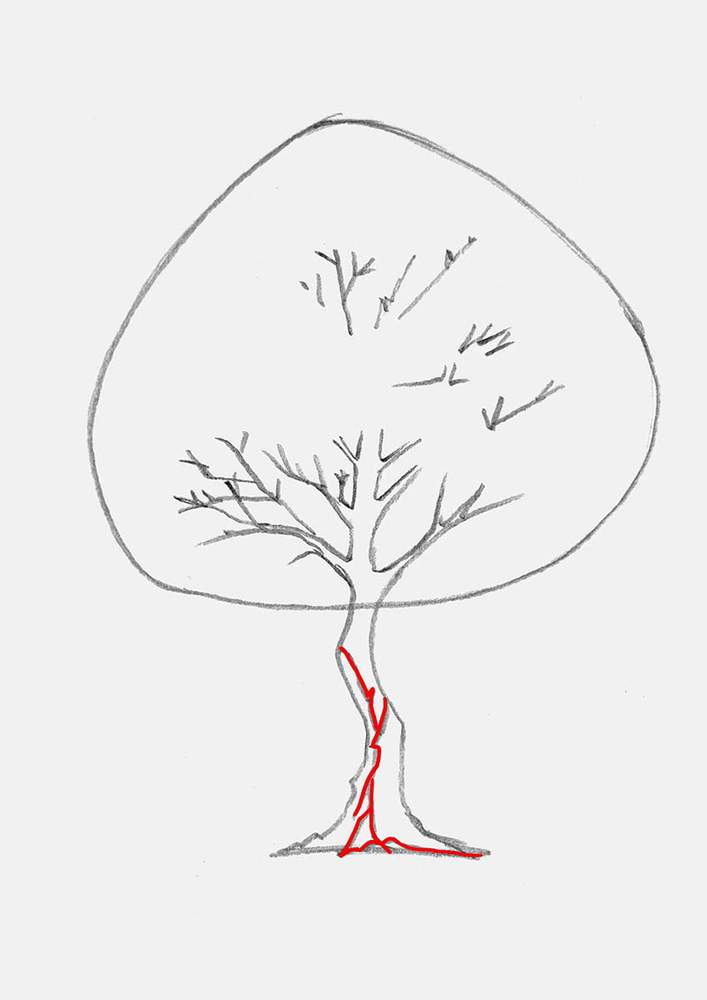
To complete the tree bark texture, I added some small wiggle lines and just small straight lines spread over the remainder of the trunk. I made mine more prominent towards the bottom of the trunk and less detailed and smaller towards the top.
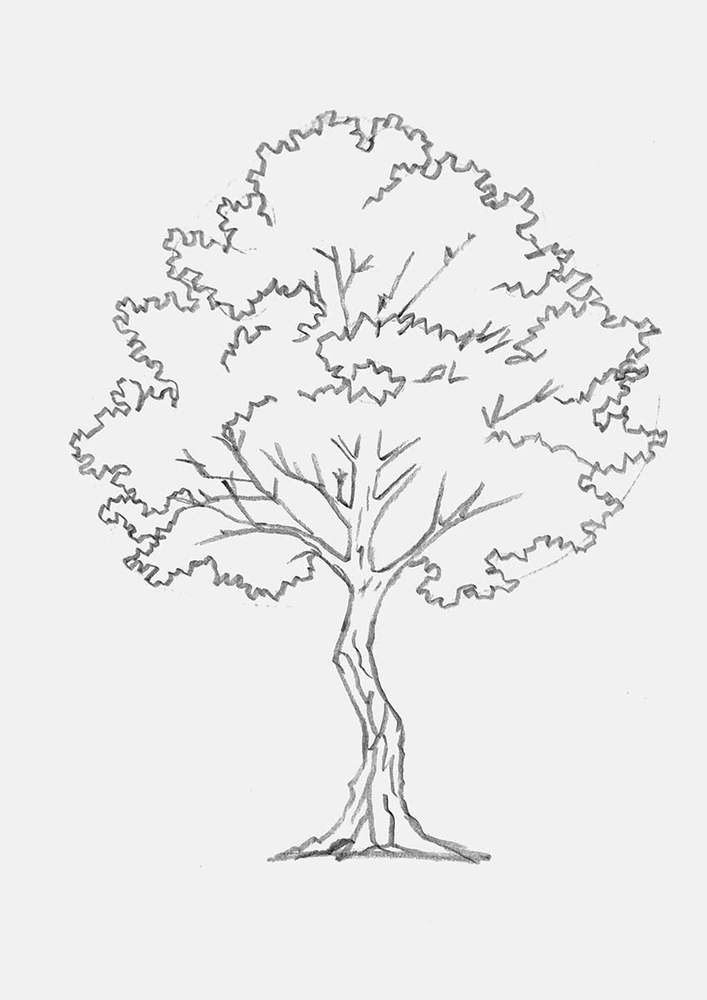
Step 3: Create The Shapes Of The Leaf Clusters
With the tree trunk and branches now all in place, I focused my attention on the blob-shaped canopy. It can't stay like this.
To start, I marked out all the leaf clusters I wanted to create. Honestly, I was just winging it. I did make sure to make all the clusters shaped differently while maintaining some sort of balance that felt right.
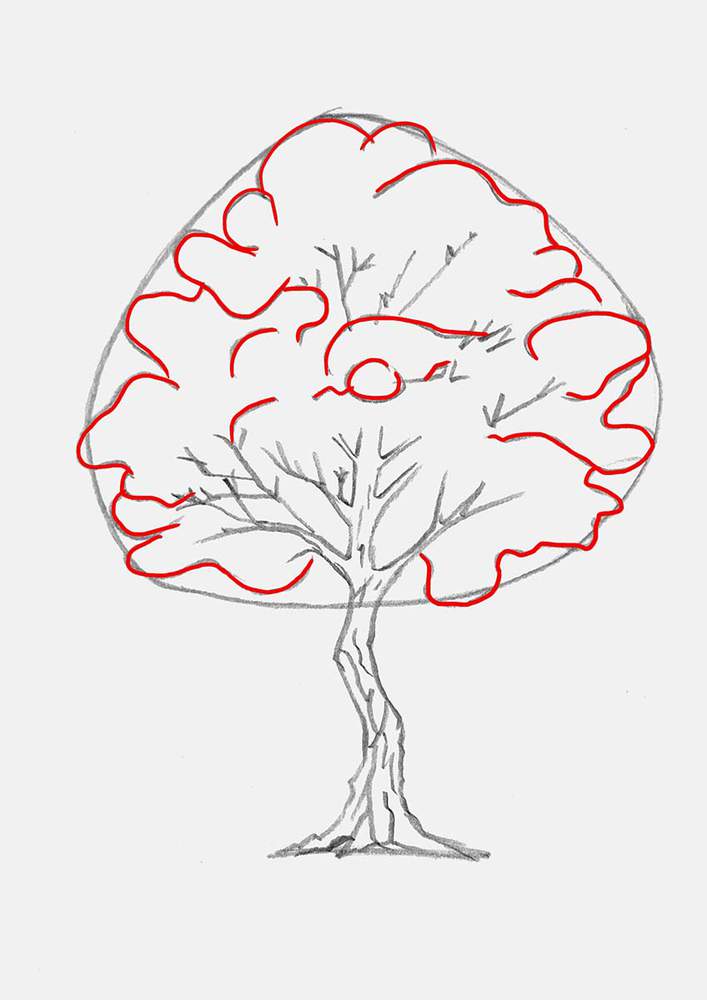
It does look a lot like a cloud right now, but don't worry, these are just guiding lines for what's next.
Step 4: Draw The Leaf Texture On The Edges Of The Leaf Clusters
Usually, when I draw trees, I would just go in with my markers and shape it from there, but with this tree, I wanted to try something else. I wanted to more closely replicate the leaf structure of a real tree, similar to the one I can see right now when I look out of my window.
To do this, I first lightened the guiding lines for the canopy and the leaf clusters.
Then, I added these zigzaggy lines all around the edges of the leaf clusters we made in the previous step.
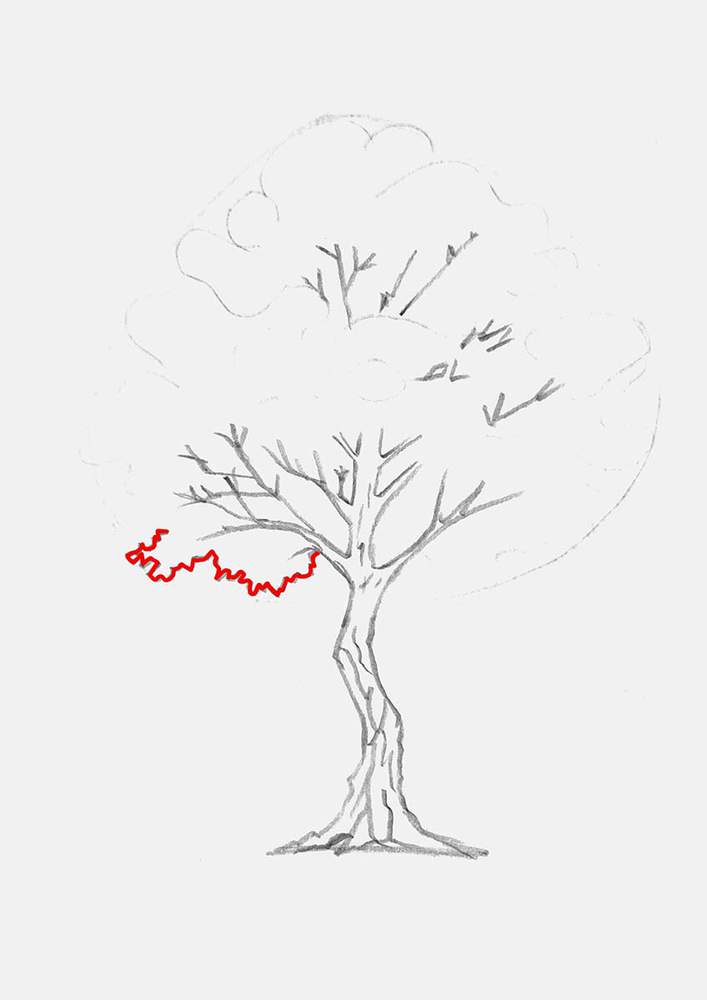
In this image, you can see more clearly how I shaped the lines.
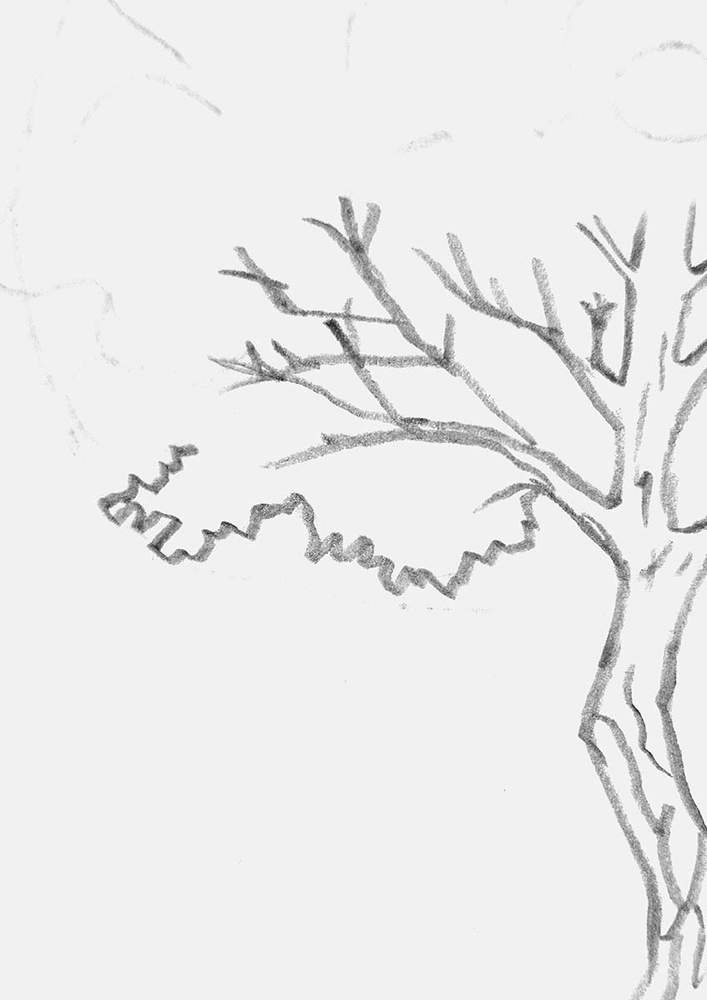
To make this texture, I just scribbled about, roughly following the guiding lines, but not too closely to make it look organic and tree-shaped.
I continued adding these lines all over the outlines of the leaf clusters until they were done.
I really like how this turned out, and it already looks so much better than my previous tree drawings!
To complete the foliage of this autumn tree, I added some details all over it, again using the squiggly lines.
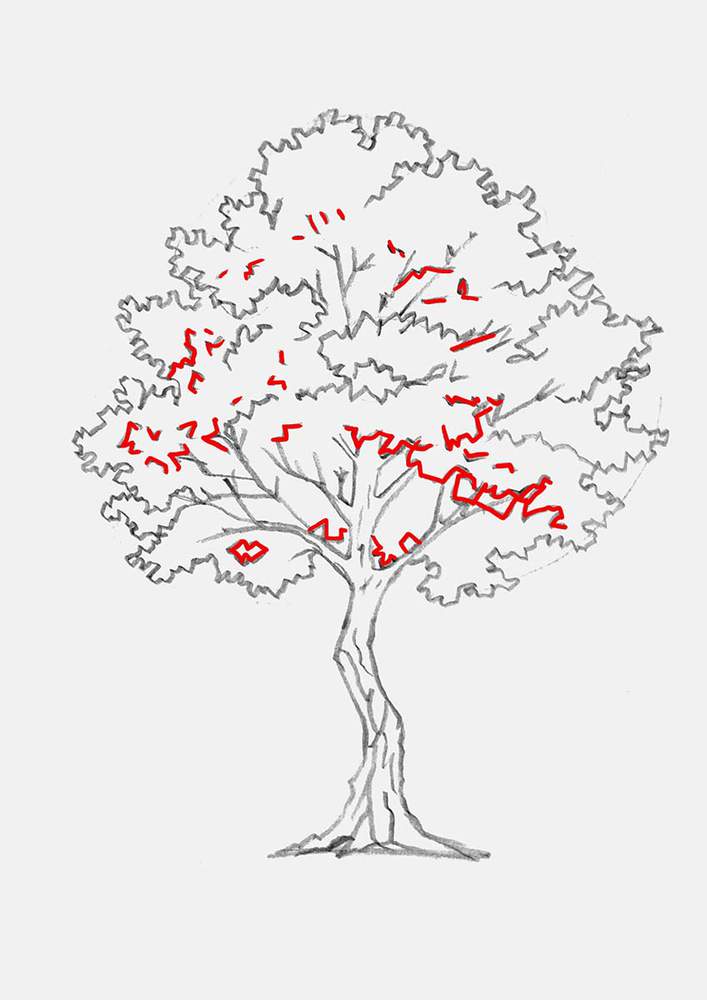
And now the tree sketch is all done, kinda.
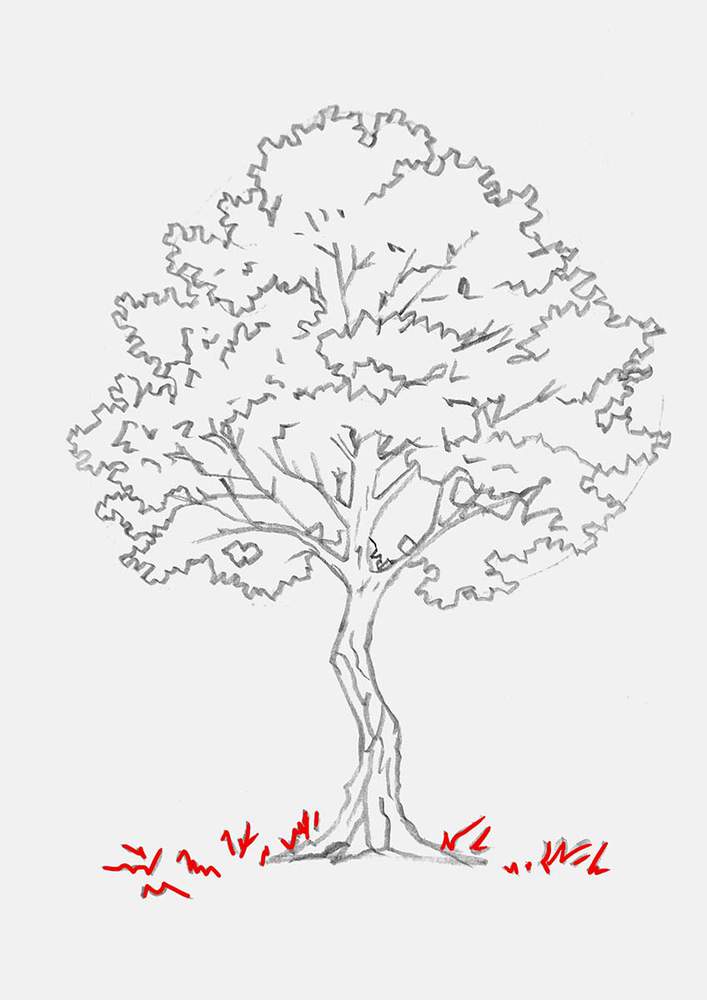
Step 5: Add Some Grass To The Base Of The Fall Tree
For this tree drawing, I wanted to add a bit of ground too, so that it looks like it's firmly planted in the ground and not just floating in space.
To do this, I added a few blades of long grass around the base of the tree while making sure to leave some space below it for what's next.
I made some bits of grass more zigzaggy and others more straight or slightly curved. Honestly, you can do whatever and it will probably look good.
Step 6: Add Falling Leaves & The Leaf-Covered Ground
Now, we're going to make our maple tree look more like it's fall. And to do that, we're going to add a bunch of falling leaves and some leaves covering the ground below the tree.
When sketching the falling leaves, I made sure to vary them in size. Some are smaller and others bigger. I also made sure to add some lobes and pointy bits to the leaves since these are supposed to be maple leaves.
I did the same for the leaves lying on the ground. I made some of them smaller and simpler in shape, and others bigger and more detailed with points and lobes.
Also, one important thing to note, the falling leaves have more normal proportions, but the leaves lying on the ground are a bit squished because they are lying flat on the ground. This is one small detail, but it will make your drawing look a lot better.
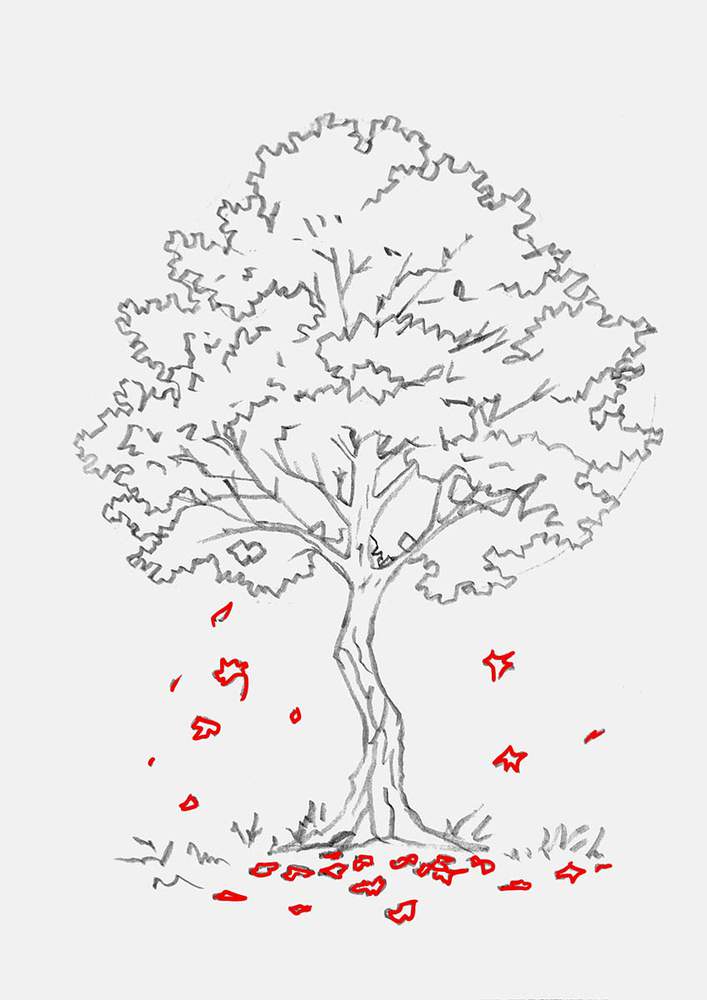
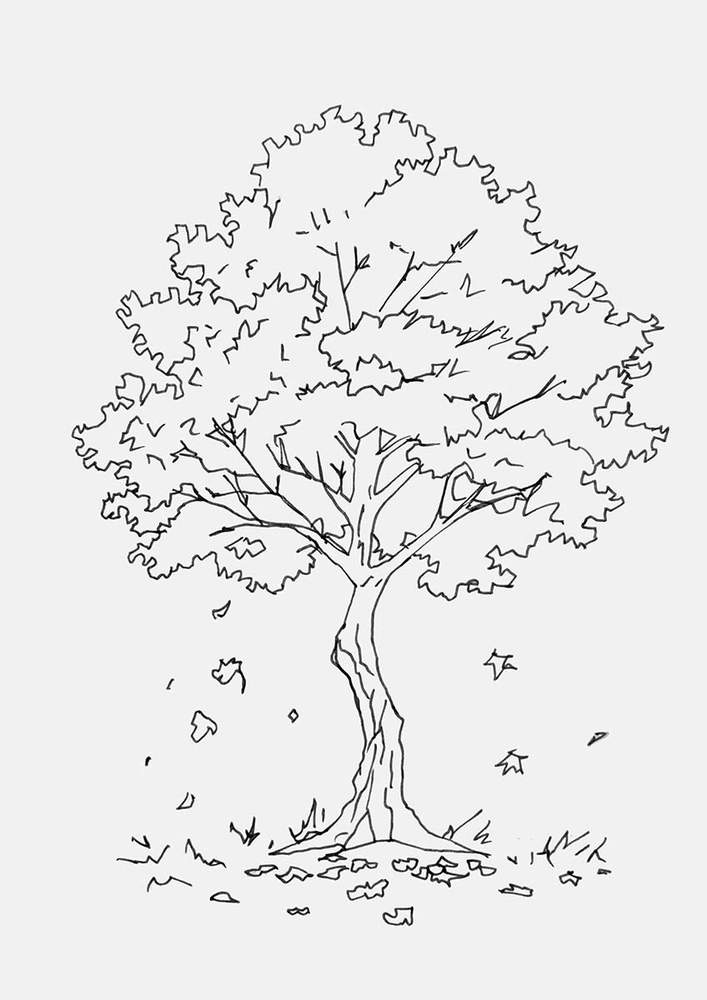
And with these falling leaves added, the fall tree sketch is done!
Step 7: Outline The Fall Tree With A Fineliner
To prepare the sketch for coloring and to make coloring the fall tree drawing with markers a little easier, I like to outline my sketch with a black fineliner.
Any fineliner will do the job as long as you make sure the ink doesn't smudge when coloring over it with alcohol-based markers. You can easily test this on a scrap piece of paper if you already have a fineliner.
What I like to use is this Stabilo Point 88 fineliner or these Pigma Micron pens. When using the Microns, you need to give the ink enough time to fully dry, which is about 20 minutes.
To outline the maple tree drawing, I just traced over the sketch lines, and since this tree is organic, you don't need to worry about super-straight, perfect lines. Wiggly lines give your tree drawing more life.
After outlining my drawing, I erased the sketch to reveal a clean outline of the fall tree.
Step 8: Color The Trunk Of The Maple Tree Brown
With the outline now done, we can color our fall tree drawing with alcohol-based markers, starting with the trunk.
I like to color the light parts first and then the darker ones.
To color the lightest parts of the maple tree trunk, I used a light brown called Sand (E220).
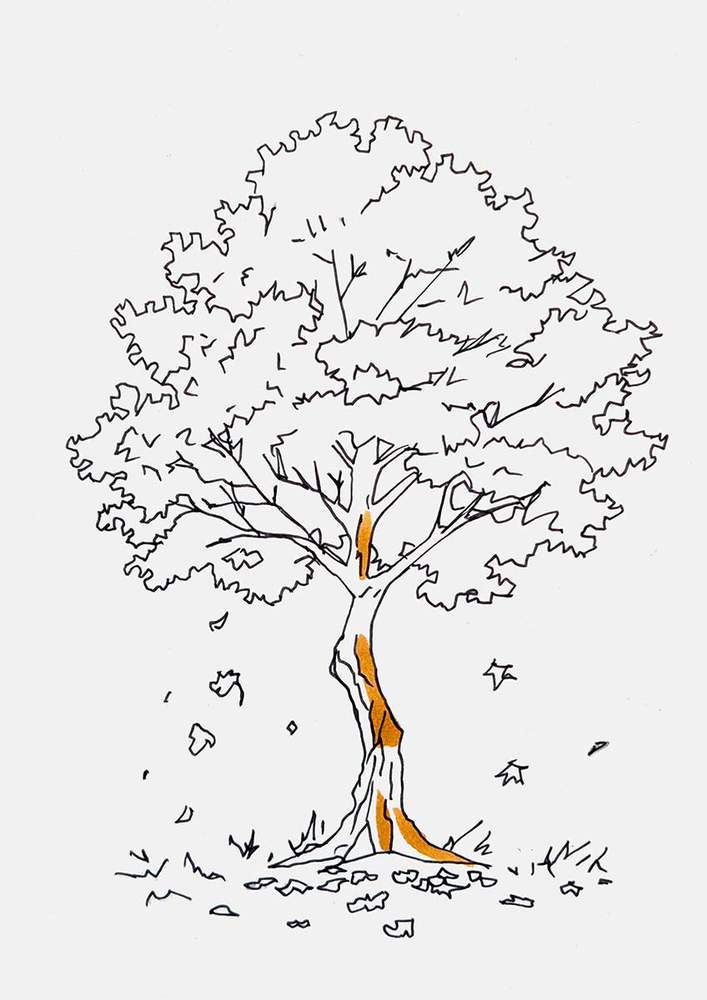
Next, I used a mid-tone brown called Reddish Brass (E120) to color all the midtones while leaving the darkest parts uncolored.
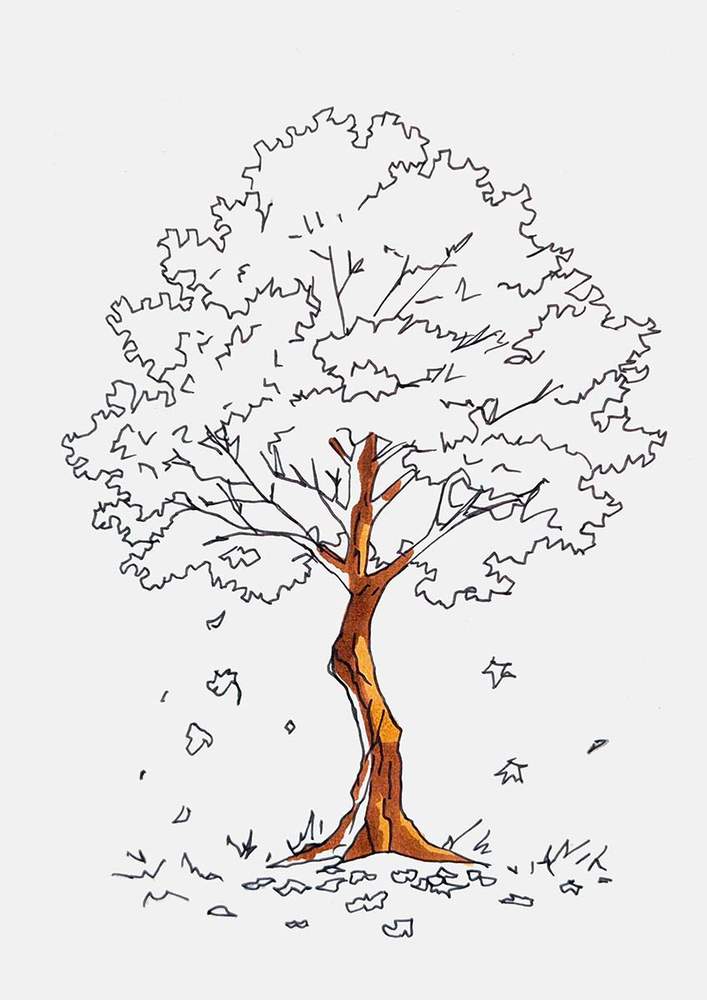
And to complete the tree trunk, I used a dark brown called Mahogany (Y12).
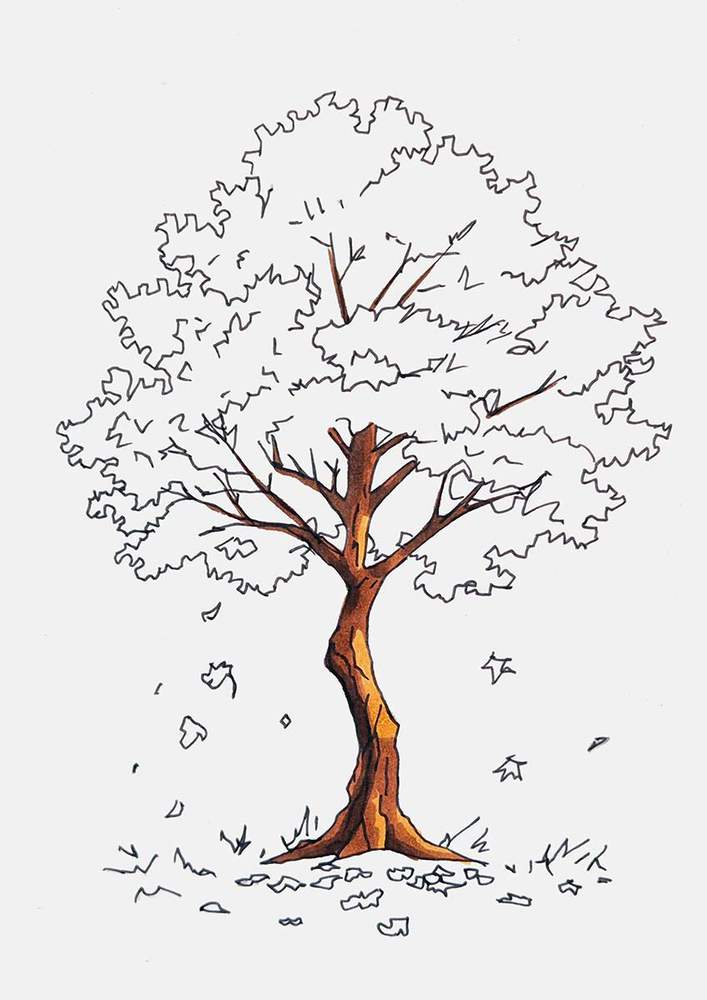
Step 9: Color The Autumn-Colored Leaves With Markers
With the tree trunk all done, we can start to make this maple tree look like a fall tree with beautifully colored leaves.
I again started with the lightest color, which is Acid Yellow (Y070) in this case. I used this to color the top part and the center of the canopy.
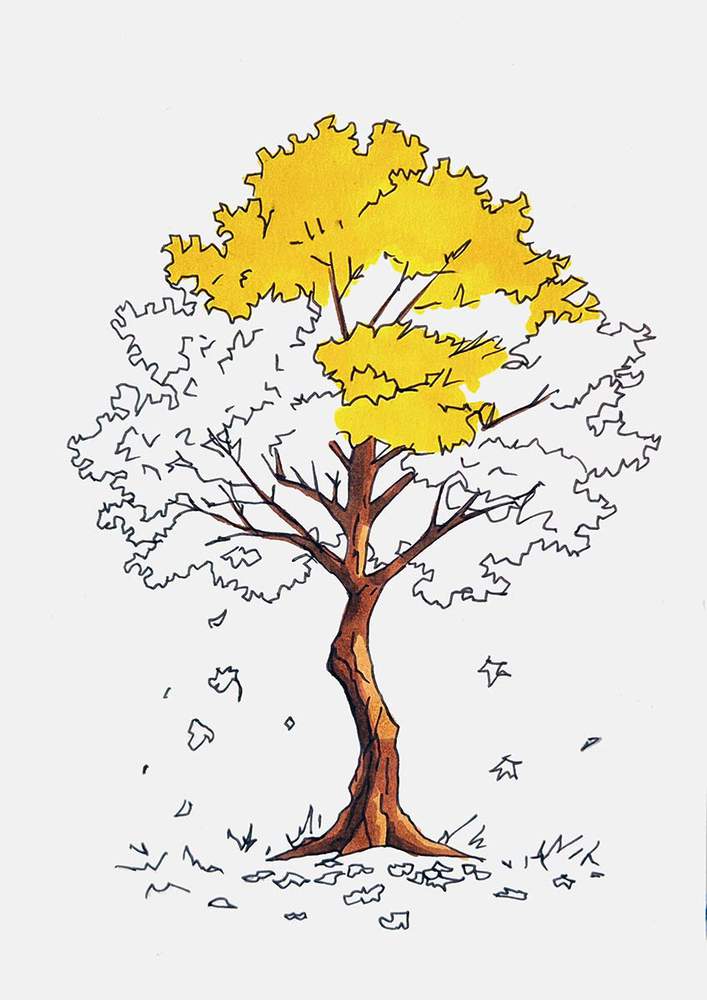
Next, I added some darker yellow shading to these parts and colored the bottom center of the leaves with Melon Yellow (YR33).
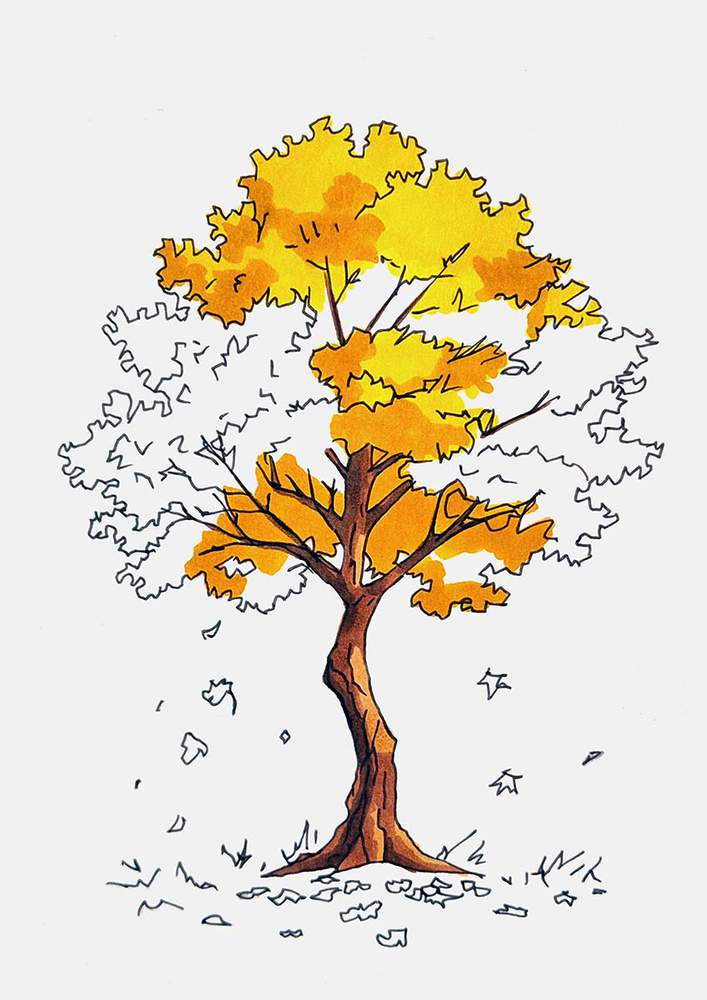
After that, I started coloring the more orange leaves. I first used a light orange called Peach Pie (YR090) to color some leaf clusters in the middle and some small ones on the outer edge.
After that, I used Orange (YR3) to color the slightly darker orange leaf patches.
Then, I moved to the more red-looking leaves. I started by coloring the remainder of the canopy with Agate (R070). I also used this color to add a little bit of shading on the orange parts, as there were too many light parts in the tree and it felt unbalanced.
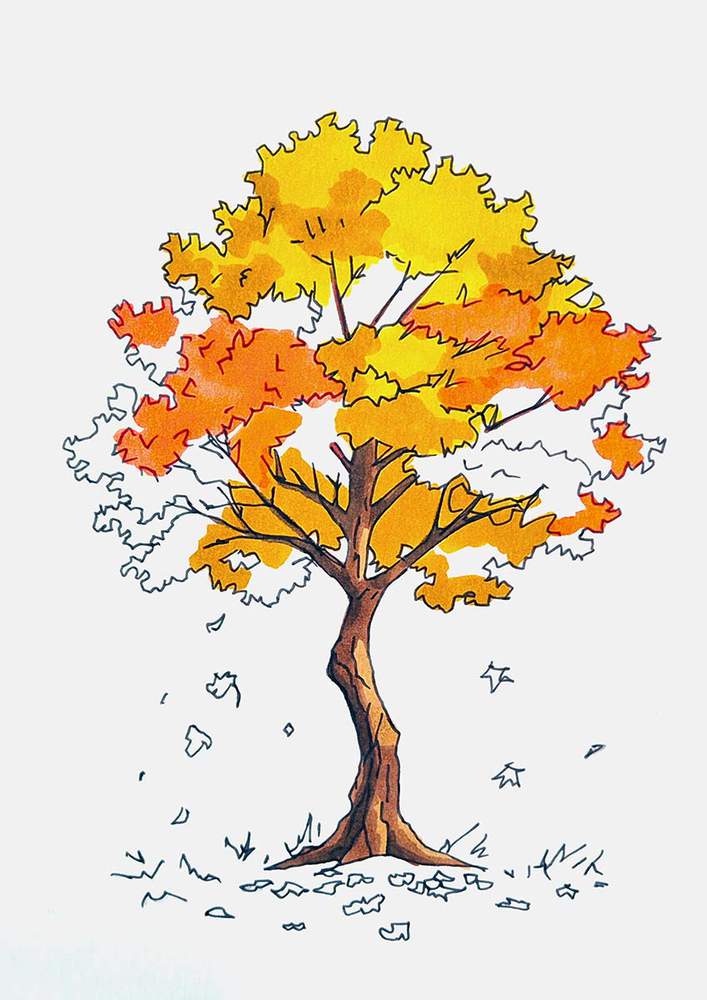
Next, I added shading to the red parts of the tree using Rouge Orange (Y5), which is slightly darker than Agate (R070), though it's a little hard to see in the photo...
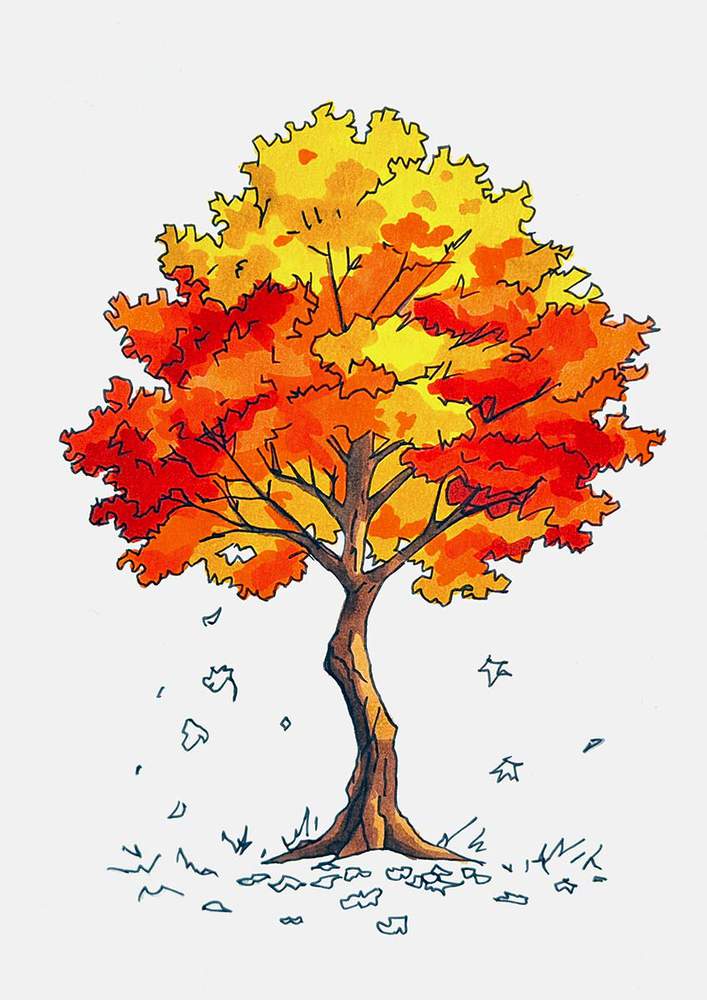
And lastly, I used the darkest red, Bright Red (R180), to add just a few bits of really dark shading to the tree to give it more depth.
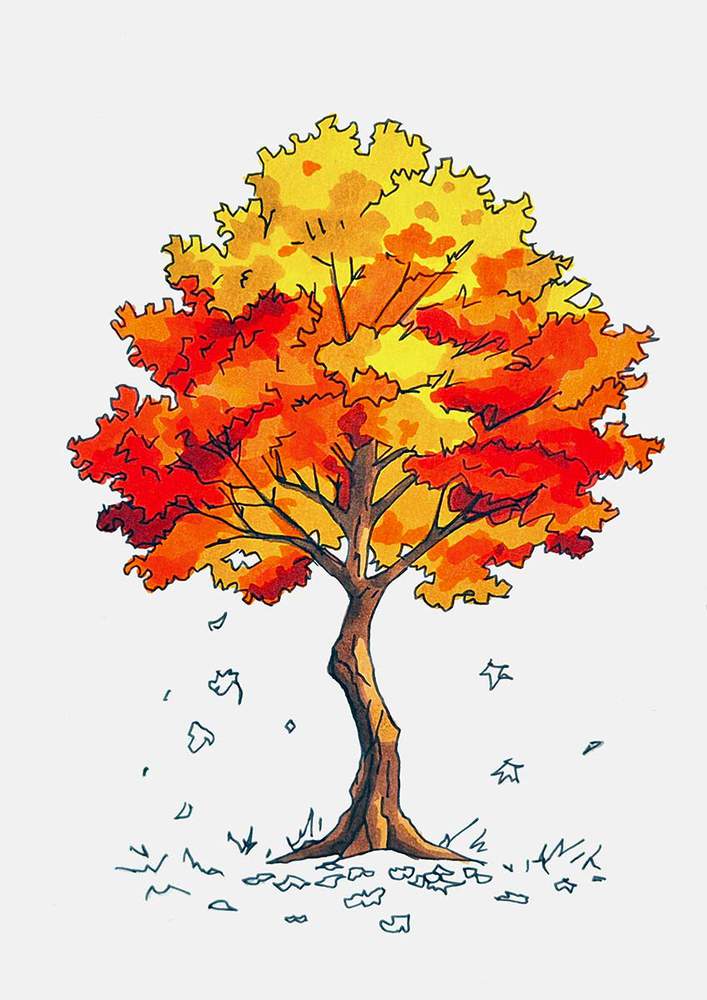
With the tree now all colored, I also colored the falling leaves and the leaves lying on the ground below the maple tree.
To color these leaves, I used a mixture of yellow, orange, and red colors and randomly colored each leaf one of these colors.

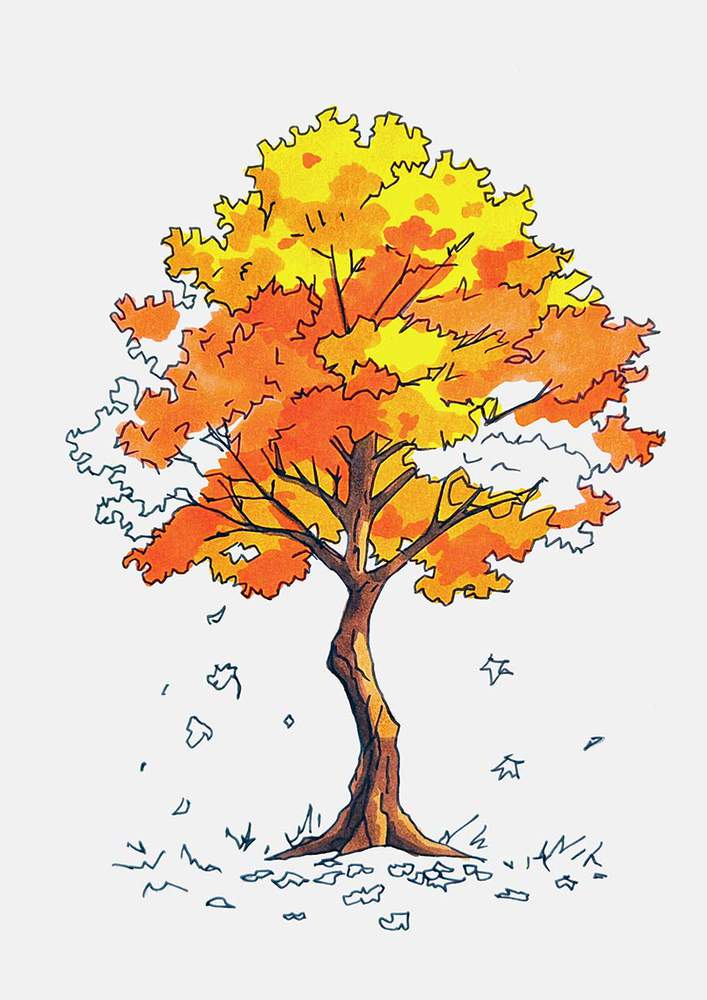
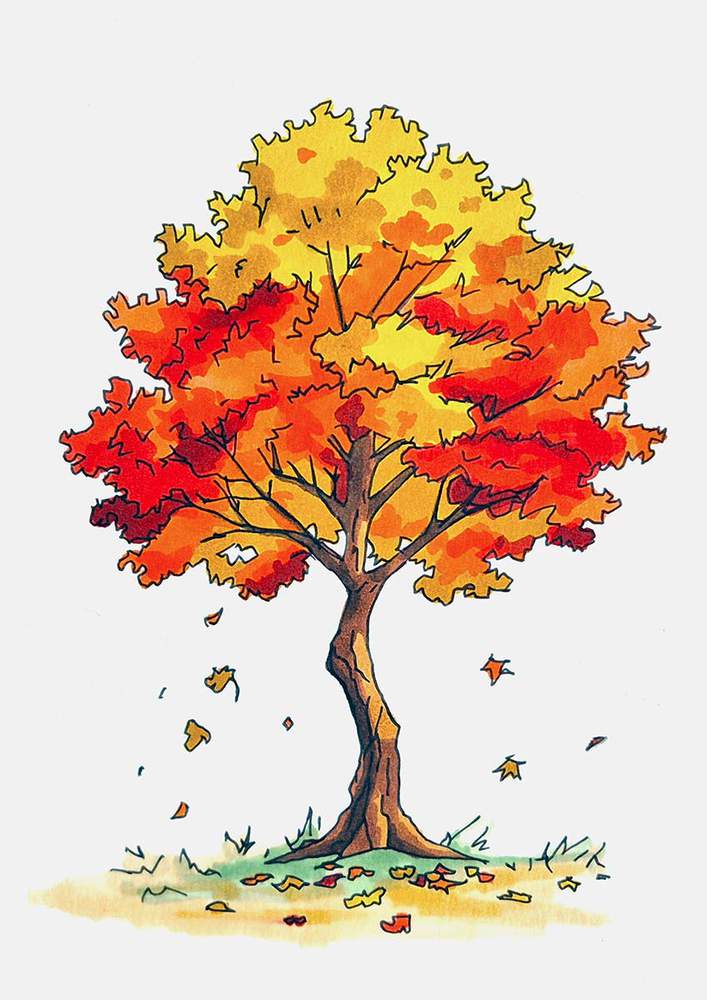
Step 10: Color The Ground & The Grass Below The Maple Tree
To complete this autumn tree drawing, I colored the ground below the tree.
I colored the grass bits and the part directly below the trunk with 2 shades of green called Lime Green (G220) and Beige Green (G240). I used the darker green to add some depth to the ground to make it look less flat. Just a few random streaks and squiggles will do, but be careful not to color over the leaves.
For the surrounding ground, I used 2 shades of yellow called Buttercup Yellow (Y120) and Mustard (Y130). I used the lighter yellow to color the ground first and then added a few squiggles with the darker yellow to make the ground look a little uneven instead of perfectly flat. Again, be careful when coloring around the leaves so you don't accidentally muddy the colors or smudge them.
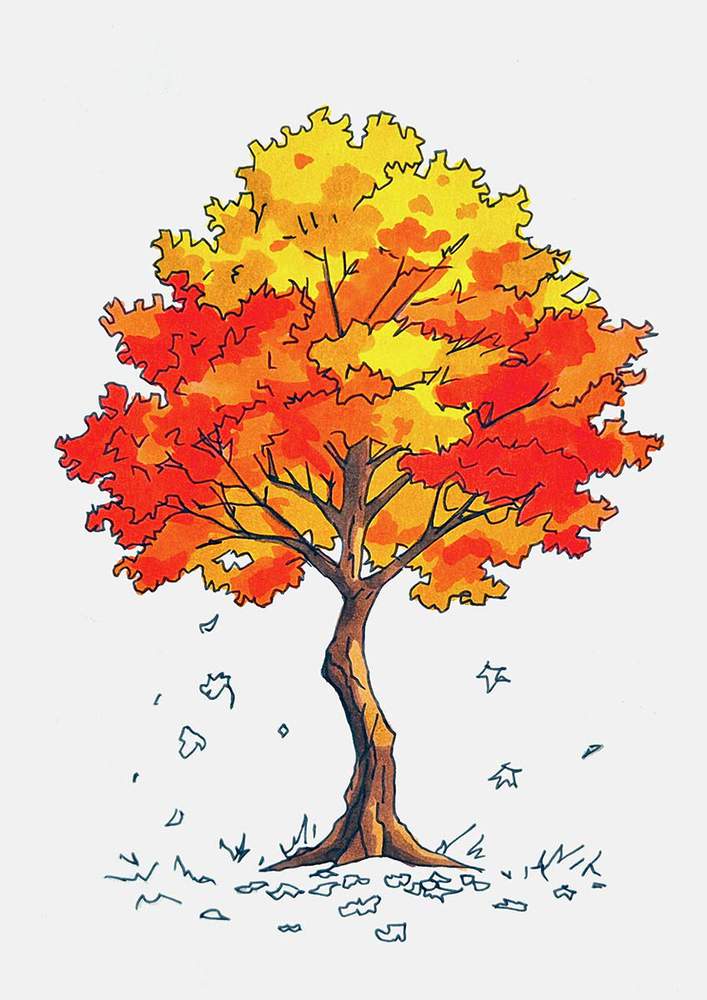
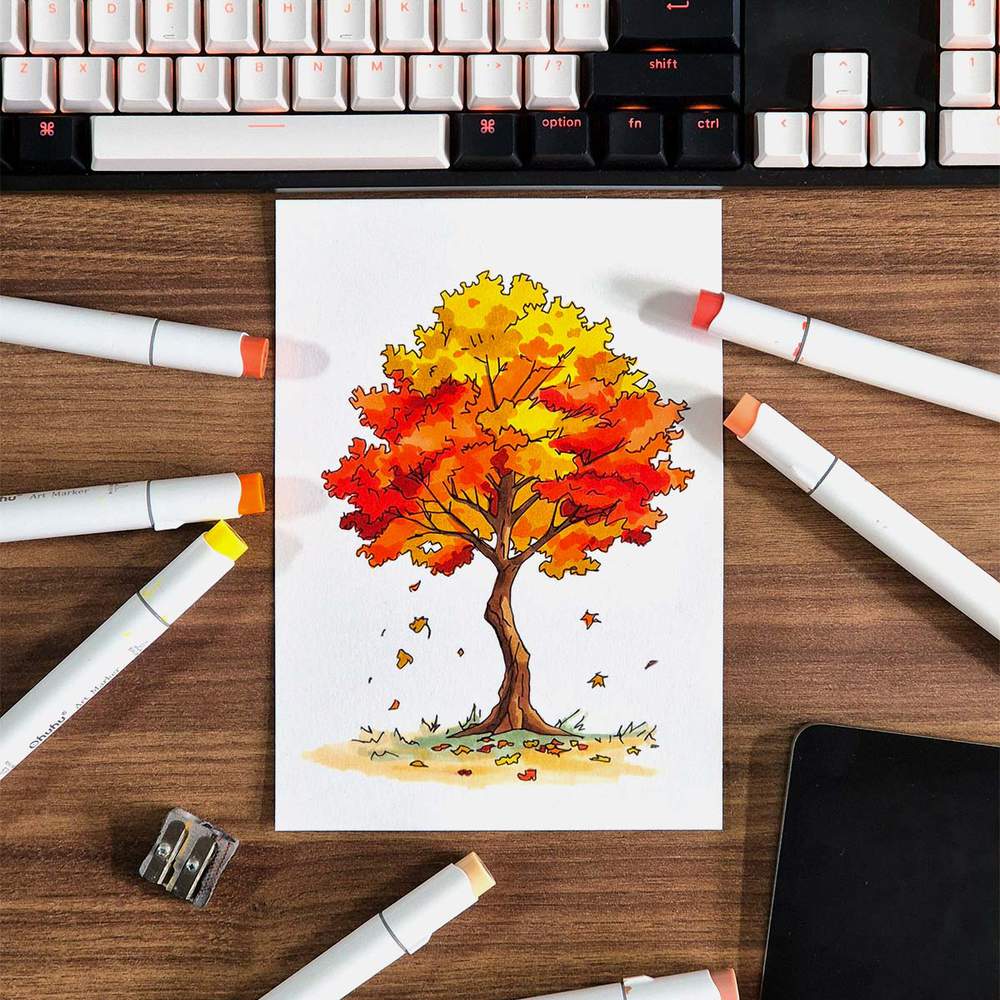
And that's the fall tree drawing all done!
This guide showed you the exact step by step process of how to draw an autumn-colored fall tree step by step from scratch, including the sketching, outlining, and coloring.
I hope your drawing turned out as well as mine. And if you enjoyed making this drawing with me, you might also like the other step-by-step drawing guides I've made. You can check them out here or click any of the linked guides below.
Thank you!

I love bringing cars to life with alcohol markers and colored pencils.
Whether you're just starting out or looking to improve your skills, I'm here to help!
Click here to learn more about me.


Be the first to comment!
Comments
There are no comments yet.