How To Draw A Cherry Blossom Tree - Super Simple Step-By-Step Tutorial
In this tutorial, I'm going to show you how to draw a simple cherry blossom tree.
I've broken the drawing up into detailed and easy-to-follow steps so you can make your very own cherry blossom tree drawing!
Let's get started!
Disclaimer: In the name of full transparency, please be aware that this blog post contains affiliate links and any purchases made through such links will result in a small commission for me (at no extra cost for you).
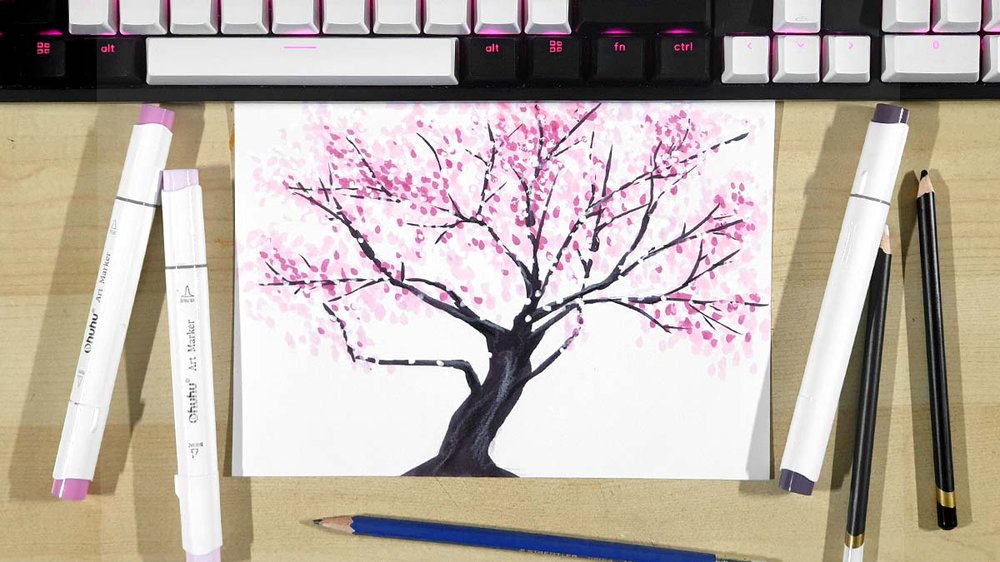
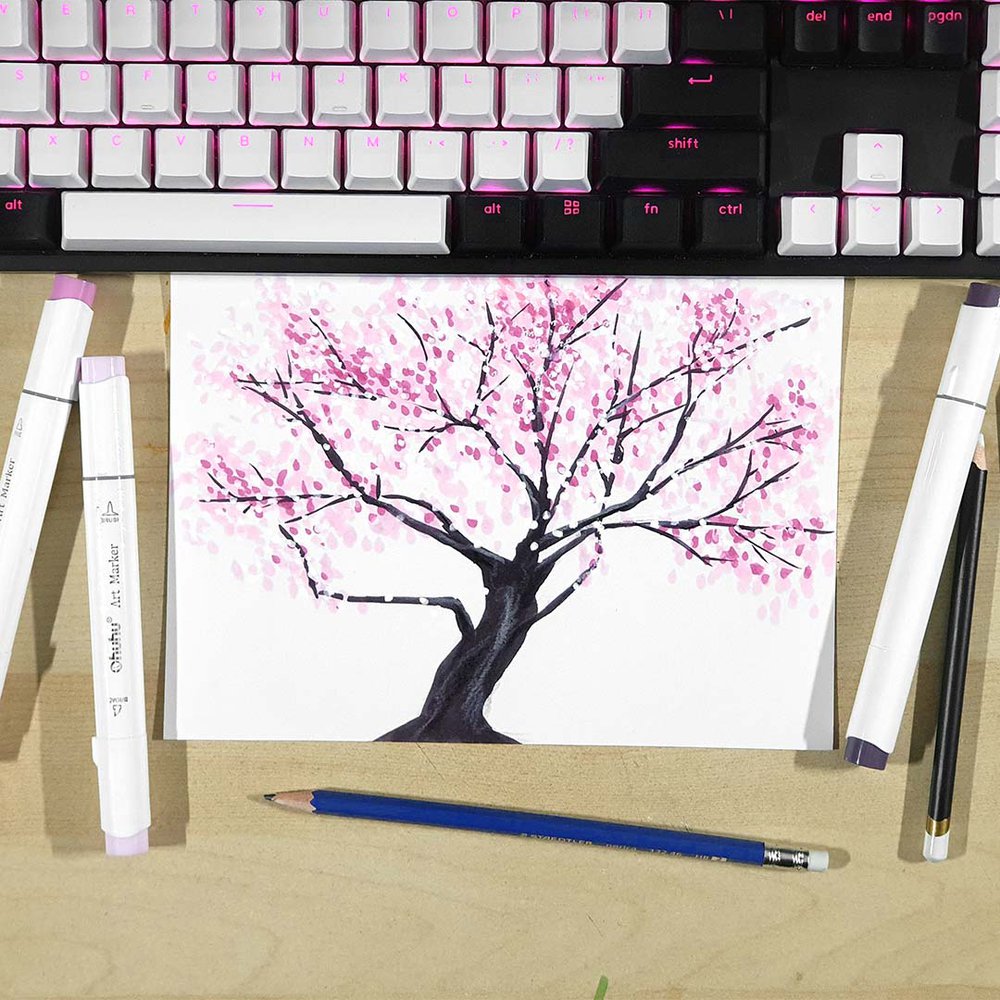
Drawing Supplies I Used To Make This Drawing
I really like alcohol markers, so that's what I chose to use to create this drawing.
I used the Ohuhu Honolulu markers in the colors RV130 Queen Pink, RV200 Dark Orchid, and R350 Dark Purple Grey.
If you're on a tighter budget, these Caliart markers seem like a good and cheap alternative.
I also used some Derwent Chromaflow colored pencils: 2400 White and 2300 Black.
And I used a white Posca PC-3M paint marker for highlights.
I made this drawing on my favorite marker paper: Canson Illustration Manga. I cut one sheet of paper in half to make it A5-size.
How Do You Draw A Cherry Blossom Tree?
To draw a cherry blossom tree, you first roughly sketch the trunk and the branches. Make sure to keep the shapes organic and not straight. Then, you add the cherry blossoms by coloring dots using a light pink, then a darker pink marker. Next, you color the tree trunk and the branches. Leave some parts of the branches uncolored where you colored the cherry blossoms. This makes it look like the blossoms are in front of the branches. Lastly, you add a few white highlights and black shadows on the trunk with colored pencils.
Step 1: Sketch The Shape Of The Cherry Blossom Tree
To draw any tree, I like to first sketch the basic shapes and the branches.
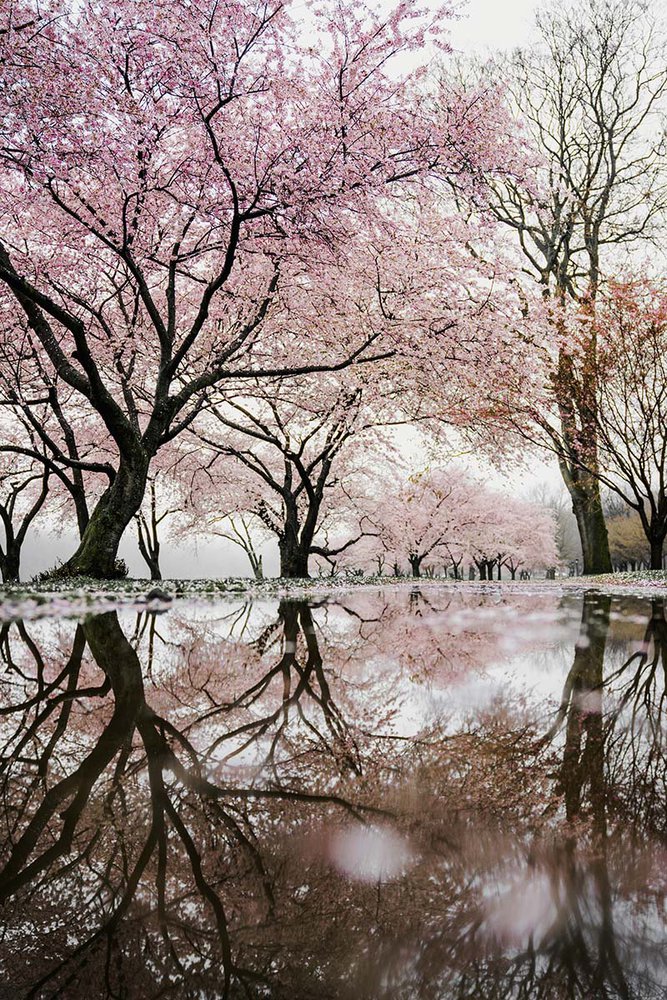
I used the cherry blossom tree in this photo as a reference for mine.
I started by sketching the trunk and curving it outwards at the bottom.
Next, I sketched the individual branches.
When sketching the branches, note that the thickness of each branch approximately subtracts from the thickness of the trunk. This is just a rough guide.
I also tried to make the branches not completely straight. Instead, I added a ton of curves and corners.
My sketch ended up looking like this:
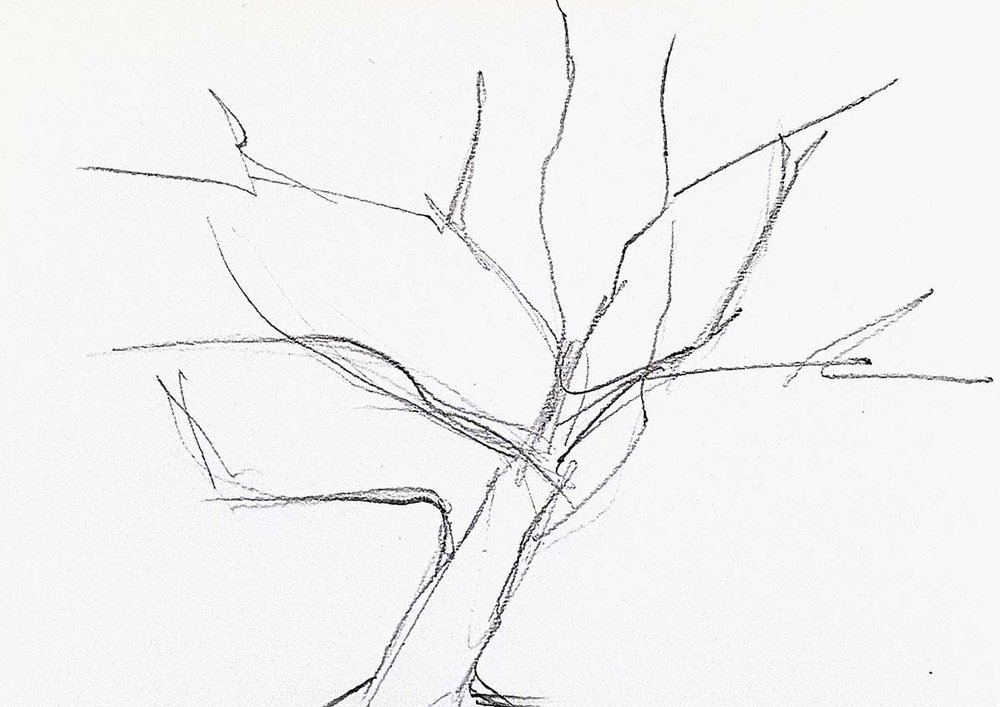
To prevent my sketch from showing through the pink marker ink, I lightened my sketch where the cherry blossoms were going to be.
The tree trunk will be dark, so there's no use in lightening that.
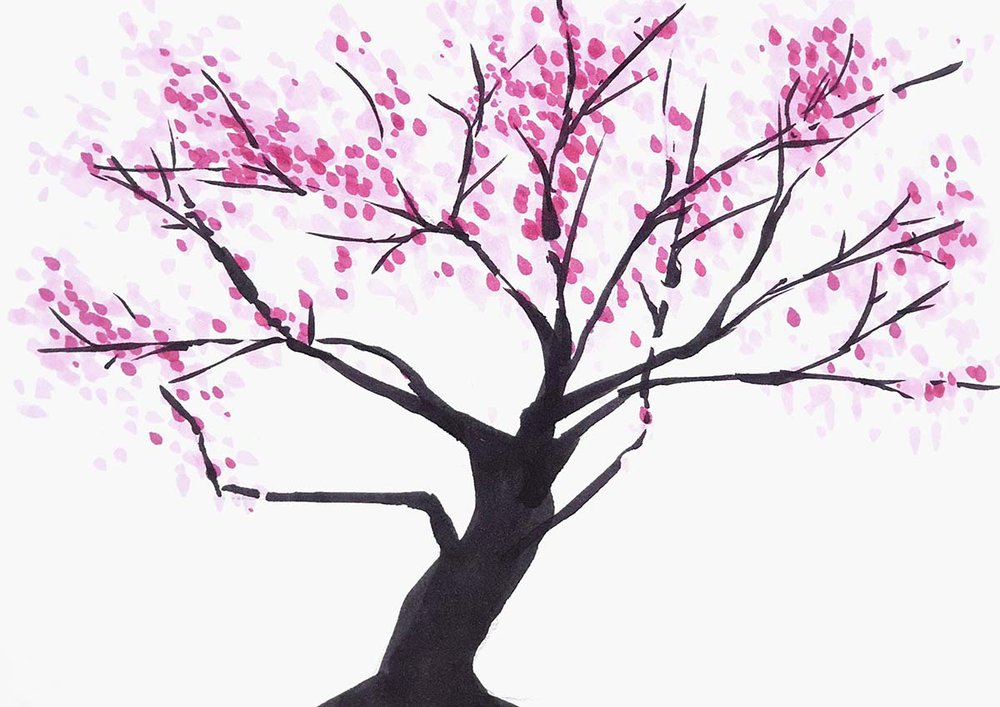
Step 2: Color The Cherry Blossoms Pink
Next, I added tons of dots by using the brush nib of my RV130 Queen Pink marker. These dots represent the cherry blossoms.
I first added a few to see if the shape looked all right.

And when I thought it looked good, I added a ton more dots.
I made the dots denser at the parts closer to the branches and where branches overlap. And I made it less dense further away from the branches or where there is only a tiny branch.
I barely colored any cherry blossoms close to the tree trunk, just a few.

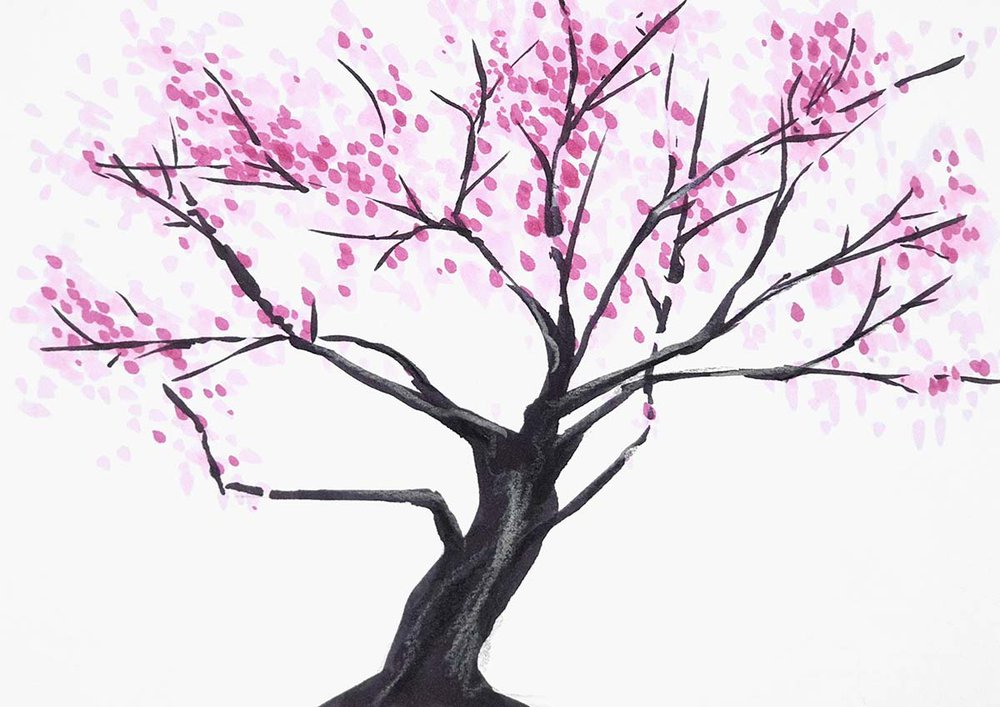
Step 3: Color The Cherry Blossom Tree Trunk
After that, I colored the trunk and the branches using R350 Dark Purple Grey.
When coloring the branches, I didn't fully connect them and I left some spots uncolored to make it look like the cherry blossoms are in front of the branches.

Step 4: Add Shadows To The Cherry Blossoms
Next, I added some dark spots to the cherry blossoms to add some depth.
To do this I used the RV200 Dark Orchid marker and added some dots.
I mostly added the dots in the denser blossom parts.
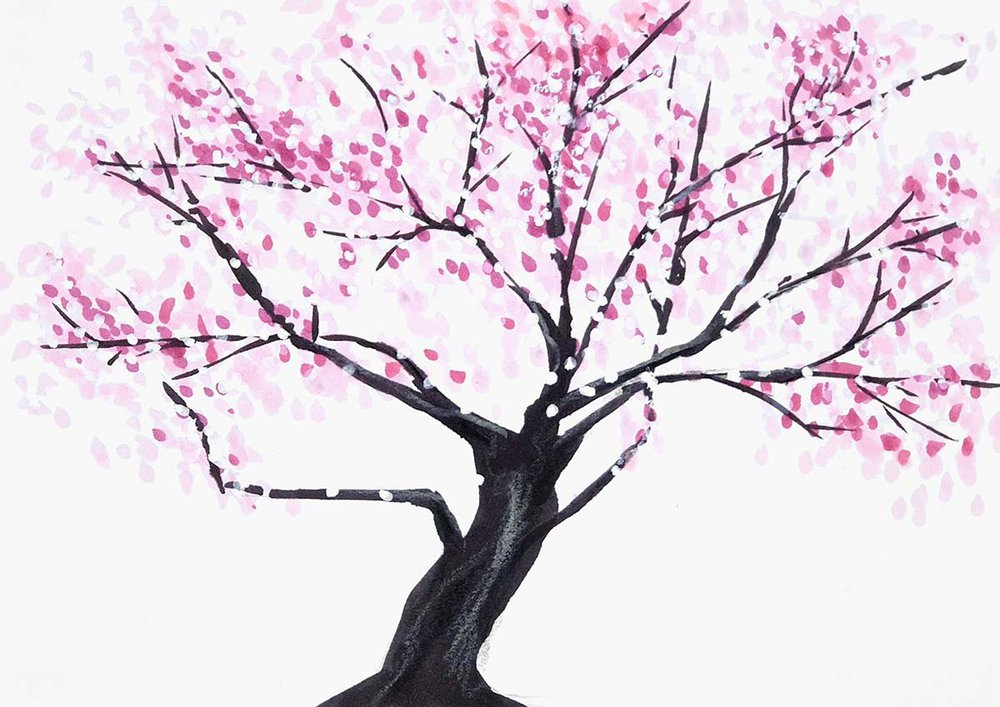
Step 5: Add Texture To The Tree Trunk & The Branches
After that, I used a white colored pencil to add a bit of texture and highlights to the tree trunk and some parts of the branches.
On the trunk, I tried to follow the shape and flow of the branches a bit and on the branches, I highlighted the top edge.
I also used a black pencil to add some shadows on the tree trunk. I added these shadows to the right and the bottom of the white highlighted textures.
Step 6: Add Highlights To The Cherry Blossoms
To finish the drawing off, I added some texture to the cherry blossoms with my white Posca PC-3M paint marker.
I added a ton of dots all over the blossoms and on the branches in some parts to make it look like the cherry blossoms where growing in front of the branches.
And That's How You Draw A Cherry Blossom Tree
I would've loved to add more cherry blossom details with a color between the light and the darker pink. However, I don't have that color.
I might add them in the future when I do have this color.
But overall, it still turned out pretty well.
I hope you liked this tutorial!
Let me know how your cherry blossom tree drawing turned out!
Thank you for following along and I see you in my next step-by-step tutorial!
Tags
Articles You Might Also Like


I love bringing cars to life with alcohol markers and colored pencils.
Whether you're just starting out or looking to improve your skills, I'm here to help!
Click here to learn more about me.


Be the first to comment!
Comments
There are no comments yet.