How To Draw A Realistic Cat Step by Step (With Markers & Pencils)
Want to learn how to draw a cute, realistic cat, even if you’ve never drawn animals before?
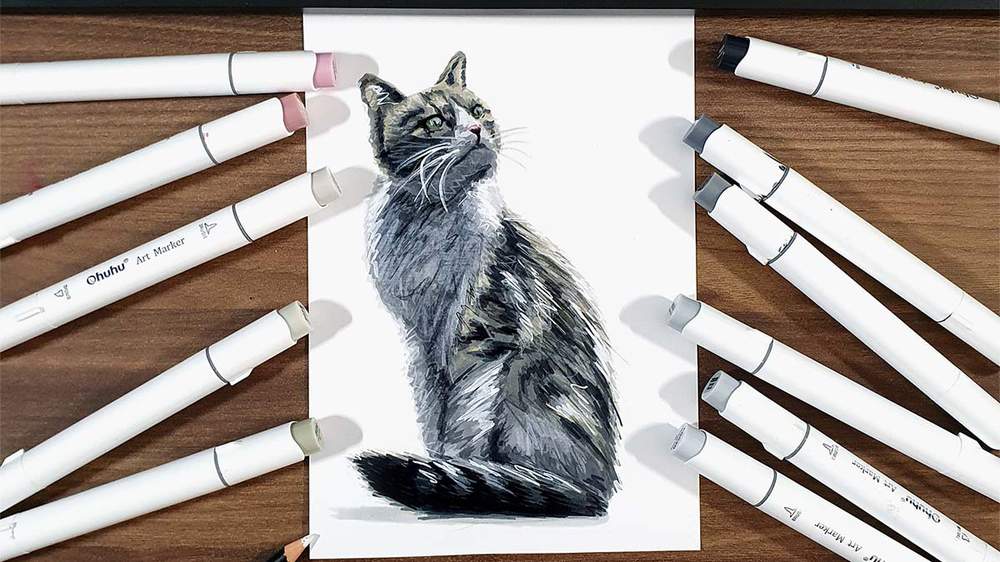
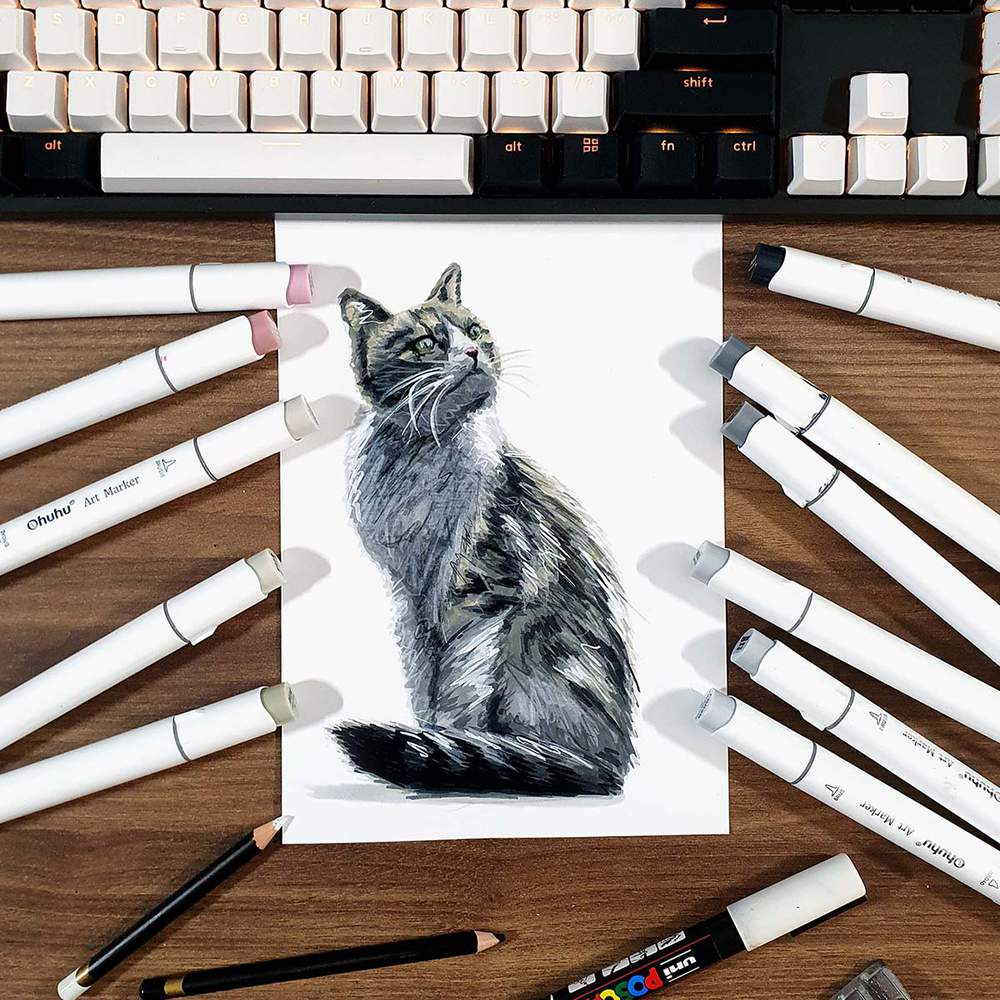
In this step-by-step tutorial, I’ll show you exactly how I sketched and colored this fluffy cat using alcohol markers and a few finishing touches with colored pencils and a white paint marker.
From outlining the fluffy tail to adding realistic fur textures and whiskers, I’ll guide you through every step of the process, including what I’d do differently next time to avoid common mistakes.
Let’s get started!
Disclaimer: In the name of full transparency, please be aware that this blog post contains affiliate links and any purchases made through such links will result in a small commission for me (at no extra cost for you).
Drawing Materials I Used In This Tutorial
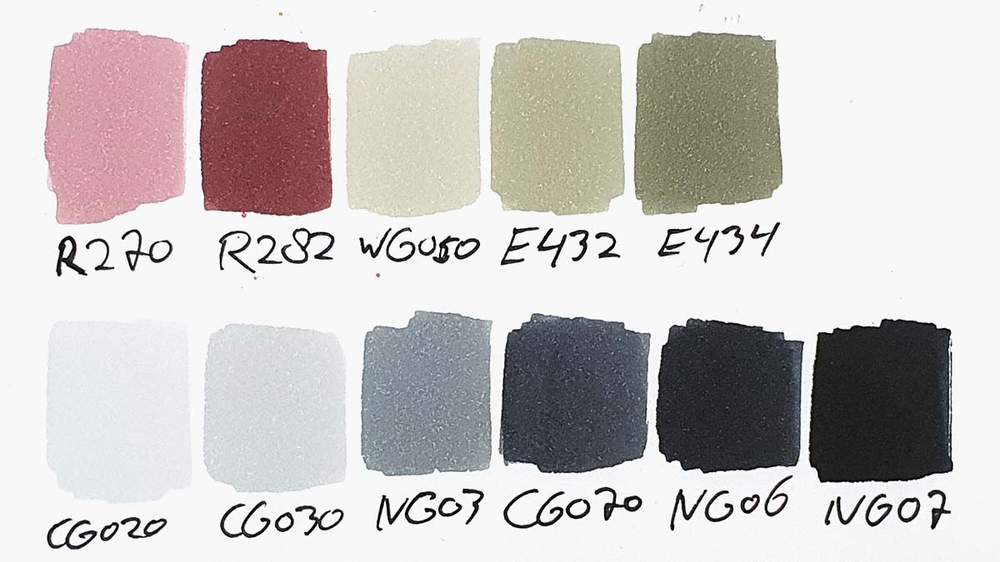
To make this drawing, I used Ohuhu Honolulu markers in the colors Baby Blossoms (R270), Colocasia Torino (R282), Warm Grey 05 (WG050), Vert Caledon (E432), Dragon Well Tea (E434), Neutral Grey 02 (CG020), Neutral Grey 03 (CG030), Neutral Grey 3 (NG03), Neutral Grey 07 (CG070), Neutral Grey 6 (NG06), and Neutral Grey 9 (NG09).
You can use Black (120) instead of Neutral Grey 9 (NG09) as they look the same.
I also used some Derwent Chromaflow colored pencils to add details. I used the White 2400 and Black 2300 pencils.
I used a white Posca PC-3M paint marker to add white highlights.
And I used an HB pencil, a ruler, an eraser, and a kneaded eraser.
I made this drawing on A4 size Canson Illustration Manga Paper.
How Do You Draw A Simple & Realistic Cat?
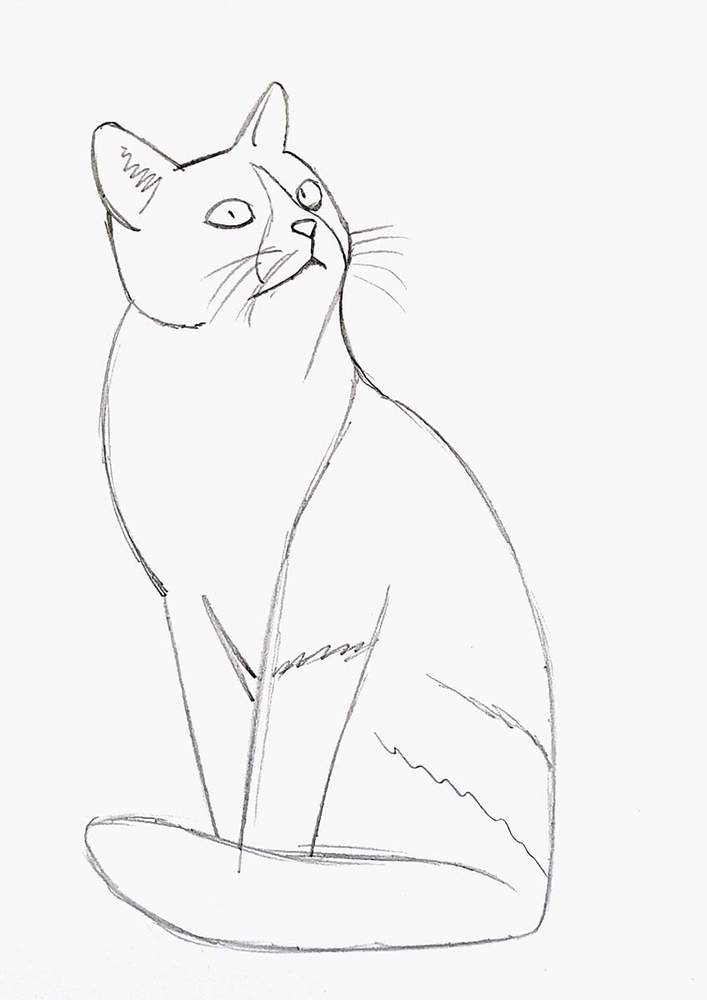
Step 1: Sketch The Outline Of The Cat
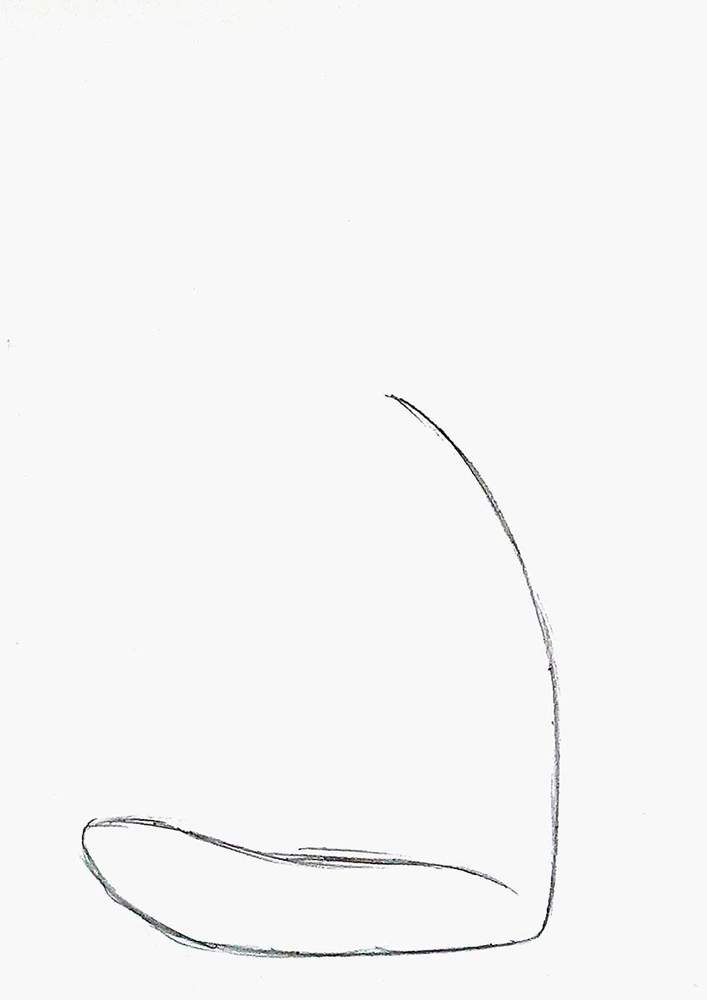
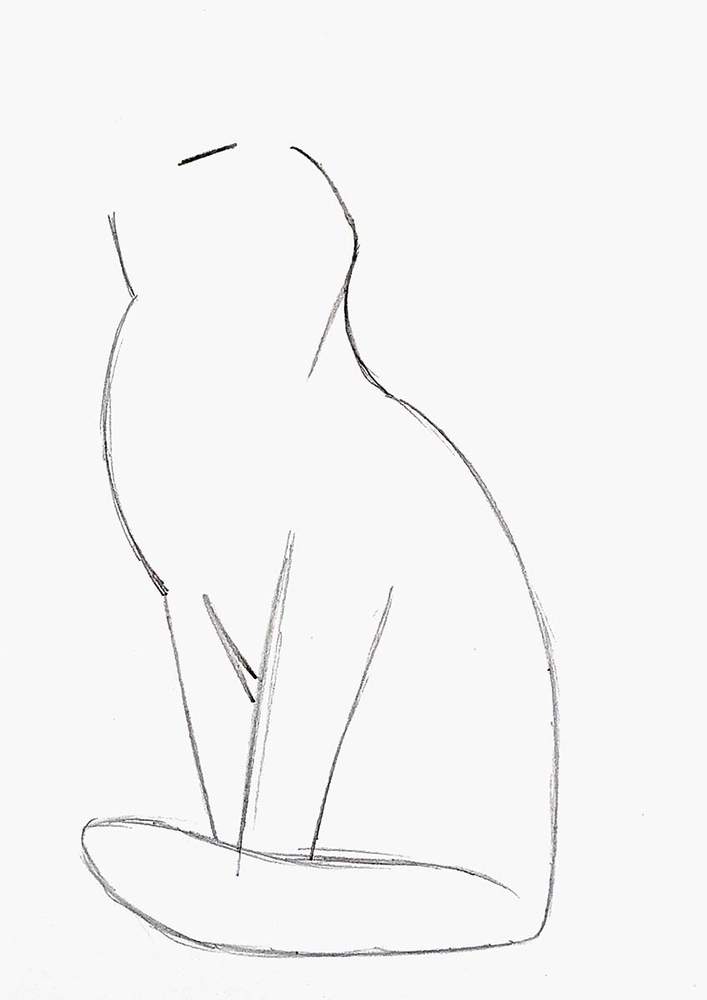
To draw a cat, I first sketched the outline.
I started by sketching the outline of the fluffy tail and the arched back of the sitting cat.
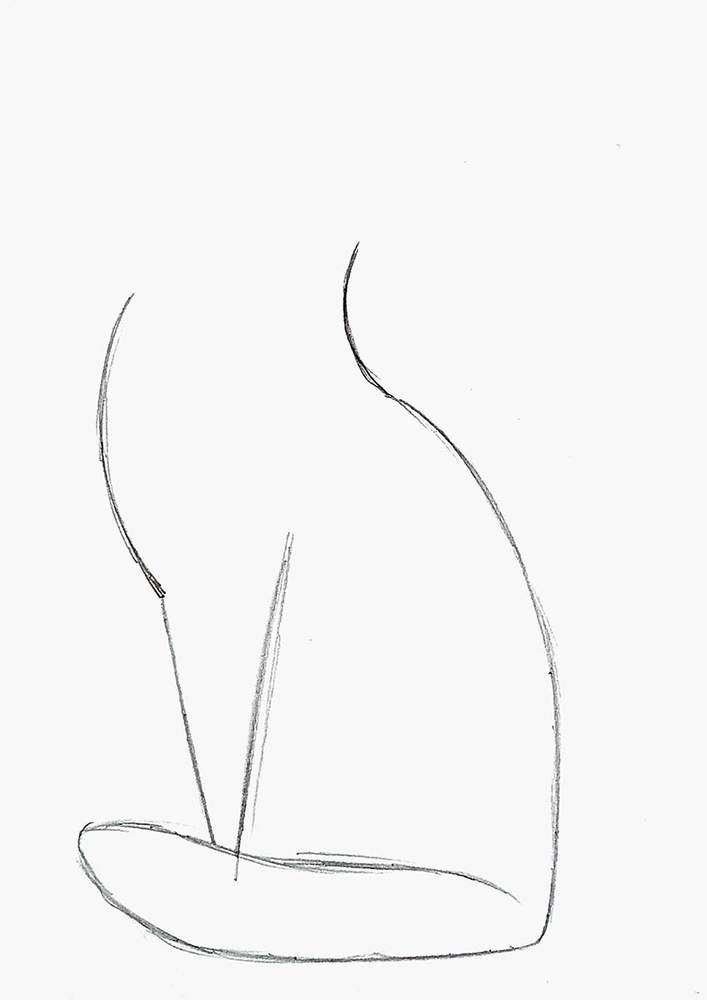
Next, I added 2 lines almost in a V-shape above the left side of the tail. These will become the front legs.
I also added 2 curved lines, 1 on the arched back we just drew and 1 on the far left.
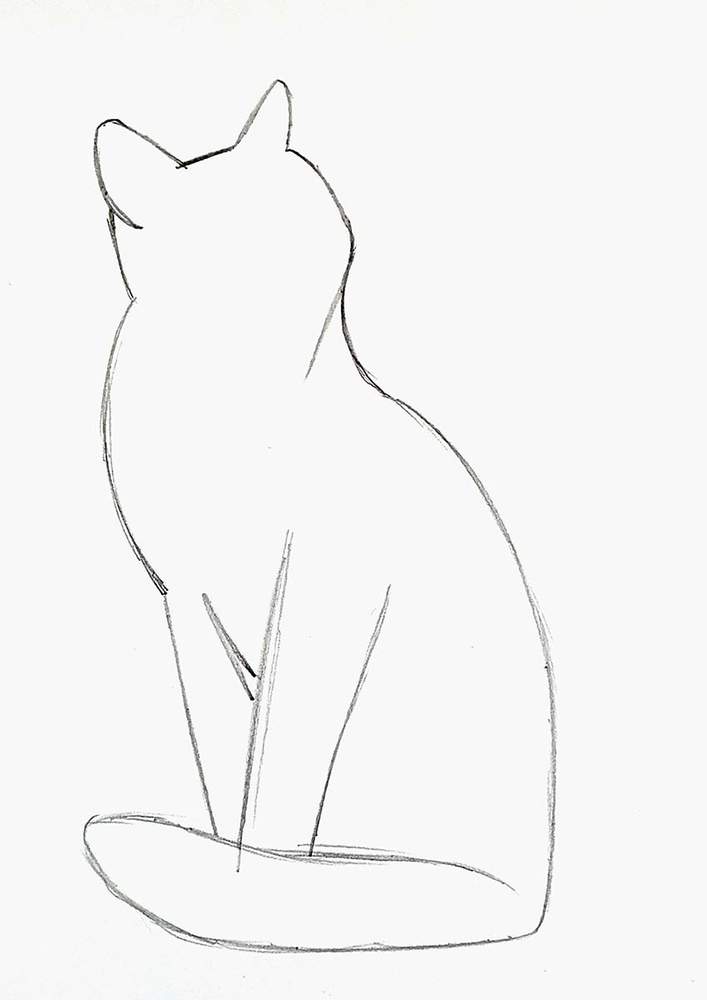
Then, I added the cat's head, which looks like a rectangle with the bottom edge missing. I also left room for the ears.
From the right corner, I sketched a line diagonally down, and I added the right edges of both front legs.
To finish the outline of the cat, I added the ears.
Step 2: Sketch The Cat's Face
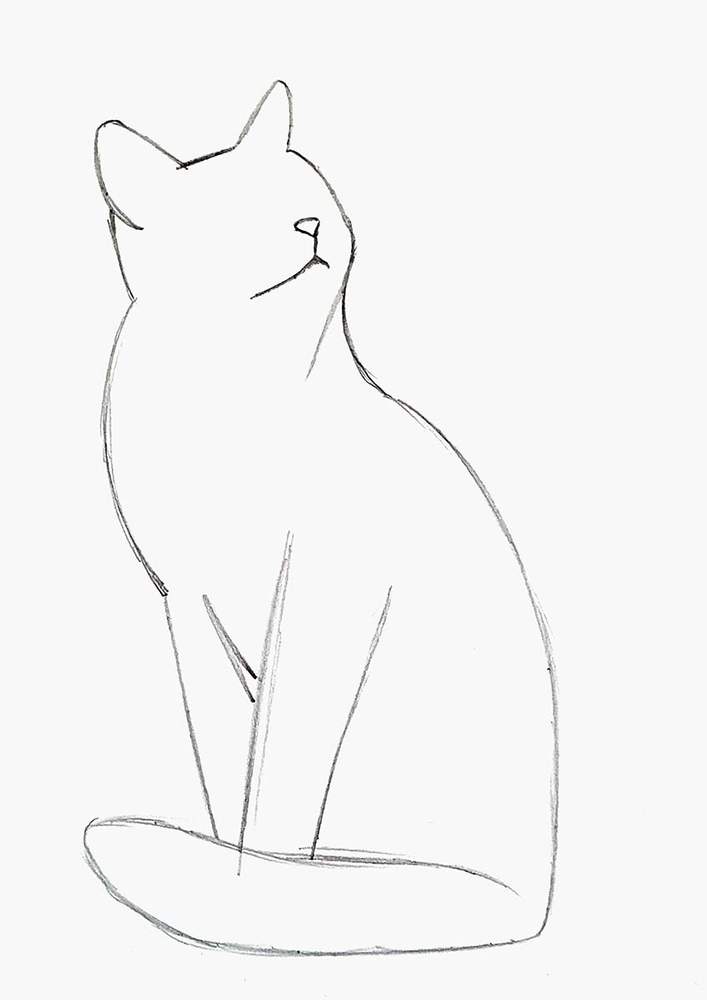
Then, I moved onto the cat's face.
I first sketched the triangular nose and the Y-shape below it.
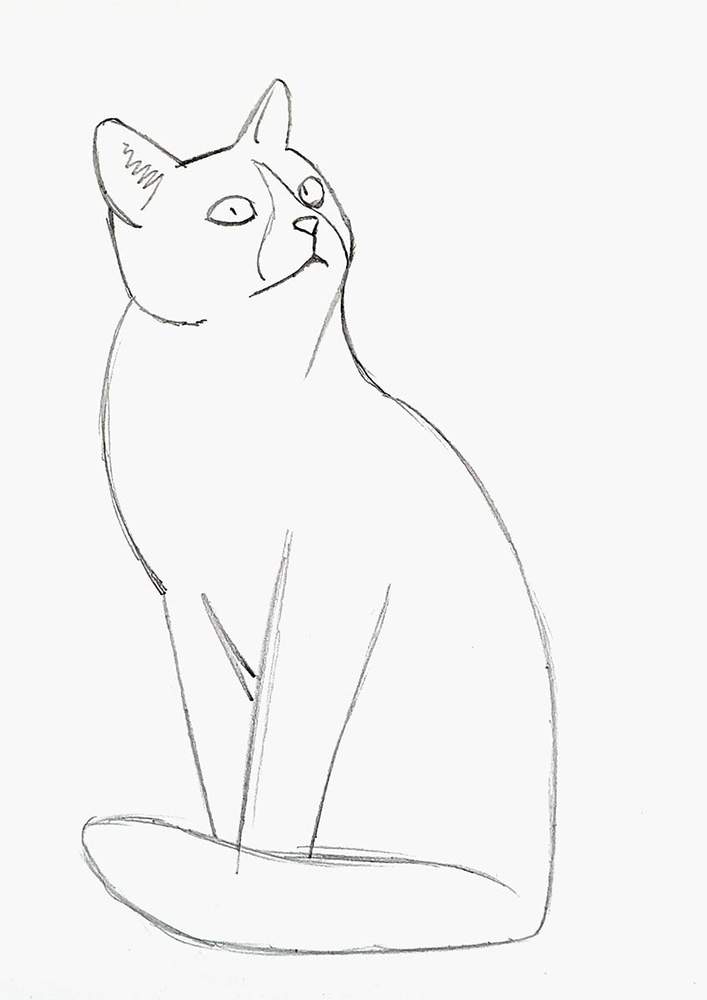
After that, I added a squiggle on the left ear and an elongated L-shape on the left edge of the right one.
I also marked out the edges between the white and the grey fur.

To finish the face of the cat, I added the eyes. The right one is kinda egg-shaped, and the left one looks more like a plum pit.
Step 3: Sketch The Fur Patterns Of The Cat
And to complete the sketch, I added the edges between the white and grey fur, and I sketched the whiskers.
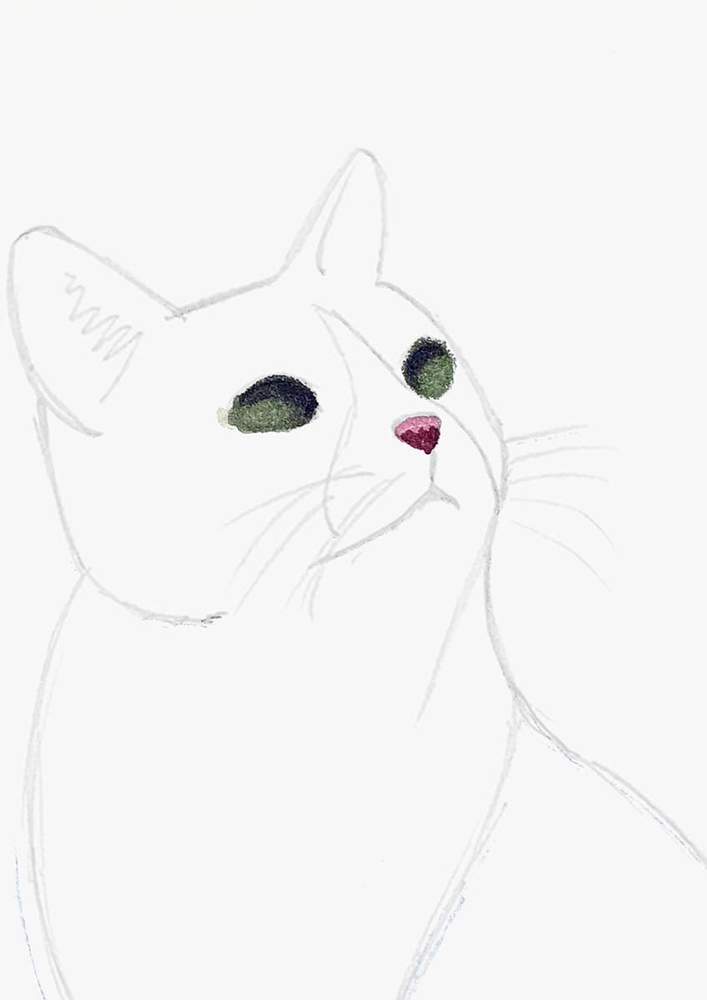
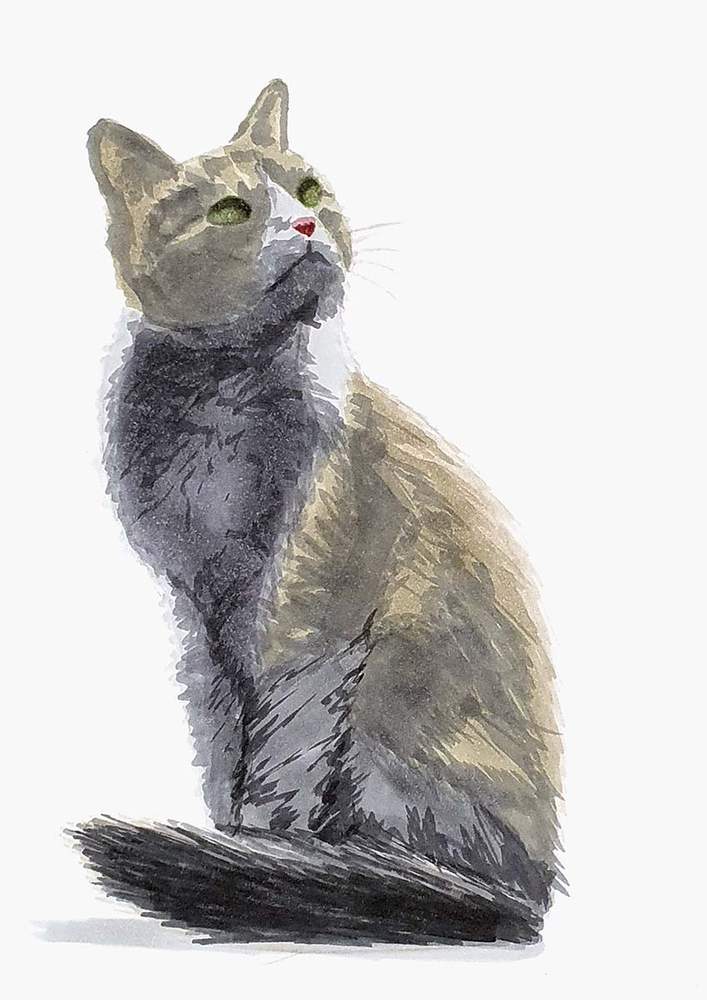
Step 4: Color The Cat's Nose & Eyes
After that, I lightened the sketch of the cat with an eraser and started coloring it in.
To color the cat drawing, I used my favorite alcohol-based markers: the Ohuhu Honolulu markers.

I first colored the eyes with Vert Caledon (E432) and the nose with Baby Blossoms (R270).

Then, I used Dragon Well Tea (E434) and Neutral Grey 07 (CG070) to add some shading to the top edges of the eyes, and I used Colocasia Torino (R282) to darken the bottom half of the nose.
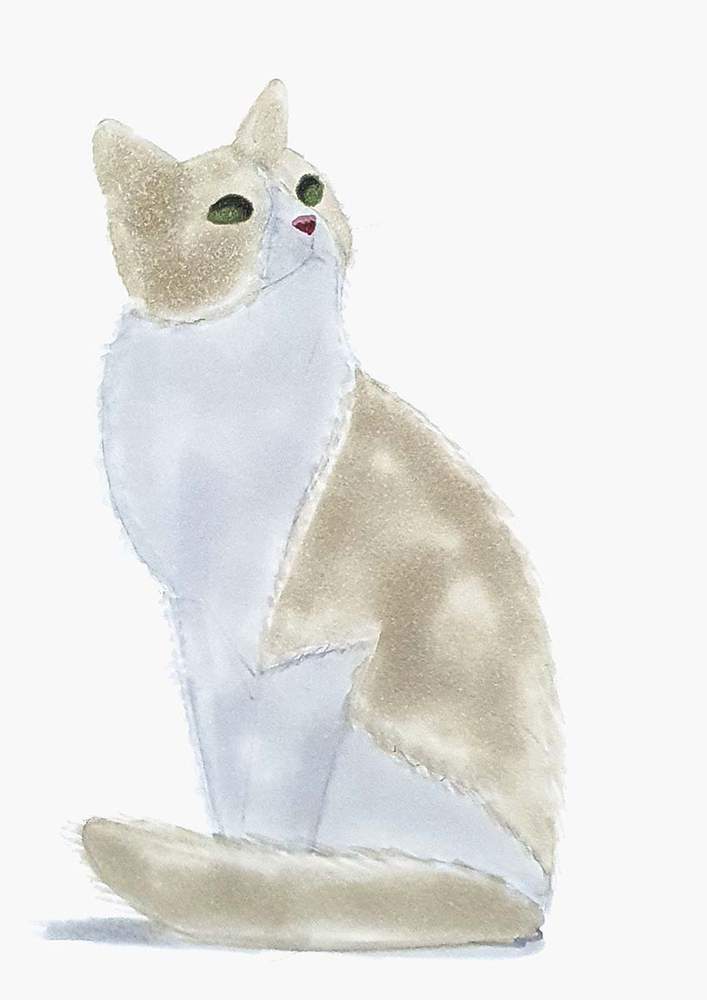
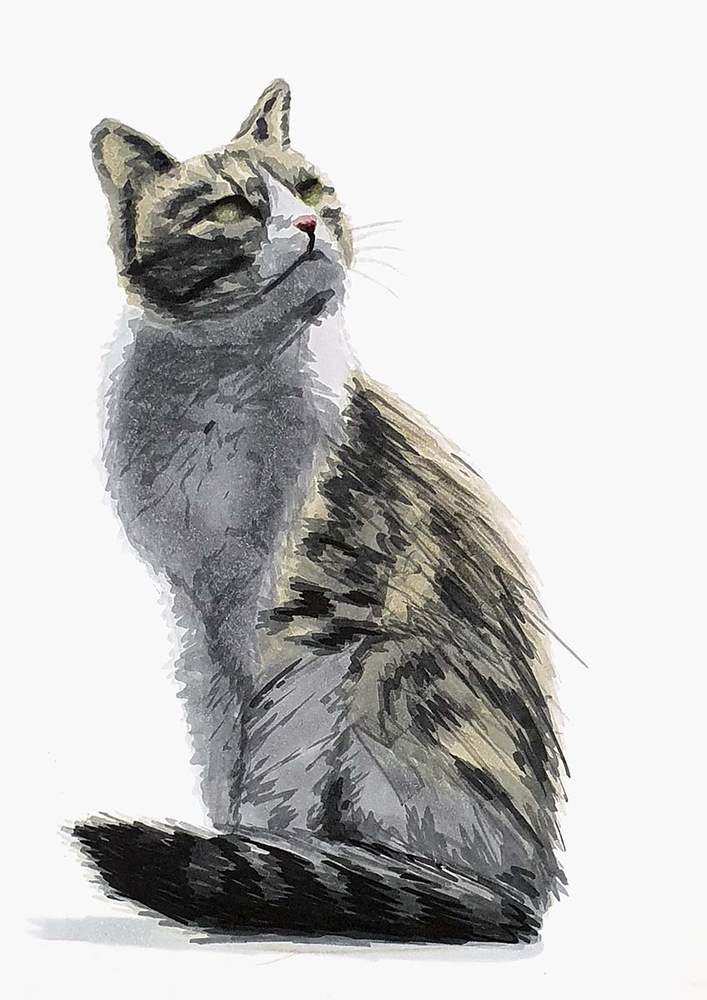
Step 5: Color The Cat's Fur
After that, I colored the fur.
I did make a mistake while doing this — and maybe you spotted it: I made the white fur waaaaay too dark...
I used Neutral Grey 03 (CG030) as the lightest tone, thinking it was light enough.
It wasn’t.
So the white fur turned out more grey than I intended.
But this can easily be avoided by using lighter grey tones.
In the next steps, I’ll name the colors I would use if I were to redo this drawing, knowing what I know now.
First, I used Warm Grey 05 (WG050) for the grey fur, and I would color the white fur with Neutral Grey 02 (CG020).
I used the sharp edge of the chisel nib to create this fur line texture around the edges.
Next, I used Vert Caledon (E432) to add shading to the grey fur. For the tail, I used Neutral Grey 3 (NG03).
And I would use Neutral Grey 03 (CG030) to shade the white fur.
I again used the short, sharply angled edge of the chisel nib to create a furry texture.
After that, I used Neutral Grey 07 (CG070) to add shading to the tail with long straight lines in the direction of the fur, and I used Neutral Grey 3 (NG03) to add shading to the warmer-toned grey fur, again by using strokes to simulate fur.
And I would use Neutral Grey 3 (NG03) to add just a few squiggly lines to the shadow parts of the white fur.
Then, I used Neutral Grey 07 (CG070) to add some darker fur patterns to the warm grey fur.
I used it sparsely for now to not go too dark too quickly. But later on, I added some more on the cat's cheek and back.

And lastly, I used Neutral Grey 6 (NG06) and Neutral Grey 9 (NG09) to add the darkest fur patterns on the tail and the warm grey fur on its head and back.
On the back and head, I added just a few darker spots.
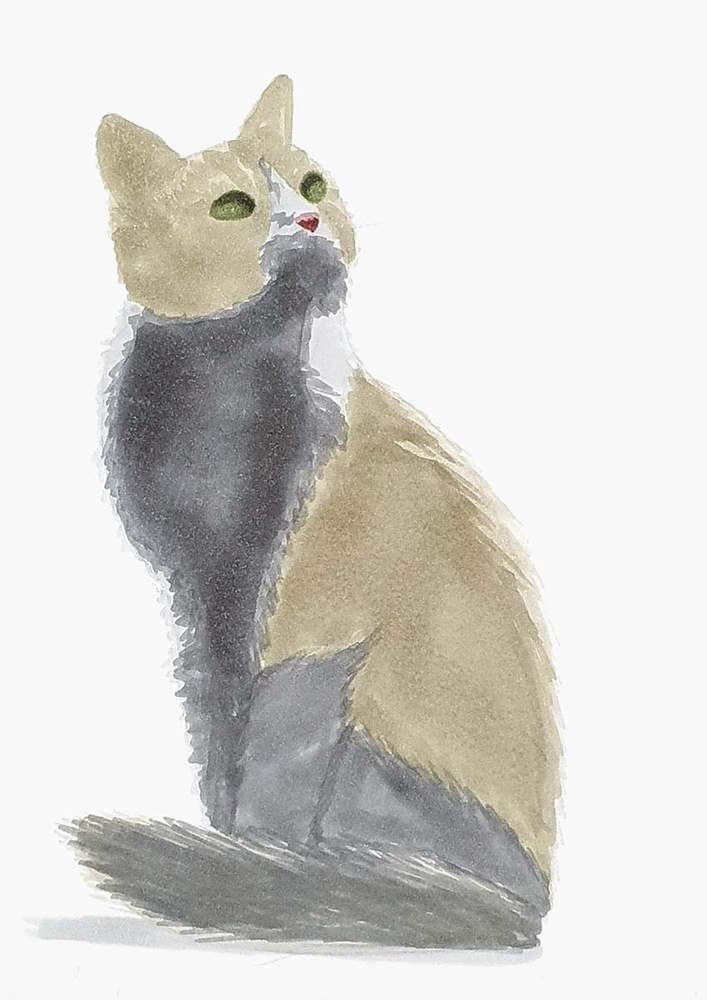
Step 6: Add Details To Your Cat Drawing With Pencils & A White Paint Marker
To make the cat come to life, I used the black and white Derwent Chromaflow colored pencils and a white Posca paint marker.

With the white pencil, I added highlighted fur to the lighter areas, and I did my best to make the white fur look white again as I made it too dark...
I used the black pencil on the darker parts of the cat's fur and to add a bit of shadow on the fur below its chin.
To finish the drawing off, I added some white highlights to the fur with my white paint marker, and I added the whiskers.
I used it just a little bit to avoid overdoing it.
Now your cat drawing is done!
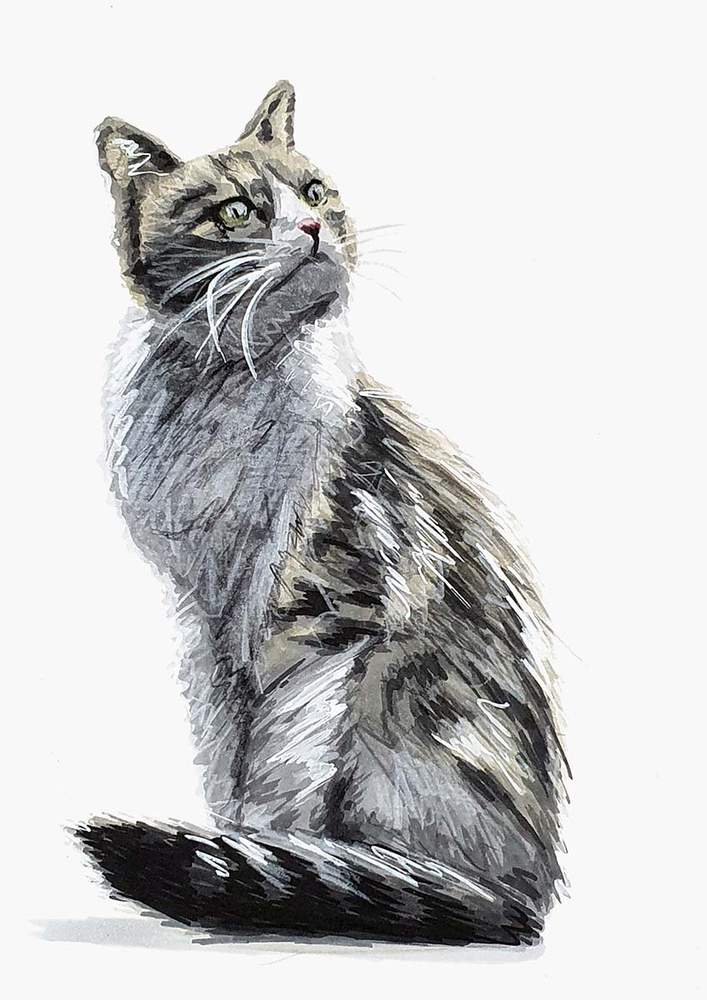
Honestly, I'm really happy with how it turned out!
I do not draw animals that often, and even though I did make the white fur too dark, I still think the cat drawing turned out really well.
I hope you enjoyed this tutorial, and I'll see you in my next one!
Thank you!
Tags
Articles You Might Also Like


I love bringing cars to life with alcohol markers and colored pencils.
Whether you're just starting out or looking to improve your skills, I'm here to help!
Click here to learn more about me.


Be the first to comment!
Comments
There are no comments yet.