How To Draw A Carnation - A Simple Yet Realistic Step-By-Step Tutorial
In today's tutorial, I'm going to show you how you can draw a simple & realistic carnation.
I've broken the whole drawing up into small and easy-to-follow steps so you can easily follow along and create your own carnation drawing.
Let's get started!
Disclaimer: In the name of full transparency, please be aware that this blog post contains affiliate links and any purchases made through such links will result in a small commission for me (at no extra cost for you).
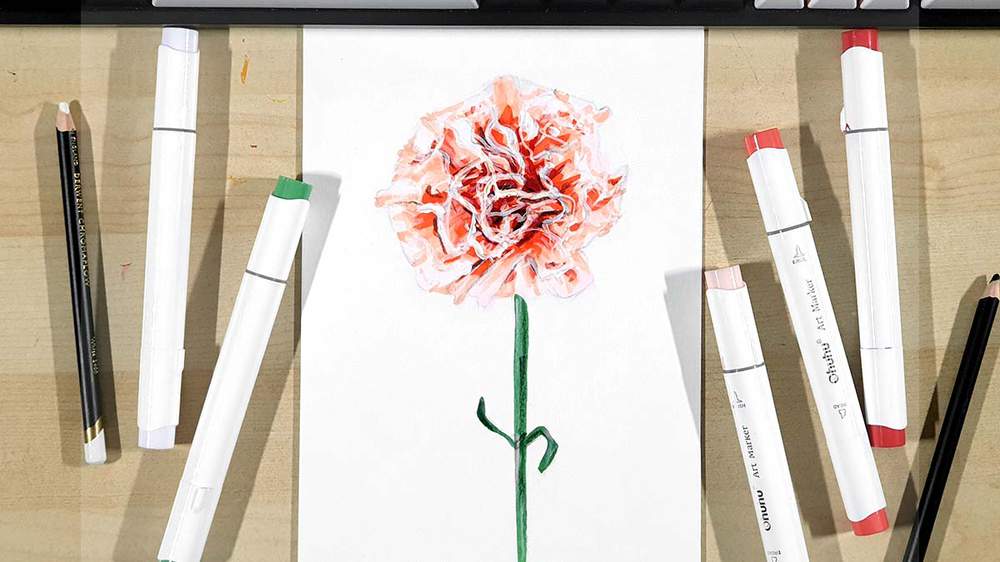
Drawing Supplies You'll Need For This Tutorial
To make this carnation drawing, I used a combination of alcohol markers and colored pencils.
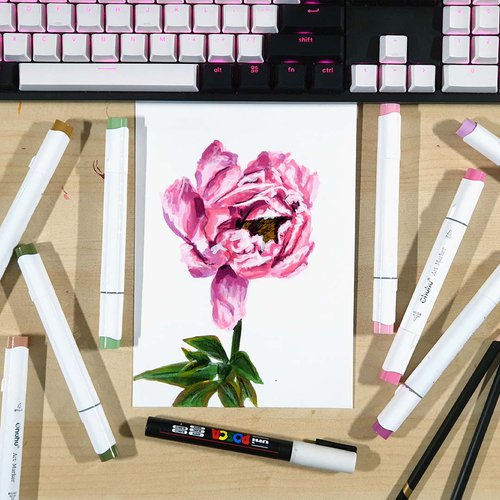
I used Ohuhu Honolulu markers in the colors G470 Pine Tree Green, RV010 Water Lily, R050 Chocolate Pink, R070 Agate, and R180 Bright Red.
If you're on a tighter budget, these Caliart markers seem like a good and cheap alternative.
I also used Chromaflow colored pencils in the colors 2400 White and 2300 Black.
And I used a white Posca PC-3M paint marker for highlights.
I made this drawing on my favorite marker paper: Canson Illustration Manga. For this drawing, I cut one sheet in half to make it A5-size.
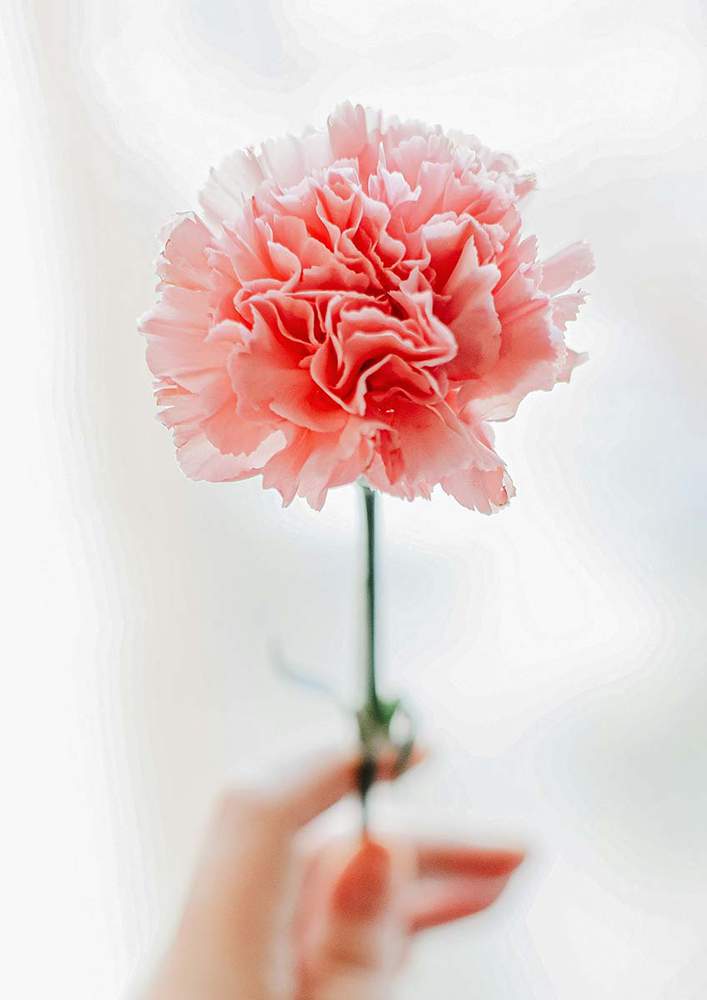
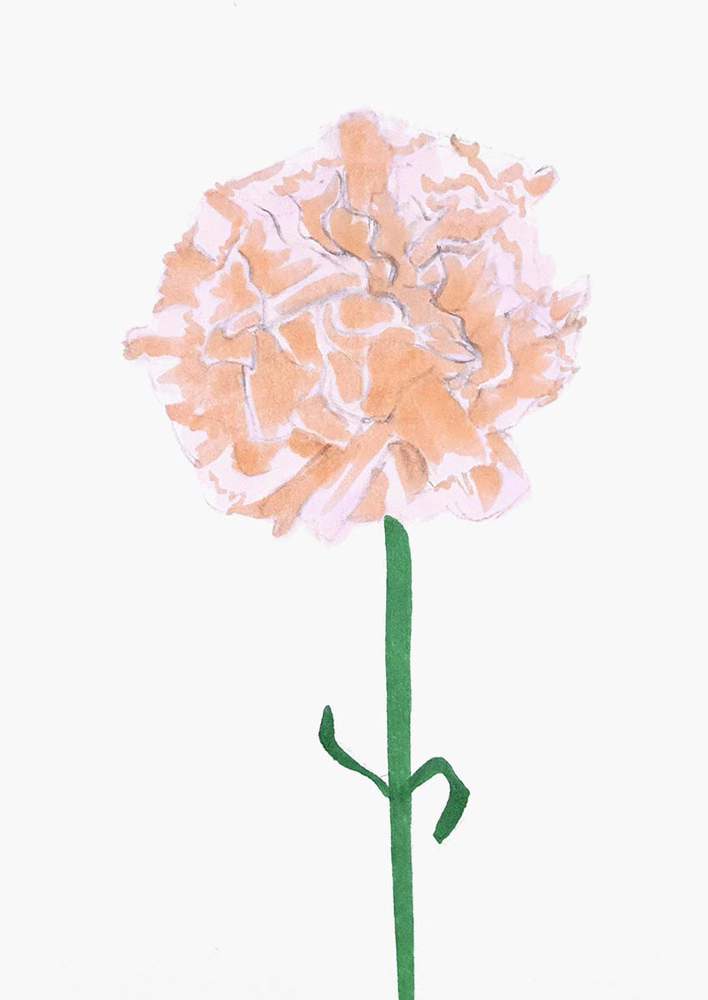
The Reference Photo I Used To Make This Drawing
To make this drawing, I used this photo I found on Unsplash as a reference.
How To Draw A Carnation?
To draw a carnation, you first sketch the basic outline. Then, you sketch the petals and the stem. Next, you color the carnation with markers, building the colors up from light to dark. And to finish it off, you add a few details with colored pencils and add a few white highlights.
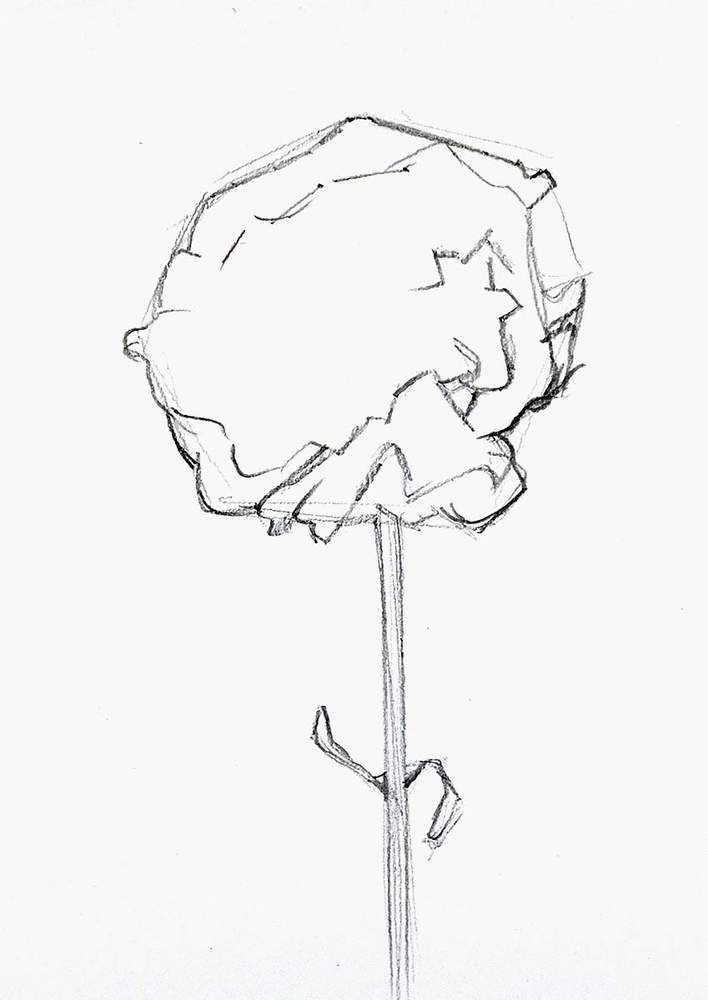
Step 1: Sketch The Basic Outline Of The Carnation
To sketch a flower like a carnation, I like to sketch the basic shape of it first.
To do this, I first mark the top, right, bottom, and left edges.
Next, I simplify the outline to a bunch of straight lines connected together.
And lastly, I roughly sketch the stem and the leaves on it.
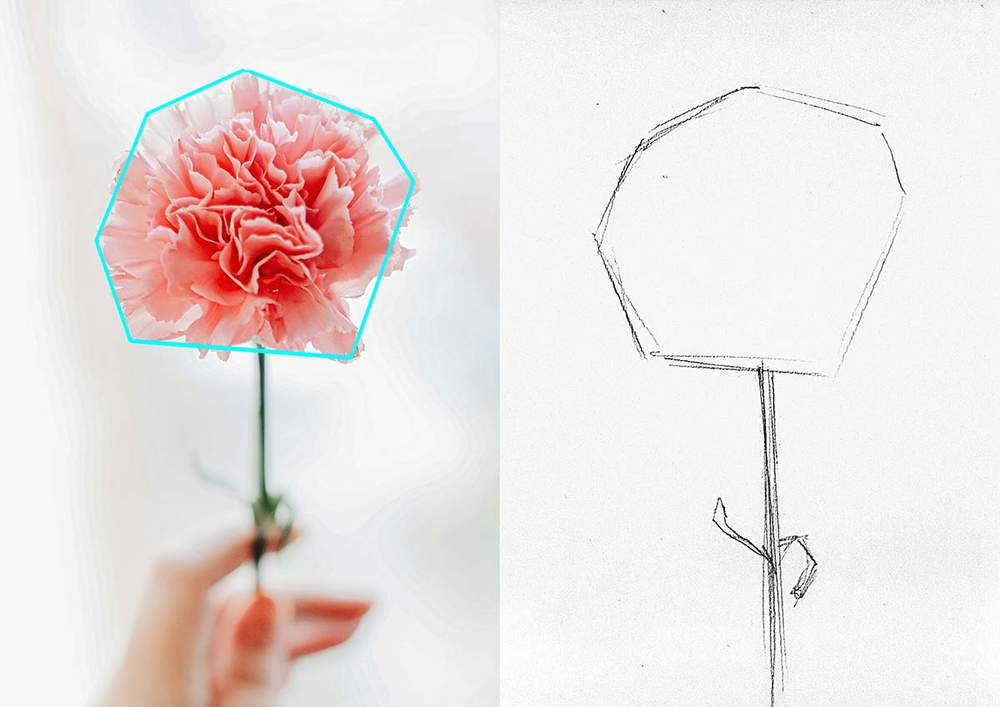
Now, we can use this base to create a detailed sketch of the carnation.
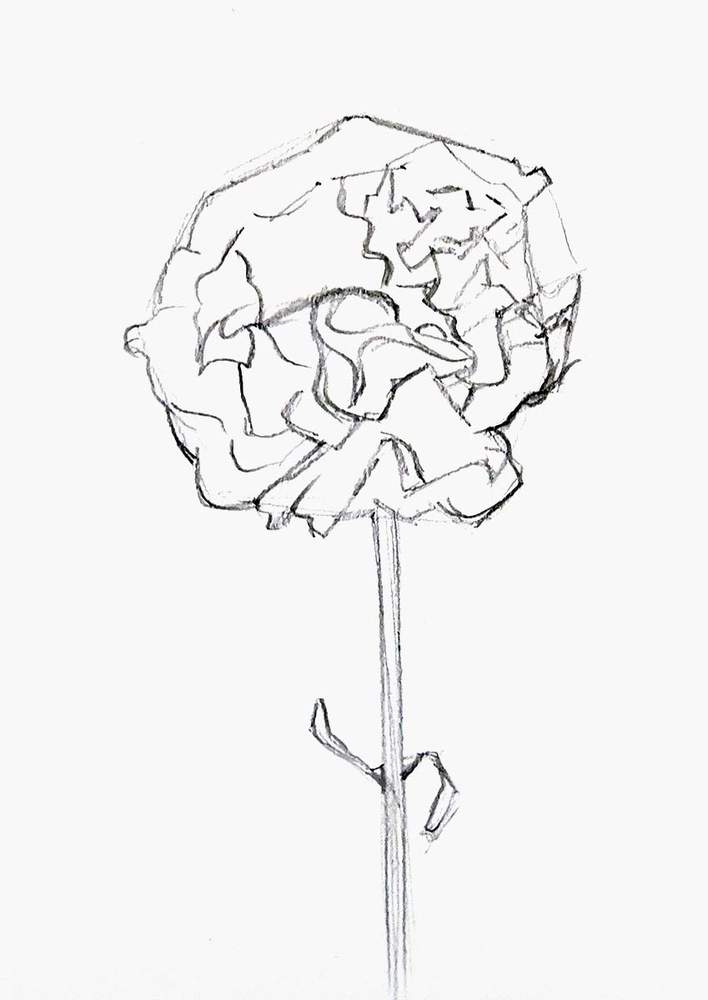
Step 2: Sketch The Petals Of The Carnation
I first refine the outline.
I carefully look at the reference and try to replicate the edges of the outer petals.
Next, I sketch each part while using the rough outline as a guide.
I also refined the stem and the leaves on it.
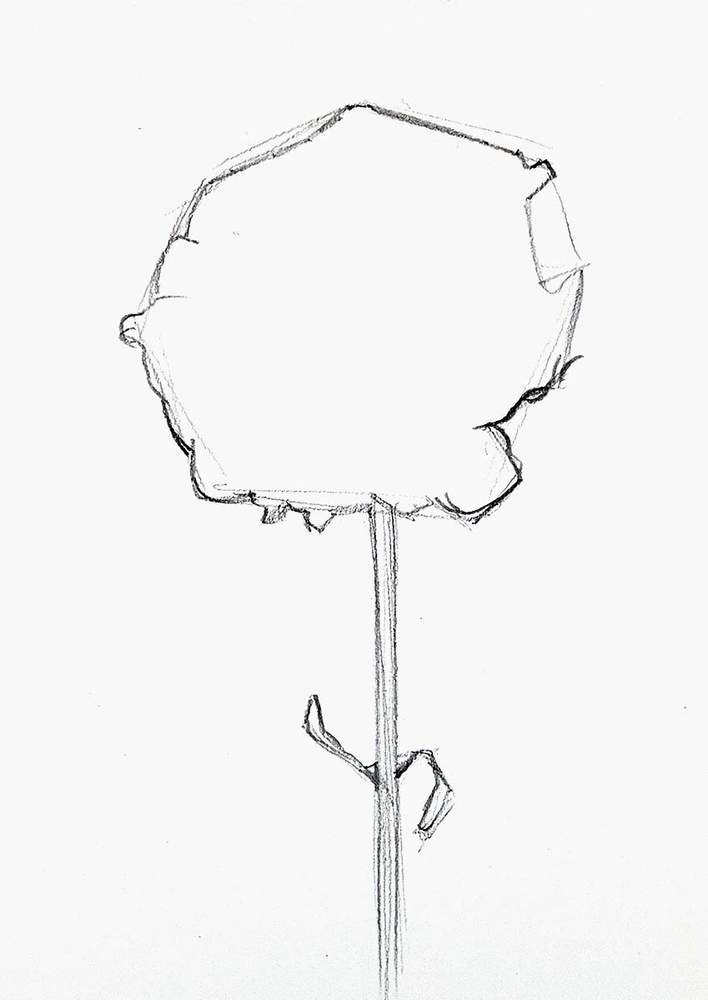
After that, I added more and more of the petals or at least the scribbly shapes that resemble the edges of the petals.
It's a pretty chaotic flower, but I tried to sketch edge by edge until I had sketched them all.
It doesn't really matter if you miss any petals. It's more than detailed enough to just leave out a few if they don't fit right.
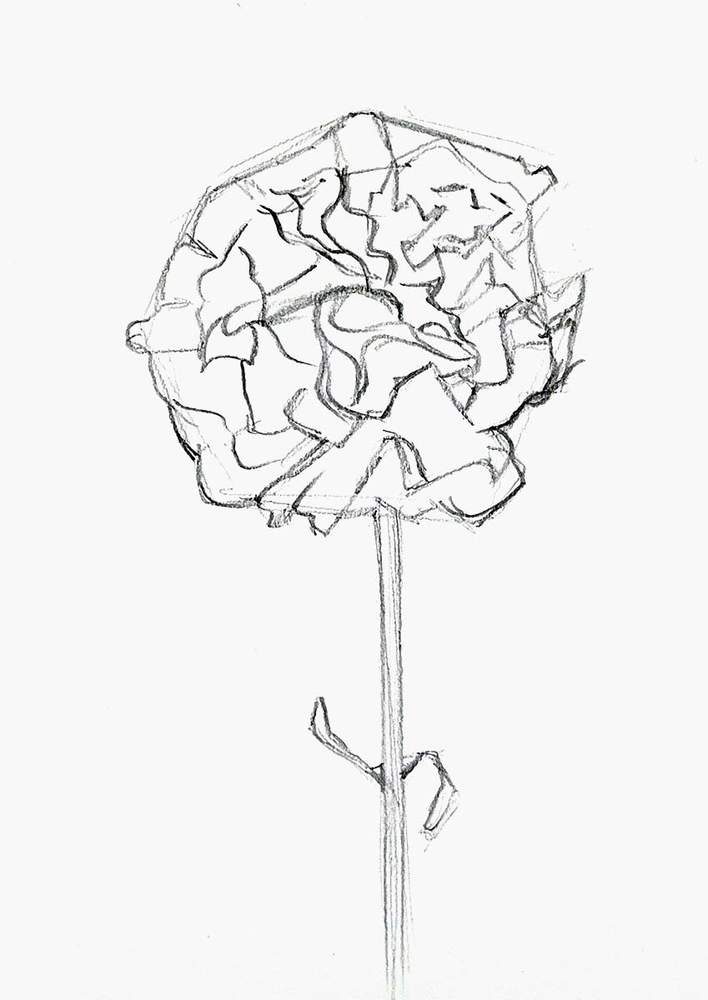
Lastly, I erased my sketch so that the sketch lines wouldn't show through the marker ink too much. I didn't erase the middle as much as it's quite a complex flower and those parts will just be colored dark.
Step 3: Color The Carnation With Markers
Now, we can start coloring in the carnation.
I first colored the stem with G470 Pine Tree Green and I colored the flower with RV010 Water Lily.
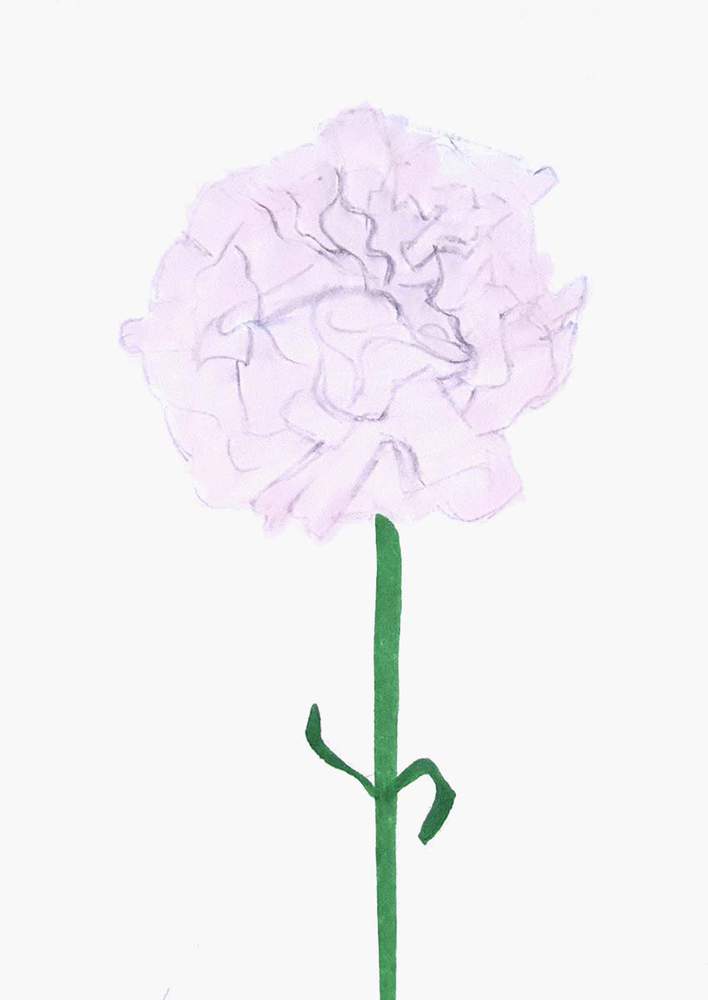
Next, I used R050 Chocolate Pink to color the shadowy parts on the petals. I created a sort of ridge-like texture by coloring some short, and sometimes long, lines in the direction of the petals.
I especially did this at the tip of the petals to make the edge look ridged.
Then, I used R070 Agate to make the shadow parts more toward the center a lot darker and brighter.

And lastly, I add just a few really dark red shadows in the center between the petals with R180 Bright Red.

Step 4: Add Details With 2 Colored Pencils
After that, I added some more details and refined the shape and edges of the petals a bit more using my 2 most-used colored pencils: white and black.
I used the black pencil to add some details in the dark shadows more towards the center and I marked a few edges of the petals lightly.
And I used the white colored pencils to add tones of highlights and textures to the petals. To add the textures, I basically just drew a bunch of lines flowing in the direction of the petals and I added some scribbly lines in the lighter parts.
I also used the white pencil to highlight the edges of the petals, especially in the middle of the flower.
I also added a highlighted side on the left of the stem and on the right leave with the white pencil.
And I added a shadow to the right side and the bottom of the leaves with the black pencil.

Step 5: Add White Highlights To Your Carnation Drawing
To finish the drawing off, I added some bright white highlights on the edges of the petals with my white Posca PC-3M paint marker. I mostly added the highlights in the petals more toward the center of the flower.
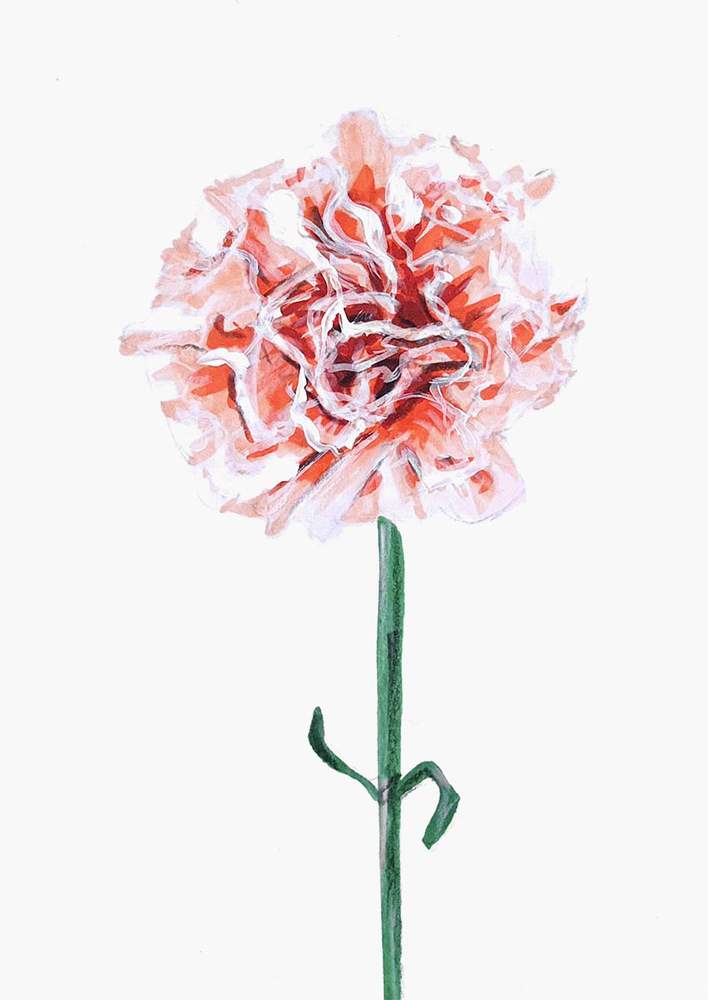
And That's How You Draw A Carnation
I hope you found this tutorial helpful!
Let me know how yours turned out and what parts you thought were difficult. This helps me improve tutorials like this one.
Thank you for visiting my tutorial and for following along!

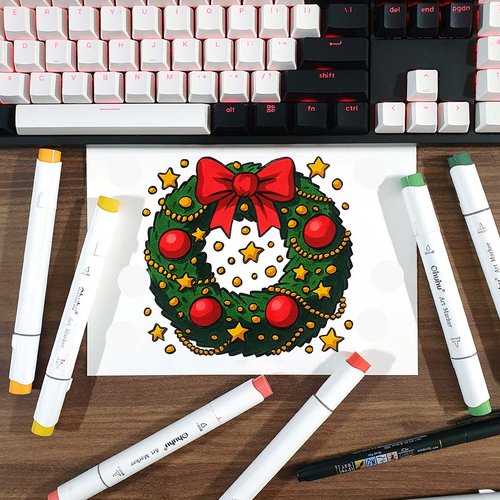
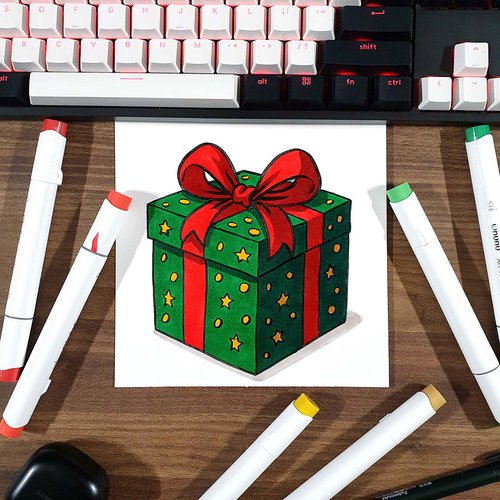
Articles You Might Also Like


I love bringing cars to life with alcohol markers and colored pencils.
Whether you're just starting out or looking to improve your skills, I'm here to help!
Click here to learn more about me.


Be the first to comment!
Comments
There are no comments yet.