11 Tips for Drawing Cars with Precision
Have you ever been captivated by the sleek curves and intricate details of cars, wishing you could capture their essence on paper?
While the thought of drawing a car might seem daunting, especially if you're a beginner, this guide will provide you with step-by-step tips to get started.
In case you want to learn how to draw a car step-by-step, here is a tutorial I made.
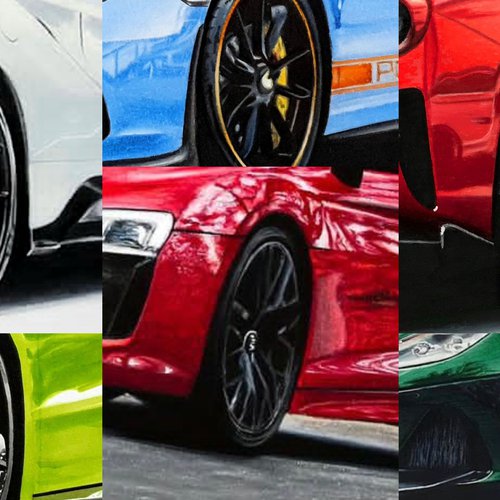
1. Choose a Quality Reference Photo

Choosing a good reference photo is the foundation of your drawing. Here's why:
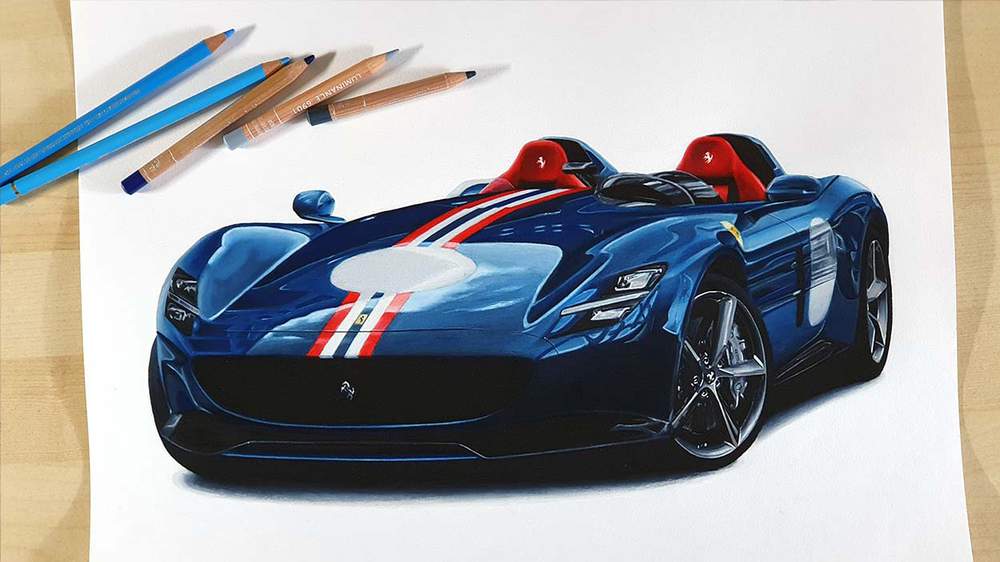
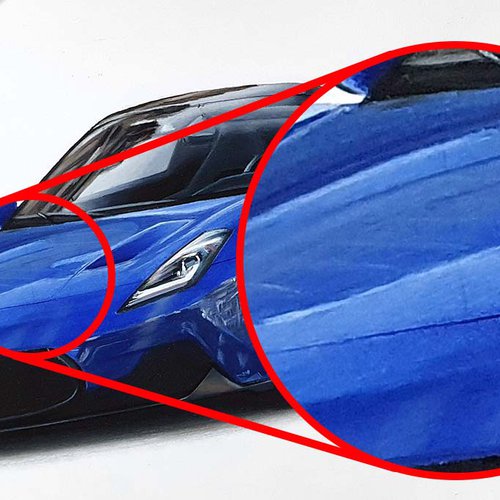
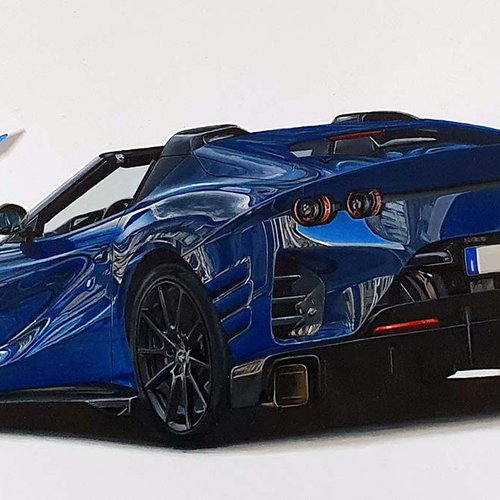
Reflections Enrich the Drawing: Opt for photos where the car's surface has clear reflections. This not only adds depth to your drawing but also makes it more dynamic and interesting in my opinion. Remember, the character of a car can often be captured in the way light bounces off it.
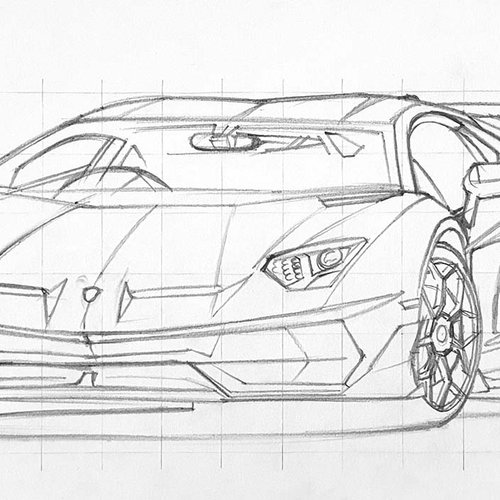
It Guides Proportions: A quality photo will help ensure your proportions are accurate. To assist with this, you can use the grid method. By dividing both your drawing paper and the reference photo into equal grids, you can focus on one square at a time. This way, it becomes easier to replicate details with precision.
- Detailed Observation: A high-quality reference photo also allows you to observe intricate details more clearly. The more detail you can see, the easier it is to reproduce accurately in your drawing, from the texture of the paint to the pattern on the grille and so on.
The better your reference photo, the clearer your roadmap will be. So, spend time picking out the perfect shot that resonates with you and aligns with your vision.
2. Perfect Your Sketch Before Coloring
The sketching phase is where you lay the foundation of your drawing. It's essential to get this right before you add color. Here's how:
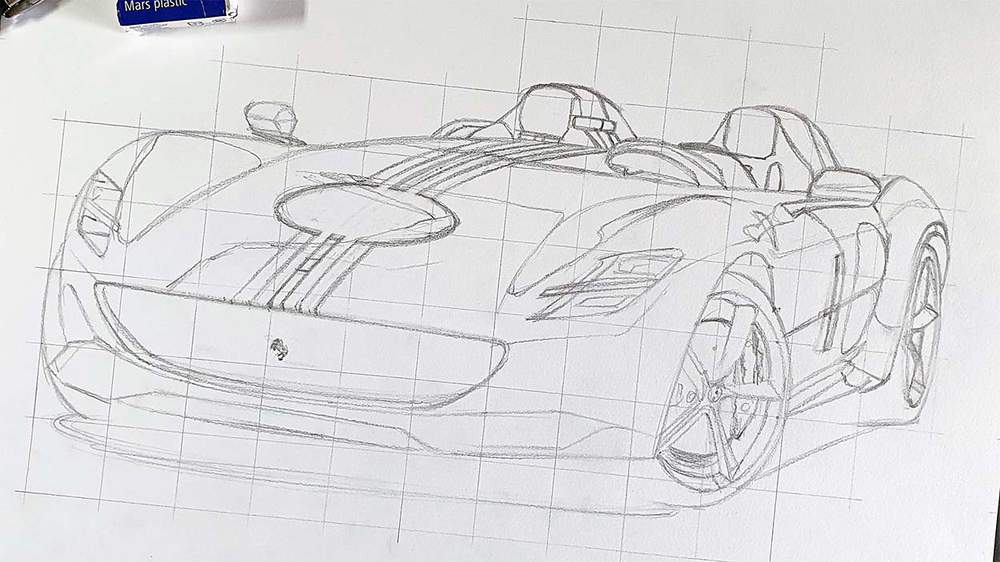
The Grid Method: As previously mentioned, the grid method is a helpful tool to ensure you get proportions right. By working on each grid square separately, you can focus on smaller sections of the car, making it easier to replicate and maintain accurate proportions. Here's a more detailed tutorial on how to use this technique.
Overlay and Cross-check: Don't rush this step. Once you've finished your sketch, overlay it with the reference photo to check for any inconsistencies. Aligning your sketch with the reference will help you spot differences in angle, size, and perspective that you might have missed. I recently started doing this and it drastically improved the accuracy of my sketches.
Patience is Key: Remember, your sketch is the backbone of your final drawing. Don't hesitate to make corrections or adjustments as needed. It's easier to make changes now than after you've started coloring.
In this article you'll find a more detailed overview of sketching techniques you can use to create accurate sketches of cars.
The initial sketch is the blueprint for your artwork. Investing time in this phase ensures a strong foundation, allowing colors and details to shine through in subsequent stages.
3. The Wheels are the Most Important to Get Right
Wheels make or break a car drawing. They're vital to get right, as they greatly affect the overall appearance and believability of your drawing.
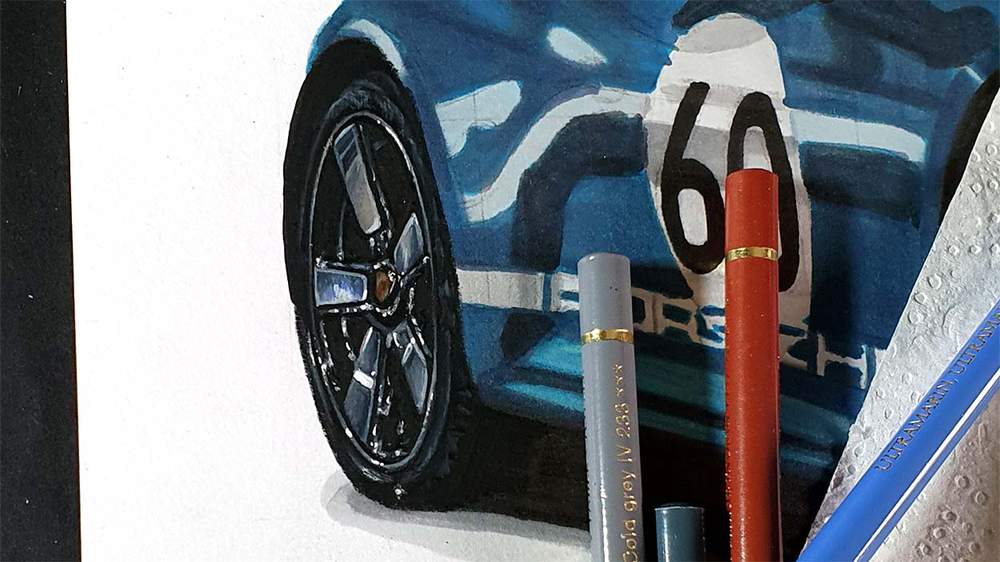
The Perfect Oval: Car wheels, when viewed from certain angles, have an oval appearance. To ensure that you get the perfect shape, consider using an oval ruler or a template. It can guide you in sketching a symmetrical and consistent shape.
Evenly Spaced Spokes: The design and symmetry of the spokes can add depth to your drawing. Ensure that they are evenly spaced and accurately represent the design in your reference photo.
Consistency in Size and Shape: If your drawing includes multiple wheels in view, maintain consistency in size and shape. The wheels should appear to belong to the same vehicle and should be proportional to the rest of the car.
Wheels are more than just circles beneath the car. They have depth, design, and details that need your attention. With careful observation and a little patience, you can master drawing them with accuracy.
4. Begin with the Darkest Elements
Starting with the darkest areas can make the drawing process smoother and more intuitive. Here's why:
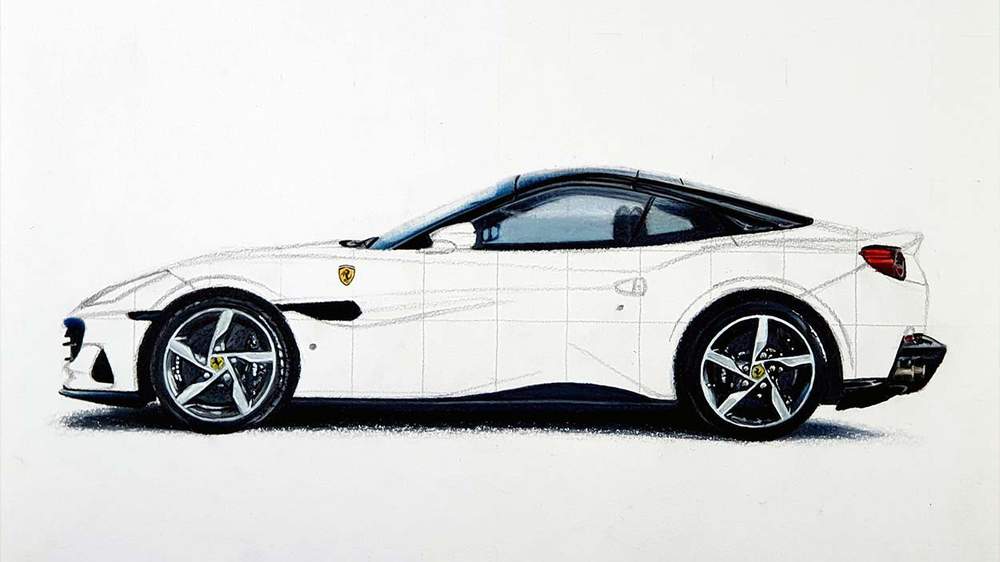
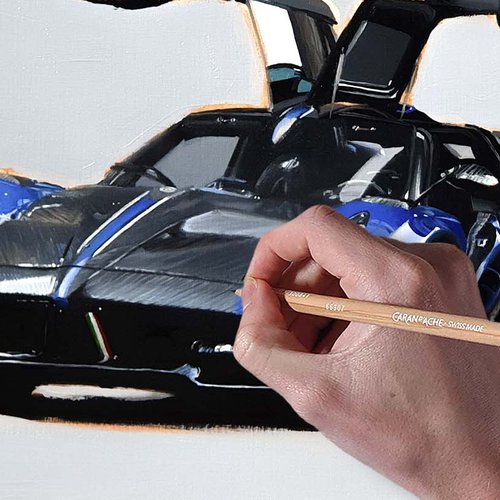
Setting Value Reference: By filling in the darkest parts first, you establish a reference point for the rest of your shades. It helps in judging the range of values you'll need throughout your drawing, ensuring consistency and depth.
Reducing Overwhelm: A blank canvas can be daunting. By laying down the darkest shades, you begin to give structure and form to your drawing, making it less overwhelming as you progress. Think of it as setting the foundation upon which you'll build.
Laying down the darkest areas first provides a clear roadmap for the rest of your drawing. It sets the tone, both literally and figuratively, ensuring a harmonious balance of light and shade throughout your artwork.
5. Details Bring Your Car to Life
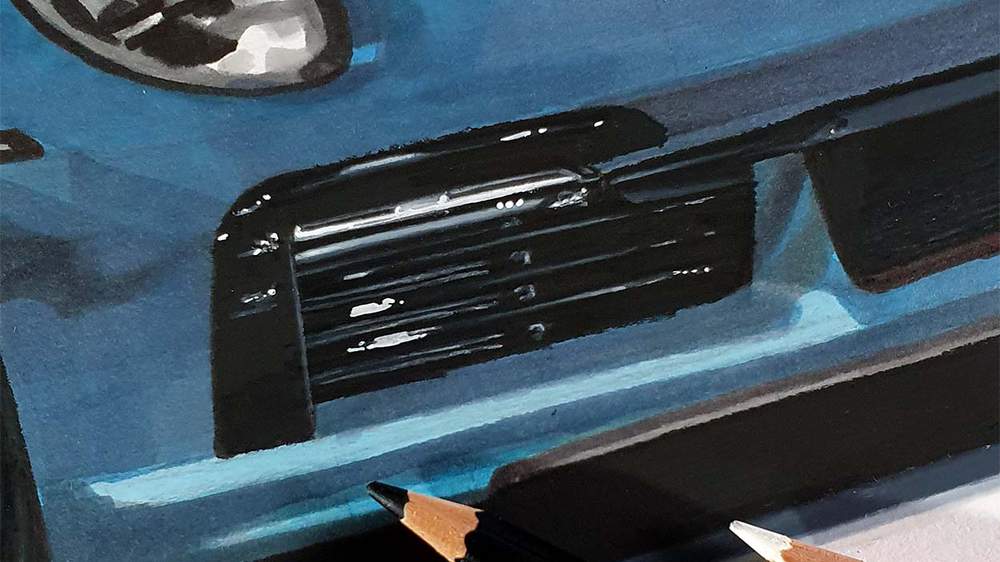
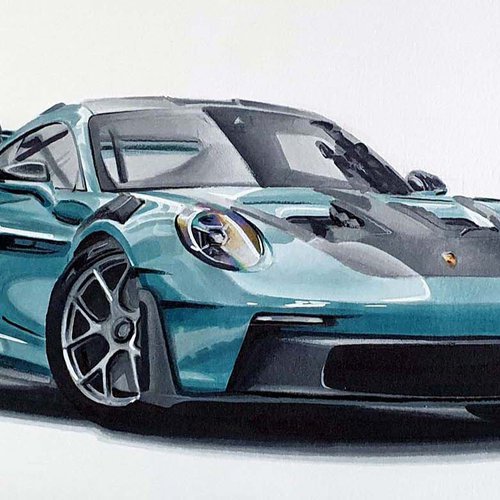
While the overall shape and proportions are crucial, it's the minute details that infuse realism into your drawing.
Observe Closely: Take a moment to study your reference photo. Notice the small emblems, the texture on the headlights, or the design of the grille. These elements might seem insignificant, but collectively, they contribute to the authenticity of your drawing.
Take it Step-by-Step: Don't feel pressured to capture every detail in one go. Build up your drawing layer by layer, adding details gradually. This approach not only makes the process more manageable but also allows you to refine and adjust as you go along.
Tools Matter: Keep a variety of tools on hand. Fine-tipped markers or sharp colored pencils are excellent for intricate details, while broader tips can fill larger areas. Having a range ensures you're equipped to handle all aspects of your drawing.
Cars are a culmination of design and engineering. Every curve, emblem, and line is there for a reason. By capturing these details, you pay homage to the craftsmanship behind the vehicle and elevate the realism of your artwork.
6. Understand the Paint's Reaction to Light
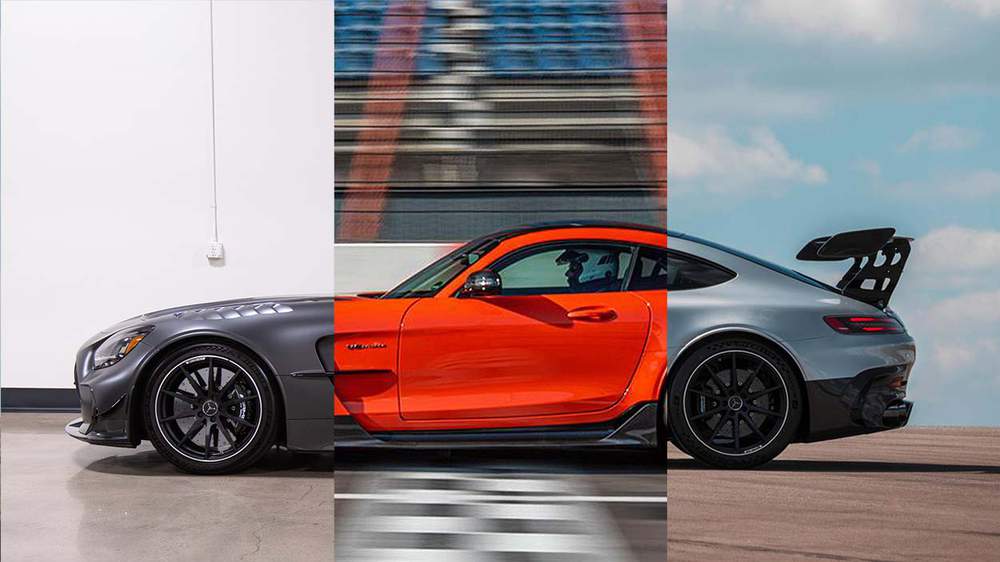
Different paint types reflect light uniquely, and understanding this can help you reproduce the car's finish more realistically. Here's a breakdown:
Matte Finish: Cars with a matte paint job don't possess sharp reflections. Instead, the light diffuses, leading to a blended, soft appearance. This means you won't be drawing intense highlights or deep shadows. Focus on creating a smooth transition between light and shadow without stark contrasts.
Flat-Paint Finish: Flat-paint cars showcase sharper reflections. However, the colors on these cars aren't as intense. The shadows won't be extremely dark, and the highlights won't be very bright. Aim to capture the simplicity of these reflections, making sure to stay true to the subdued tonal variations.
Metallic Finish: Metallic paints offer a different challenge. They not only give sharp reflections but also exhibit extreme contrasts. The highlights can be incredibly bright, while the shadows can be deep and rich. Moreover, metallic cars often reflect a significant portion of their surroundings, adding to the complexity. When drawing such cars, embrace the contrasts and be mindful of the intricate reflections.
Recognizing the nuances in how different paint finishes reflect light can transform your car drawings from good to exceptional. This knowledge allows you to capture the car's true essence and the mood set by its environment.
7. Draw Shapes, Not Objects
This tip is all about training your perception and prioritizing what you see over what you know.
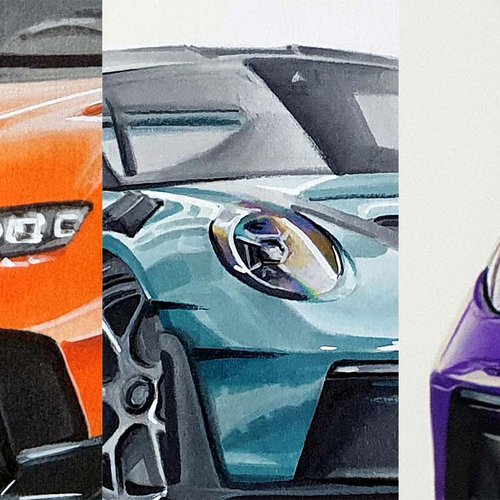
Perceive, Don't Assume: When confronted with intricate parts like headlights or grilles, focus on the shapes and colors they form rather than the object itself. For instance, if a headlight has multiple reflections and hues, draw each shape and shade as you see it, without getting caught up in the idea that it's a "headlight."
Less is More: Avoid the temptation to draw details that aren't present in your reference. By adding what isn't there, you risk compromising the realism of your drawing. Instead, stay true to your observation.
Shapes Overwhelm, Details Follow: Start by capturing the broader shapes first. Once they're in place, you can delve into the finer details. This approach ensures that the overall form is correct and that the details fit into the bigger picture seamlessly.
By focusing on shapes rather than objects, you develop a keen eye for observation. This skill is invaluable, allowing you to capture the nuances and subtleties that make your drawing stand out.
8. Don't Overdo White Highlights
Highlights play a pivotal role in adding depth and realism to your drawing. However, it's crucial to strike the right balance.
Limit Pure White Highlights: While it might be tempting to add numerous bright white reflections, in reality, pure white highlights are relatively rare. Instead, they often come in softer shades, influenced by the car's surroundings and the light source's color.
Subtlety is Key: A few strategically placed highlights can have a more significant impact than numerous scattered ones. Focus on key areas where light naturally hits the car's surface, such as the curve of the hood or the top of the wheel arches.
Refine and Soften: If a highlight feels too harsh or bright, you can always tone it down. Using colored pencils, gently layer over the highlight to reduce its intensity, blending it seamlessly with the surrounding area.
Achieving realism in your drawings often lies in the subtleties. By mastering the art of restraint with white reflections, you create a more believable representation of how light interacts with surfaces.
9. Keep Your Pencils Sharp
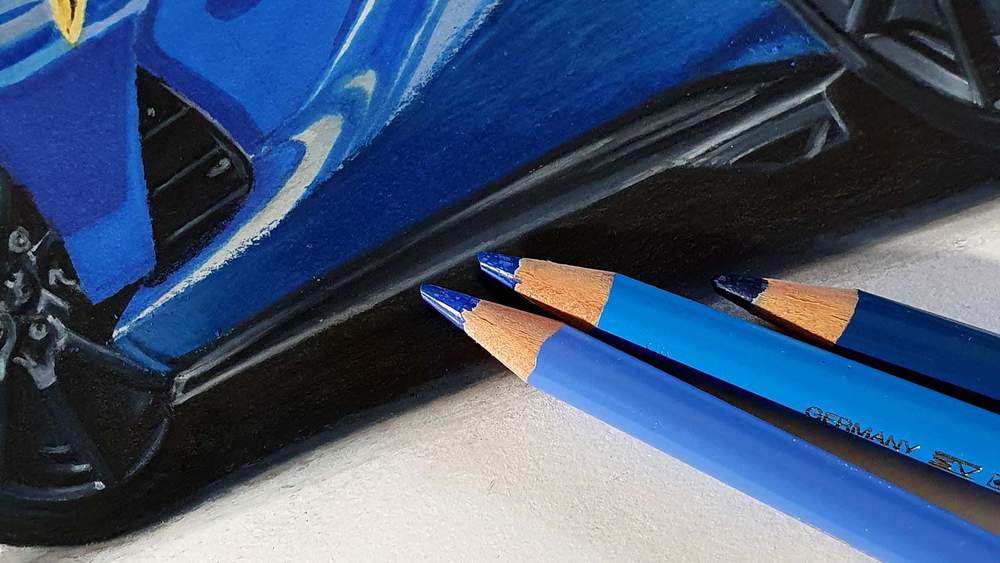
The quality of your lines and the ease with which you can add details largely depend on the sharpness of your pencils.
Precision and Detail: A sharp pencil tip allows for fine lines, intricate details, and a smoother application. This is particularly beneficial when working on areas that require precision, such as emblems, rims, or grille patterns.
Efficient Coloring: With a sharp pencil, filling in larger areas becomes more uniform. You can easily get into the paper's tooth, resulting in a more consistent and saturated color application.
Ease of Use: A sharper pencil reduces the pressure you need to apply, leading to less strain on your wrist, especially during prolonged drawing sessions.
Regularly sharpening your pencils not only ensures the best possible outcome for your drawing but also enhances your drawing experience. Investing in a quality sharpener can make a world of difference in maintaining your pencils' performance.
10. Patience is Paramount
Drawing, like any other skill, requires time, dedication, and most importantly, patience. Here's why taking your time is vital:
Quality Over Speed: While it might be tempting to rush through certain sections or skip over details, the end result is often more rewarding when you've invested time and care. By slowing down, you allow yourself to observe more closely, make thoughtful decisions, and execute with precision.
Learning Curve: Especially as a beginner, there will be challenges and moments of frustration. Remember, every artist has faced obstacles. Taking breaks when needed and approaching your work with a fresh perspective can make a significant difference.
Evolution: Your drawing will evolve as you progress. Sometimes, taking a step back to assess your work can provide new insights or areas to improve upon. Don't feel pressured to get everything right in one go.
Quality artistry isn't a race; it's a marathon. By pacing yourself and valuing the process as much as the outcome, you'll find greater satisfaction in each stroke and shade.
11. Embrace the Journey with Practice
Drawing is a journey of continuous growth and learning. As with any journey, the road might be bumpy at times, but it's filled with valuable lessons.
Starting Out: If you're new to drawing cars, it's natural to face challenges. Every artist starts somewhere. Embrace your starting point, and remember that every drawing you create is a step toward improvement.
Non-linear Progress: Your growth as an artist won't always be straightforward. Some drawings might surpass your expectations, while others might not live up to them. Instead of getting discouraged, consider each piece as a learning experience.
Consistent Practice: The key to improvement is consistent practice. Set aside dedicated time for drawing, experiment with techniques, and most importantly, enjoy the process. Over time, you'll find your unique style and voice as an artist.
The joy of drawing lies not just in the final artwork but in the journey of creation. Embrace the process, learn from every experience, and continue to fuel your passion for drawing.
Articles You Might Also Like


I love bringing cars to life with alcohol markers and colored pencils.
Whether you're just starting out or looking to improve your skills, I'm here to help!
Click here to learn more about me.


Add a comment
Comments
Got something here