9 Tips for Coloring with Alcohol Markers

Welcome to the colorful world of alcohol markers! Whether you're a budding artist or a seasoned pro, these versatile tools can take your artwork to new heights.
Known for their vibrant colors and smooth blending capabilities, alcohol markers are a favorite among illustrators, designers, and hobbyists. However, mastering their use requires a bit of know-how.
In this article, we'll explore nine essential tips to help you get the most out of your alcohol markers. From choosing the right paper to mastering blending techniques, these tips will set you on the path to creating stunning, professional-looking pieces.
What Are Some Tips for Using Alcohol Markers?
1. Use the Right Paper
When it comes to alcohol markers, the paper you use makes a big difference. Regular paper isn't suitable as the ink tends to bleed through it, which can ruin both your work and the paper. Instead, opt for marker-friendly paper. These papers are designed specifically for use with markers and are usually thicker and smoother. This helps in preventing bleeding and provides a better surface for your artwork. A recommended choice is Canson Illustration Manga paper, known for its quality and compatibility with alcohol markers.
2. Layer Colors Gradually
Layering colors is a key technique in achieving depth and dimension in your artwork. Start with your lighter shades and gradually add in the darker tones. This method allows for a more controlled and refined build-up of color. Alcohol markers are particularly well-suited for layering, as their ink can be overlapped to create various shades and depths. This technique is essential for bringing a lifelike and dynamic quality to your drawings.
3. Blend While Wet
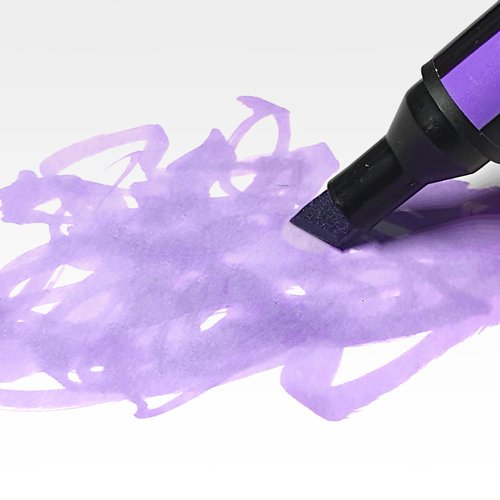
One of the best features of alcohol markers is their ability to blend smoothly. To achieve the best results, blend the colors while the ink is still wet. This makes the transition between colors seamless and natural-looking. Blending while the ink is wet allows for easier mixing of colors, helping you avoid harsh lines and create smooth gradients. It's a fantastic way to add a professional touch to your artwork, making the colors flow together harmoniously.
4. Use a Colorless Blender
A colorless blender is an incredibly useful tool when working with alcohol markers. It's not actually for blending colors together; rather, it's used to soften edges, correct small mistakes, or create highlights and textures in your artwork. The blender is essentially a marker filled with a clear, alcohol-based solution. When applied, it can push the colored ink around, either lightening it or making it easier to blend into surrounding areas. This can add a professional touch to your work, giving you more control over the final appearance.
5. Work in Sections
When you're coloring a large area or blending multiple colors, it's best to work in small sections. This approach ensures that the ink doesn't dry before you have the chance to blend it, which is crucial for achieving smooth and even coloring. By focusing on one small area at a time, you can maintain control over the blending process and prevent the colors from becoming muddy or uneven. This technique is especially important for larger or more complex pieces where consistent color quality is key.
6. Control Your Pressure
The amount of pressure you apply with a marker can greatly affect the outcome of your artwork. Light pressure produces a softer and more translucent color, which is great for subtle shading or building up color gradually. On the other hand, applying more pressure results in a bolder, more saturated color. This is useful for defining edges or adding intensity to your artwork. Experimenting with different levels of pressure can give you a wider range of tones and effects, adding depth and interest to your coloring.
7. Test Colors First
Before applying color to your main artwork, it's always a good idea to test the colors on a scrap piece of paper. This practice helps you understand how the colors behave when they are layered or blended together. Since alcohol markers can sometimes look different on paper than they do in the marker cap or when dry, testing them out first can prevent any unwanted surprises in your final piece. This step is crucial for complex projects where precision in color choice is key.
8. Avoid Over-Saturation
While it's tempting to add a lot of ink to achieve vibrant colors, over-saturating the paper can lead to problems. Too much ink can cause the colors to bleed outside your intended lines or create blotchy areas. It's important to apply ink in moderation and allow it to dry slightly before adding more layers. This approach ensures that the colors remain within the boundaries of your design and that the paper maintains its integrity. Remember, you can always add more layers, but it's difficult to fix over-saturated areas.
9. Blend Colors from Dark to Light
A unique aspect of alcohol markers is their ability to blend smoothly from dark to light shades. To utilize this feature effectively, start with your darker color and then use a lighter color to blend into it. This technique helps to create a seamless transition between shades, adding a realistic gradient effect to your artwork. It's particularly useful for creating shadows, depth, or a sense of light in your drawings. Mastering this technique can significantly enhance the overall quality and realism of your marker art.


Be the first to comment!
Comments
There are no comments yet.