Mistakes to Avoid When Blending Colored Pencils

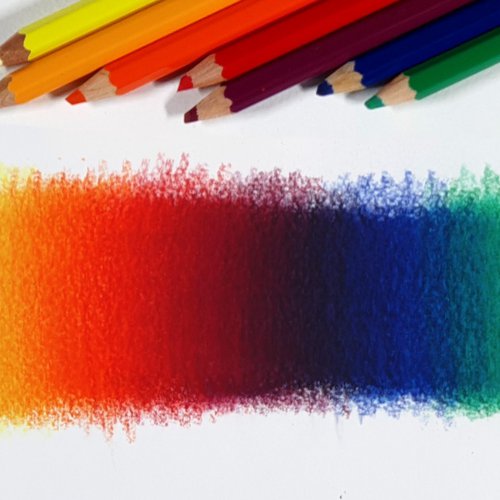
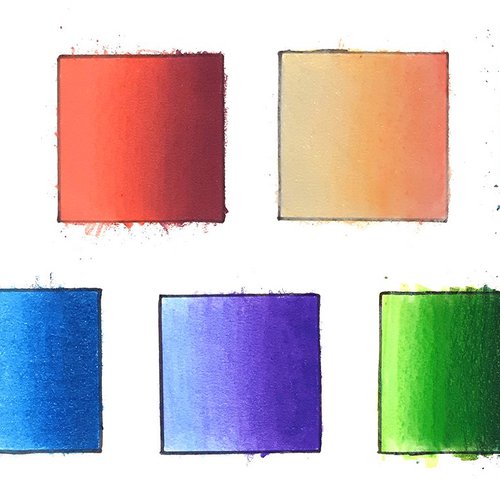
Blending with colored pencils can be such a rewarding and exciting experience. When done right, it can create smooth and seamless color transitions, add depth and texture, and truly bring your artwork to life.
Using colored pencils that blend well is the first step toward a seamless blend, so check out this list of the best blending colored pencils.
However, there are some common mistakes that can negatively affect your final masterpiece.
As an experienced artist, I'm here to help you avoid these pitfalls and guide you through the do's and don'ts of blending colored pencils. So, let's dive right in!
What Mistakes Should You Avoid When Blending Colored Pencils?
1. Using Too Much Pressure
One of the most common mistakes when blending colored pencils is applying too much pressure. This can cause the colors to become muddy and blend together too much, losing their individual characteristics.
How to avoid using too much pressure:
Use light pressure when blending. It's essential to let the colors do the work and not force them together.
Build up layers gradually. This will give you more control over the blending process and help maintain the vibrancy of each color.
Be mindful of the pressure used when coloring in individual areas. Consistency is key to achieve a balanced and harmonious final piece.
2. Not Layering Enough
Blending works best when there are multiple layers of colors underneath. Failing to layer enough can result in a final artwork that lacks depth and vibrancy.
How to avoid not layering enough:
Layer multiple colors before blending. This will create a rich and dynamic base for your blending process.
Use a light hand when coloring. This allows you to build up layers without damaging the paper or causing colors to become muddy.
Use different pressures and strokes to create texture. Experiment with various techniques to add dimension and interest to your artwork.
3. Rushing the Process
Blending colored pencils takes time and patience. Rushing the process can result in a final artwork that looks sloppy and unfinished. On the other hand, taking the time to blend properly can lead to a polished and professional result.
How to avoid rushing:
Work slowly and methodically. Blending is a delicate process that requires your full attention and care.
Take breaks when needed. This allows you to maintain focus and approach your work with a fresh perspective.
Use a light hand when blending. Gentle strokes will produce a more refined and elegant result.
4. Not Considering Color Theory
Blending colors that are too different or don't complement each other can result in an unappealing outcome. Considering color theory can lead to a final artwork that is harmonious and visually appealing.
How to choose colors that work well together:
Use a color wheel. This invaluable tool will help you understand the relationships between colors and make informed decisions about your palette.
Consider complementary, analogous, or monochromatic color schemes. These schemes create a balanced and cohesive appearance that will enhance the overall impact of your artwork.
Study the works of other artists. Learning from the masters can inspire and inform your own color choices.
5. Not Testing on Scrap Paper
Testing blending techniques on scrap paper can help you avoid mistakes and adjust your technique if needed. It's a simple yet effective way to ensure your final artwork looks its best.
How to test blending techniques:
Use a small section of paper. This allows you to experiment without wasting materials.
Try different pressure and stroke techniques. This will help you find the approach that works best for your unique style.
Use different types of paper. The texture and weight of the paper can greatly affect the blending process, so it's important to find the one that suits your needs.
6. Ignoring the Tooth of the Paper
The tooth of the paper refers to the texture or grain of the paper surface, and it can significantly impact your blending process.
Ignoring the tooth of the paper can result in a final artwork that looks rough or pilled. It's essential to understand how the tooth of your paper affects your blending process and adjust your techniques accordingly.
How to adjust blending techniques based on the paper's tooth:
Use a light hand on papers with a lot of tooth. This will help you avoid damaging the surface and maintain the integrity of your artwork.
Experiment with different types of paper. Each artist has their preferences, and finding the perfect paper for your style will greatly enhance your blending results.


Be the first to comment!
Comments
There are no comments yet.