How to Fix Mistakes when Drawing with Colored Pencils

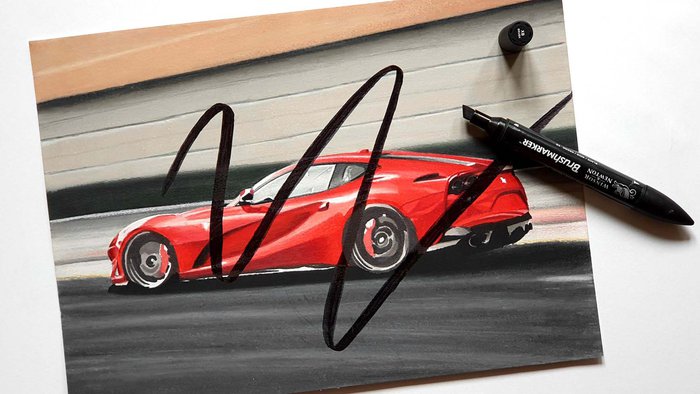
As an artist, I make mistakes in every drawing, and there's nothing more frustrating. Sometimes a marker leaks a bit, sometimes clouds don't turn out the way I wanted, and sometimes I didn't plan my drawing enough. These mistakes might seem like the end of the world, but more often than not, you can fix them.
In the world of colored pencil art, a mistake doesn't have to be a permanent setback.
With the right techniques and a creative approach, many errors can be corrected, modified, or even turned into unexpected opportunities.
In this article, we'll explore various strategies I use to fix mistakes when drawing with colored pencils, embracing imperfections as part of the artistic process, and learning how to make the most of every stroke, smudge, and shade.
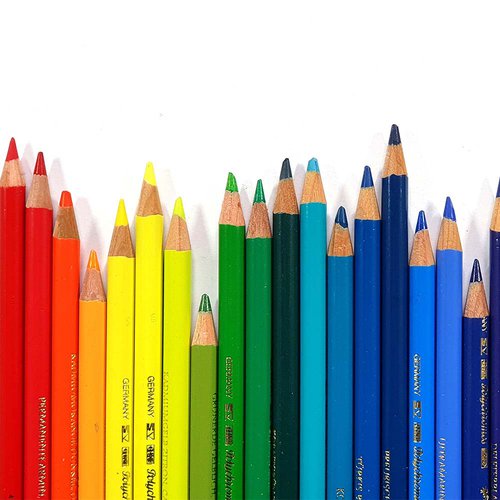
Curious about the top colored pencils for realistic drawings? My blog post has all the details on the 5 best options.
What Can You Do To Fix Mistakes When Using Colored Pencils?
1. Glaze a more accurate color on top
Glazing is a simple yet effective technique that you can use to correct small color mistakes in your drawings. This method involves applying a thin layer of a different color on top of the existing one. It's a bit like adding a tinted film over a window. The underlying color shows through, but it's altered by the color of the glaze.
When to Use Glazing
Glazing works best for minor adjustments where you need to tweak a color without completely covering it up. If the green in your leaf isn't blue enough, for example, you can glaze a blue color over it. This doesn't cover the green but rather combines with it to create a more blue-green shade.
How to Glaze
Here's a step-by-step guide to glazing:
Choose the Right Color: Select a colored pencil that's close to the color you want to achieve. If you're trying to make a green more blue-green, pick a blue that's similar in tone to the green you've used.
Test First: Before applying the glaze to your drawing, test the color on a scrap piece of the same paper you're using. This will give you an idea of how the two colors will blend.
Use a Light Touch: Apply the new color lightly over the area you want to adjust. You want to create a thin, transparent layer, so be gentle and use the side of your pencil rather than the tip. This ensures a softer application.
Build Up Slowly: It's better to build up the color slowly with several light layers rather than going in heavily all at once. This gives you more control and allows for a more subtle adjustment.
Tips for Successful Glazing
Use Compatible Colors: Not all colors will blend well together. Stick to colors that are close on the color wheel or are natural blends (like blue and green).
Consider the Paper: Different papers will react differently to glazing. A paper with a bit of texture will usually work better as it has more tooth to grip the pencil.
Practice Makes Perfect: As with many art techniques, practice on spare paper before applying to your actual drawing.
Glazing is a versatile technique that can add depth and complexity to your colored pencil works, not just for correcting mistakes. Experimenting with it can not only help you fix those little mishaps but also enhance your overall understanding of how different colors interact with one another. It's a valuable skill that can add a new dimension to your artistic toolbox.
2. Layer a more accurate color on top
Layering colors is a common technique used in colored pencil art, and it can be particularly useful when correcting mistakes. By carefully layering one color on top of another, you can modify an existing color, cover up a mistake, or add depth and complexity to a drawing.
When to Use Layering
Layering is best used when you need to make significant color adjustments but haven't yet burnished the drawing. Burnishing flattens the paper's tooth and makes it difficult to add more color. Some wax-based colored pencils, such as Caran d'Ache Luminance, are particularly good at layering, even over-burnished areas.
How to Layer
Follow these steps to successfully layer a more accurate color on top of a mistake:
Identify the Area: Determine the specific area where the color needs to be corrected.
Choose the Right Color: Select a colored pencil that matches the desired shade. The chosen color should be able to blend with or cover the existing color.
Test the Color: As with glazing, it's wise to test the color on a separate piece of the same paper to see how it interacts with the original color.
Apply with Care: Gently apply the new color over the mistaken area. Use soft, even strokes and build up the color slowly.
Blend if Needed: Depending on your desired result, you may want to blend the new color with the existing one. This can be done with a blending pencil or by softly layering and overlapping the colors.
Adjust Pressure: If you need to layer a lighter color over a darker one, such as white on top of black, you'll likely need to use a bit more pressure. This will help the lighter color show up on top of the darker one.
Tips for Successful Layering
Avoid Overworking the Paper: Too much pressure or overworking can damage the paper and make further adjustments difficult. Build up layers slowly and with care.
Understand Your Pencils: Some colored pencils layer better than others. Familiarize yourself with the characteristics of your specific brand and type of colored pencil.
Consider Burnishing: If you haven't burnished yet, you'll have more flexibility in layering. If you have already burnished, be aware that layering might be more challenging.
3. Use mixed media
Sometimes, when working with colored pencils, you might find that the typical techniques of glazing or layering aren't enough to correct a mistake. In these cases, turning to mixed media or paint can be an effective solution. Mixed media art involves using different types of art materials in one piece, such as combining colored pencils with watercolors or acrylics.
When to Use Mixed Media
Using mixed media or paint is appropriate when you need to make more significant changes or when the paper has been overworked with colored pencils and no longer accepts more layers.
How to Use Mixed Media
Here's how you can incorporate mixed media or paint into your colored pencil work:
Choose the Right Medium: Select a medium that will work well with your colored pencil. Acrylic paint, watercolor, or ink can be good choices.
Test the Medium: Before applying the new medium to your main piece, test it on a scrap piece of the same paper. Observe how it interacts with the colored pencil and how it dries.
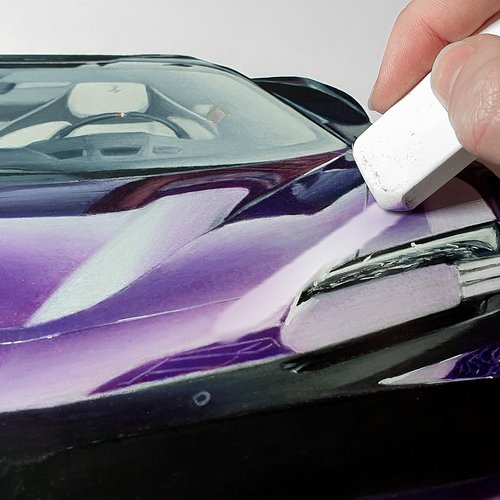
Prepare the Area: Clean the area where you want to apply the paint or other media. This might include lightly erasing colored pencil or applying a thin layer of a suitable primer if necessary.
Apply with Precision: Use a brush or other tool to carefully apply the mixed media. Be mindful of the consistency and amount you're using, as applying too much can cause the paper to warp.
Blend with Colored Pencil: Once the paint or other media has dried, you can go back over it with colored pencils to blend and create a seamless transition between the mediums.
Tips for Successful Mixed Media Use
Know Your Materials: Understanding how different media interact with colored pencils and paper is essential. Research or experiment to find what works best for your particular situation.
Work Slowly and Carefully: Mixing media can be tricky, and mistakes can be more challenging to correct. Take your time, and don't rush the process.
Consider the Whole Composition: Think about how the new medium will affect the entire piece, not just the area you're correcting. Maintaining harmony in texture and color is key.
Using mixed media or paint to correct mistakes in colored pencil art can open up new possibilities and creative avenues. It's a technique that requires patience, experimentation and a keen understanding of how different materials work together.
When done with care, mixed media can not only fix mistakes but also add depth, texture, and interest to your artwork. It's an adventurous step that can take your art to new levels of complexity and beauty.
4. Change your drawing to incorporate the mistake
Art is often a process of exploration and discovery, and sometimes what may initially seem like a mistake can turn into a unique creative opportunity. Instead of trying to fix or cover up a mistake, you can choose to incorporate it into your drawing. This approach can lead to unexpected and often beautiful results.
When to Incorporate the Mistake
This technique is suitable when the mistake or unintended mark isn't easily corrected using other methods, or when you see potential in the "mistake" to add something special or interesting to your drawing.
How to Incorporate the Mistake
Assess the Mistake: Look at the mistake and consider how it could be turned into a feature. Could a smudge become a shadow? Could an incorrect color add a new dimension to the image? Be open to possibilities.
Sketch Ideas: Before committing to the change, sketch out a few ideas to see how the mistake might be incorporated into the overall composition.
Adjust the Composition: Modify other elements of the drawing to harmonize with the mistake. This might mean adding new details, changing shapes, or even rethinking the entire composition.
Blend and Integrate: Use your colored pencils or other tools to blend the mistake into the drawing. Add shading, details, or other elements to make it look intentional.
Embrace the Unexpected: Allow yourself to go with the flow and see where the new direction takes your artwork. Sometimes, unexpected changes can lead to the most creative outcomes.
Tips for Successfully Incorporating Mistakes
Stay Flexible: Don't be too rigid with your initial concept. Being open to change and improvisation can make incorporating mistakes more successful and enjoyable.
Consider the Overall Balance: Think about how the change will affect the overall balance and composition of the drawing. You want the "mistake" to enhance the piece, not detract from it.
Learn from the Process: Even if the final result isn't what you initially envisioned, consider what you've learned from the process. Each experience is a step toward growth as an artist.
Incorporating mistakes into your drawing is more than a technique to correct errors; it's a philosophy that encourages creativity, adaptability, and a positive approach to unexpected challenges. By viewing mistakes as opportunities rather than failures, you can turn them into unique artistic expressions. This approach can not only lead to surprising and innovative artwork but also foster a more resilient and adventurous artistic spirit. Remember, some of the greatest artworks were born from happy accidents!
5. Accept the mistake and continue
In the journey of creating art, not all mistakes need to be fixed, hidden, or incorporated into the artwork. Sometimes, the best course of action is to simply accept the mistake and continue with the drawing. This approach acknowledges that art doesn't have to be perfect to be beautiful and that the process itself is valuable.
When to Accept the Mistake
Accepting the mistake is a suitable option when the error is minor, doesn't detract significantly from the overall piece, or when you feel that attempting to fix it might lead to further complications.
How to Accept the Mistake
Evaluate the Impact: Consider how much the mistake truly affects the piece. Is it a major flaw or just a small imperfection? Sometimes what feels like a significant error to the artist is hardly noticeable to others.
Consider the Effort to Fix: Weigh the effort required to fix the mistake against the potential benefit. If fixing the mistake could lead to more issues or if it's in a delicate area, it might be best to leave it be.
Embrace Imperfection: Recognize that art is a human endeavor, and imperfections can add character and authenticity. Sometimes, these "flaws" can make the piece more relatable and appealing.
Focus on the Bigger Picture: Rather than dwelling on the mistake, shift your focus to the overall progress and direction of the piece. Concentrate on the elements that are working well and the vision you are trying to achieve.
Learn and Move On: Take note of what went wrong and why, and use that knowledge in future works. Learning from mistakes is a crucial part of growth as an artist.
Tips for Successfully Accepting Mistakes
Develop a Positive Mindset: Understand that mistakes are natural parts of the creative process. They don't define your ability or the value of your work.
Avoid Over-Critiquing: Being overly critical can hinder creativity. Appreciate your work for what it is, not for what it isn't.
Seek Outside Opinions: Sometimes, a fresh perspective from a friend or fellow artist can help you see that the mistake is not as noticeable or critical as you thought.
Accepting mistakes and moving on can be a liberating and empowering part of the artistic process. It fosters a healthy attitude towards art-making, where the emphasis is on creativity, expression, and enjoyment rather than perfection. By accepting that mistakes are an integral part of the journey, you can create a more relaxed and joyful artistic practice. After all, it's often the imperfections that give art its soul and character.
6. If all else fails and it's too significant then start over
Starting a piece of art over from scratch might seem like a drastic measure, but there are situations where it may be the best course of action. This decision isn't about admitting defeat but recognizing that a fresh start can sometimes provide the best opportunity for success.
When to Start Over
Starting over may be the right decision when the mistake is too significant to correct, when the paper has been damaged beyond repair, or when continued attempts to fix the error are leading to further complications. It's also worth considering if the mistake is central to the artwork and affects its overall integrity.
How to Start Over
Assess the Situation: Carefully evaluate the mistake and consider all possible remedies. If you conclude that starting over is the best option, give yourself permission to do so without guilt.
Learn from the Mistake: Before abandoning the original piece, analyze what went wrong. Understanding the mistake will help you avoid repeating it in the new piece.
Save the Original: Keep the original drawing, even if you're starting over. It can serve as a reference and a reminder of what you've learned.
Begin with a Fresh Perspective: Start the new piece with a clear mind and renewed energy. Apply what you've learned from the previous attempt to make the new drawing even better.
Celebrate the Process: Recognize that every step, including the decision to start over, is part of your growth and development as an artist.
Tips for Successfully Starting Over
Be Patient with Yourself: Understand that starting over is not a failure but a courageous decision to strive for something better.
Seek Support if Needed: If the decision to start over feels overwhelming, consider seeking feedback or encouragement from fellow artists or art mentors.
Embrace the Opportunity: View starting over as an opportunity to create something new and improved, not as a setback.
Starting over may seem like a challenging step, but it can often be a positive and transformative experience. It's a decision that requires wisdom, self-awareness, and a commitment to quality. By embracing the chance to begin anew, you open yourself to new possibilities and demonstrate a dedication to your craft. Remember, art is not just about the final product; it's about the journey, the learning, and the growth along the way. Starting over is simply another step on that journey, filled with potential and promise.


Be the first to comment!
Comments
There are no comments yet.