How to Draw Car Wheels - Easy Step-by-Step Guide
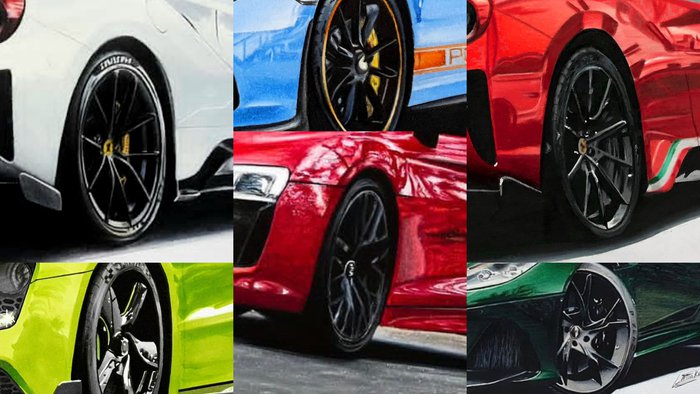
Drawing wheels can be a complicated thing. As you've probably noticed when drawing cars it is very important that the wheels look good. I struggled a lot with sketching and drawing wheels and I know that many other people do too. Over the last couple of years, I developed a step-by-step technique that works really well for me. And I hope that it will help you a bit at becoming better at drawing wheels too.
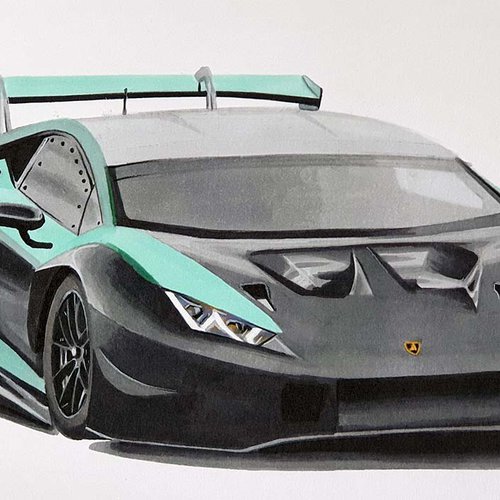
If you'd like to know how to draw a full car, make sure to check out this article I wrote.
Steps of drawing car wheels
Drawing wheels can be broken down into 8 simple steps:
- Sketching the wheel
- Outlining all black parts with a fineliner
- Coloring all black parts black with a marker
- Coloring the brake caliper and the brake disc with markers
- Coloring the brake disc and brake caliper with colored pencils
- Coloring the rim
- Color corrections and highlights
- Coloring the tire
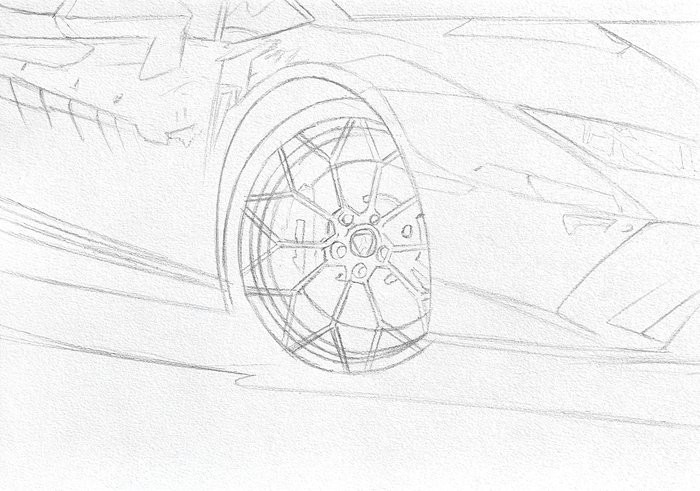
Step 1: sketch the wheel
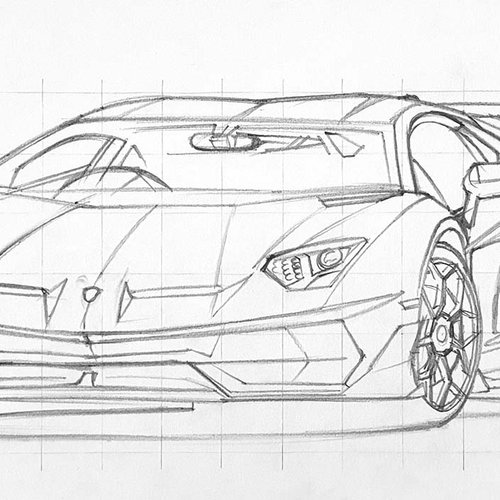
The first step is to (obviously) sketch the wheel. You can freehand it, use a grid, whatever you like. It is very important that the wheel has the right shape otherwise it will look a bit wonky and unrealistic. To sketch the perfect ellipse for the wheel you can use a ruler with ellipses or you can use a drawing technique like the grid method.
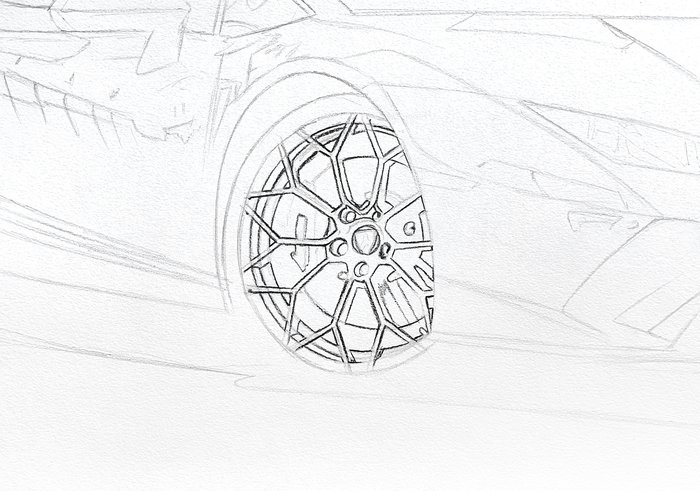
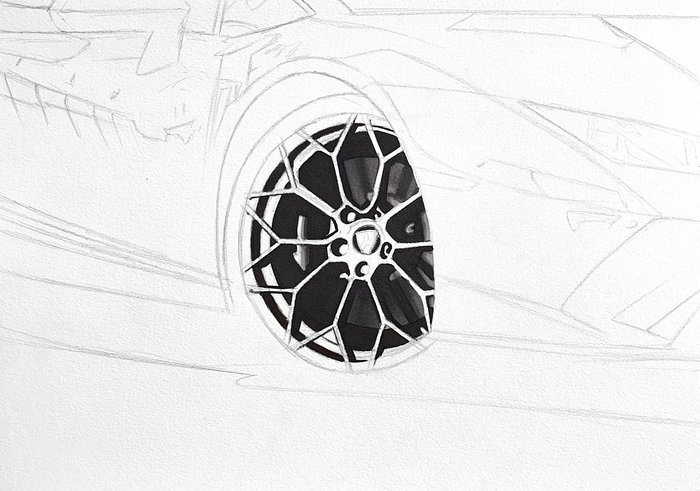
Step 2: outline all dark parts with a black fineliner
Wheels can look very complicated and overwhelming. But luckily most wheels are for a big part black. So to make it a lot less complicated you just color all black parts black with a black marker. But before you do that it's better to first outline those black parts with a fineliner, like I've done below. This will make it a lot easier to color those parts black in the next step. By outlining you decrease the chance of accidently going over parts you didn't want to be black.
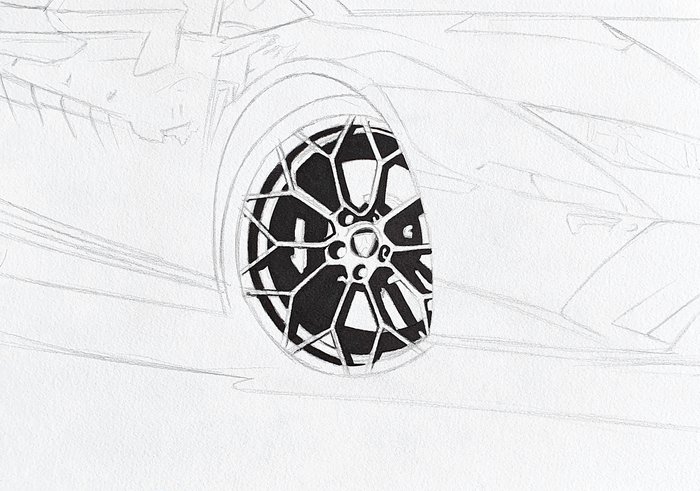
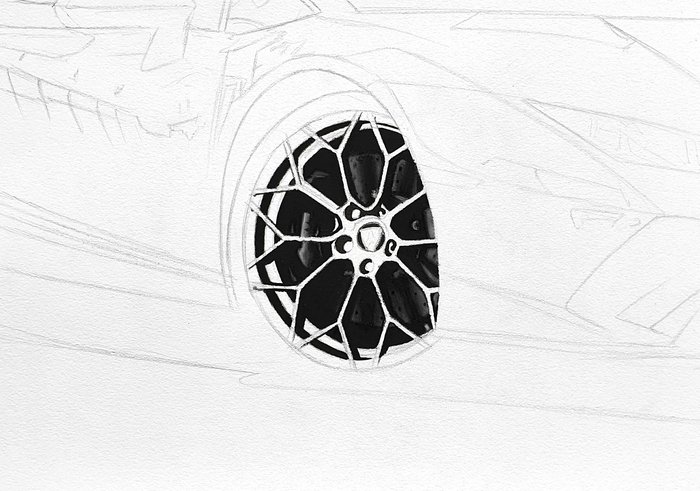
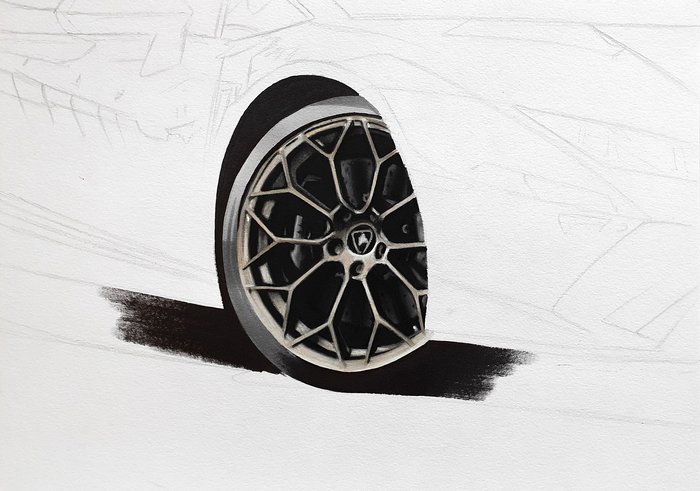
Step 3: color all black parts black
Now it's time to color the outlined areas with a black marker. As you can see in the image below already half of the wheel is drawn, just by coloring it black. It is important that you use an alcohol based marker (Copics, Promarkers, etc) and not water based markers, because water based markers damage the paper and make it very difficult to draw on top of with colored pencils. This isn't the case with alcohol based markers.
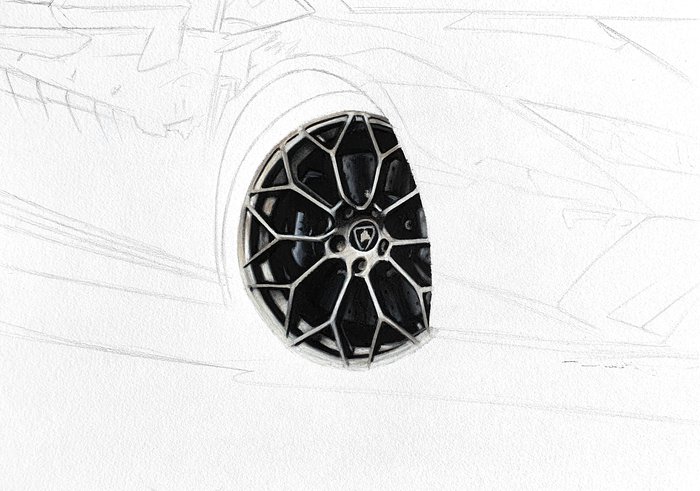
Step 4: color the brake calliper and brake disc with a marker
After you've colored every black part it's time to color the brake caliper and the brake disc with markers. It's best to start with the lighter shades and gradually work your way to the darker areas with the darker markers. I started by coloring the whole brake disc grey and then darkened the areas that needed to be darker. The brake diac in my case only had a very small part that isn't black. I started with the light grey and blended that into the black.
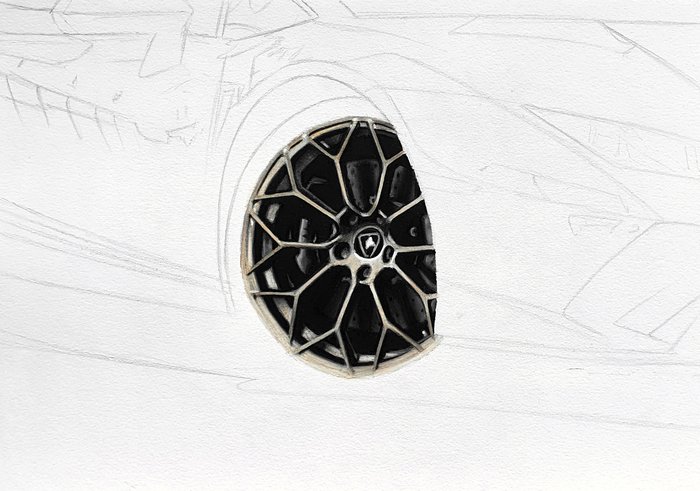
Step 5: color the black parts, the brake disc and the brake caliper with colored pencils
To make the parts you've just colored look even better you can add a layer of colored pencils on top. The markers are really great to get rid of all the white spots, but they are often not as dark as you'd like or not the perfect color. So to change that you can color on top of the markers with colored pencils to make the black parts even darker and change the color a bit if needed. This works really well and you don't have to worry about covering the white spots anymore as you've already done that with the markers.
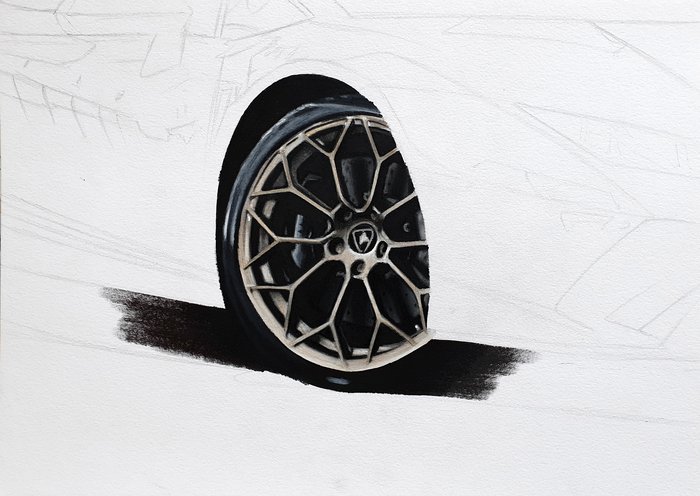
Step 6: color the rim
Now it's time to draw probably the most complicated part: the rim. Rims can look very complicated, but all you have to do is draw spoke by spoke and work your way around until all spokes are colored. And again it's easiest to color the lighter parts of the spoke first and then the darker colors. Always make sure your pencils are sharp enough to color the narrow lines of the spokes. Before you color the rim with colored pencils, you can color it with markers to get rid of the white of the paper and as a sort of guide of where to draw what color.
Step 7: Color corrections and highlights
Now that to rim is fully colored you cab do some color corrections if the rim isn't the right color yet. For example I noriced that the rim shoeld be more orange/brown so I just wen over the whole rim with an orange and brown pencils and blended it with a white and lightgrey pencil.
I also added some highlights with a white pencil and a white paint marker.
Step 8: color the tire
All that's left now is the tire. To cokor the tire it's easiest to first color it with markers. This doesn't have to be perfect at all. It's mostly just to get rid of the white of the paper, but it's also a guide of where to which color should go.
Once you colored the tire with markers you can to color the whole tire with colored pencils. Now it's time to add the details and make the tire the right shade. Most of the time the tire has a narrow black circle at the inside, closest to the rim.
Conclusion
Wheels can be a very difficult thing to draw and it is very important that they look good for the whole drawing to look realistic. But with this simple process of drawing wheels, it will become a lot easier and clearer. I hope this will help you in your journey to becoming better at drawing cars. If you have questions regarding these steps, feel free to ask them in the comments below.


Be the first to comment!
Adding comments is temporarily turned off...
Comments
There are no comments yet.